This step involves:
-
Creating a connection
-
Creating Named and External credentials to be used for callouts to Jira from Salesforce
-
Enabling Named credential for callouts
-
Linking the External Credential to the Auth. Provider created earlier
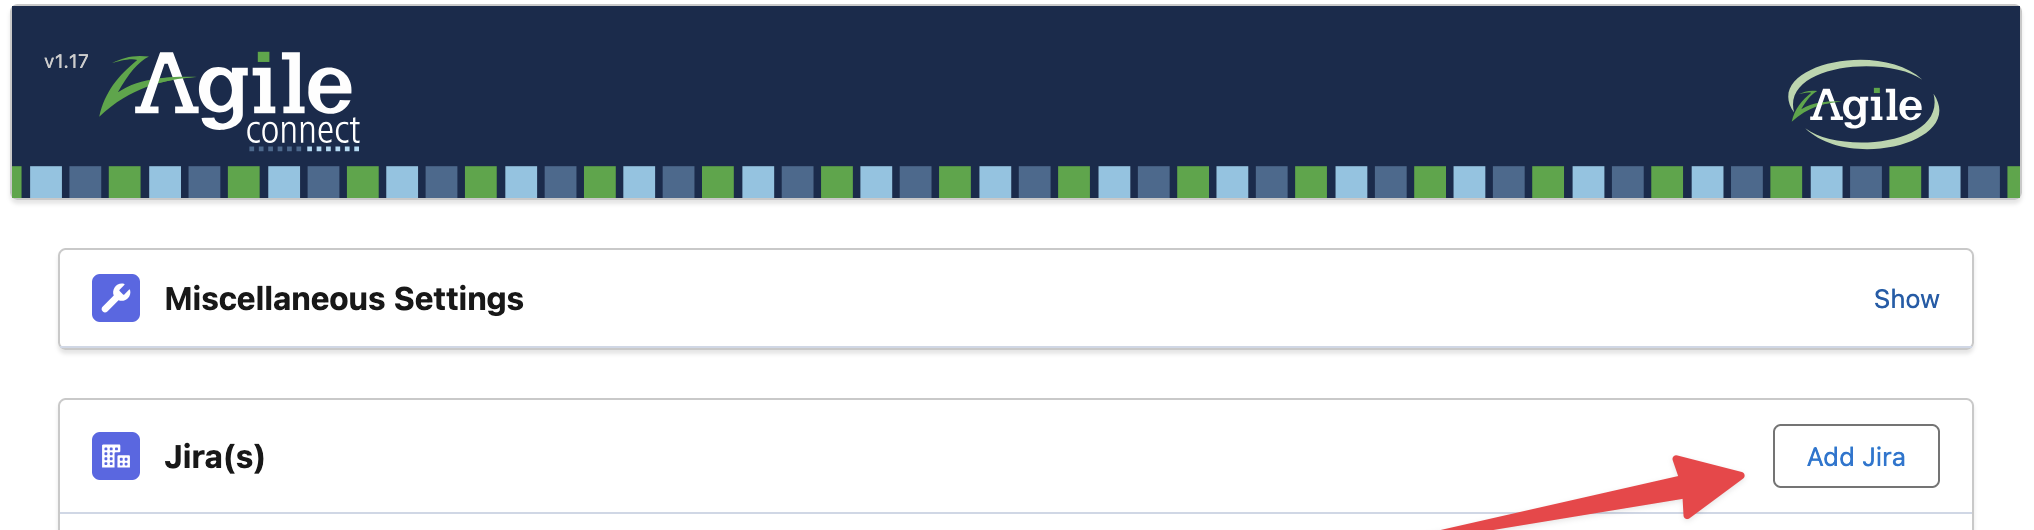
1. Creating a Connection
In zAgileConnect Setup add a new Jira and specify an Alias
Skip this step if there is already a connection to the Jira instance and/or you are migrating authentication from OAuth 1.0 → OAuth 2.0).
2. Creating Named and External Credentials
In the zAgileConnect package configuration -> Jira Connection Settings → Step 1 (Sign in to Jira),
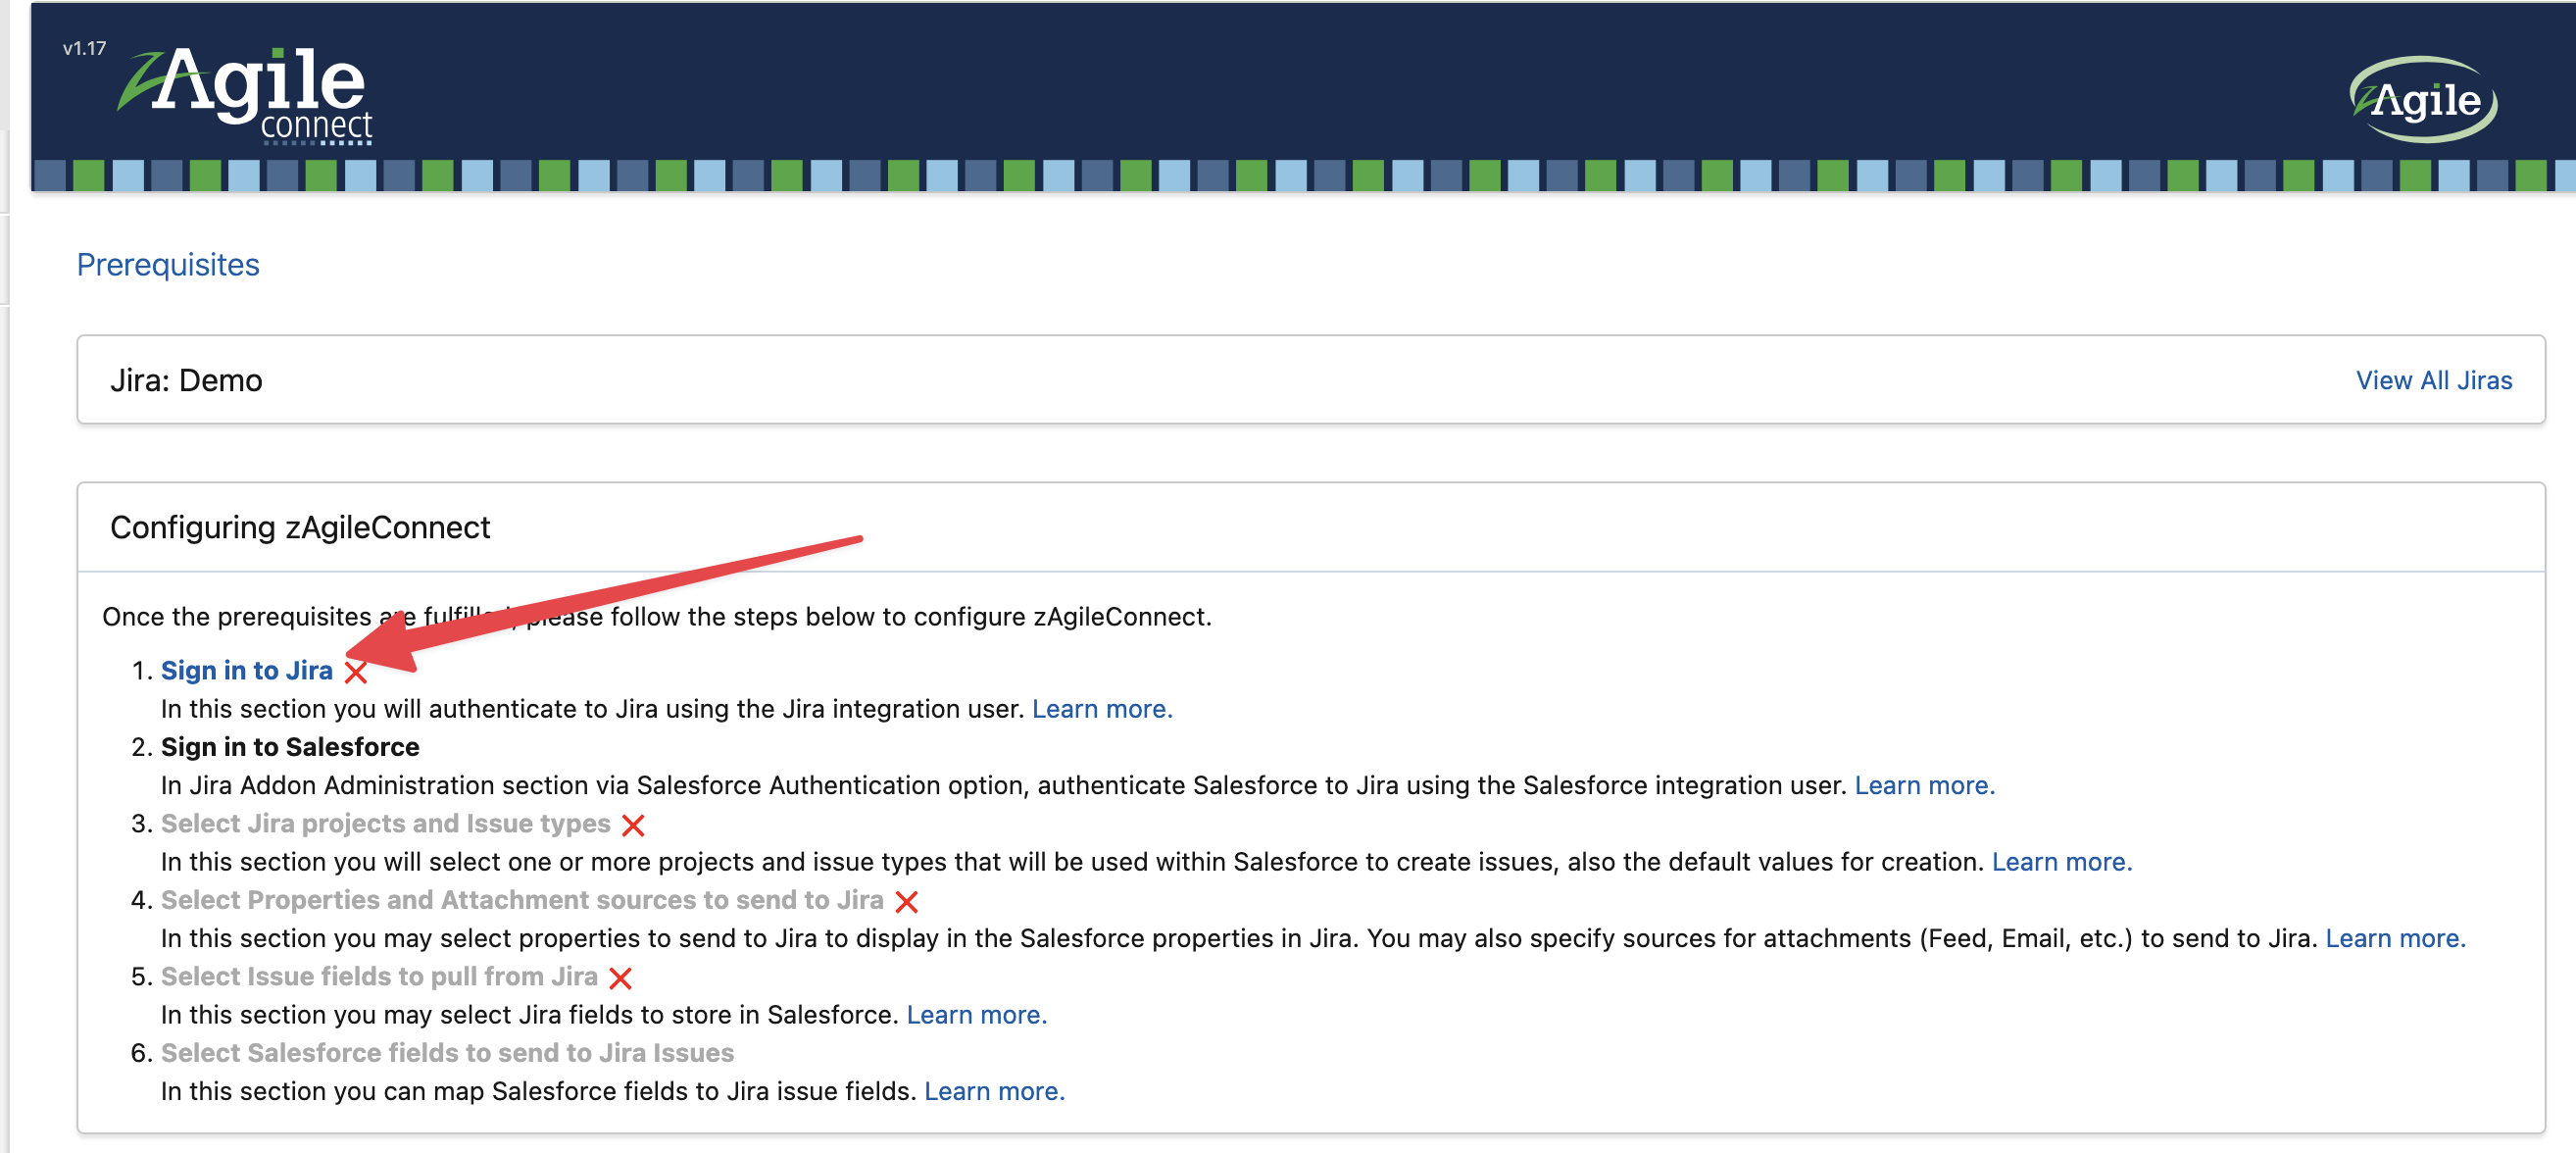
Switch to Authentication via Named Credentials link
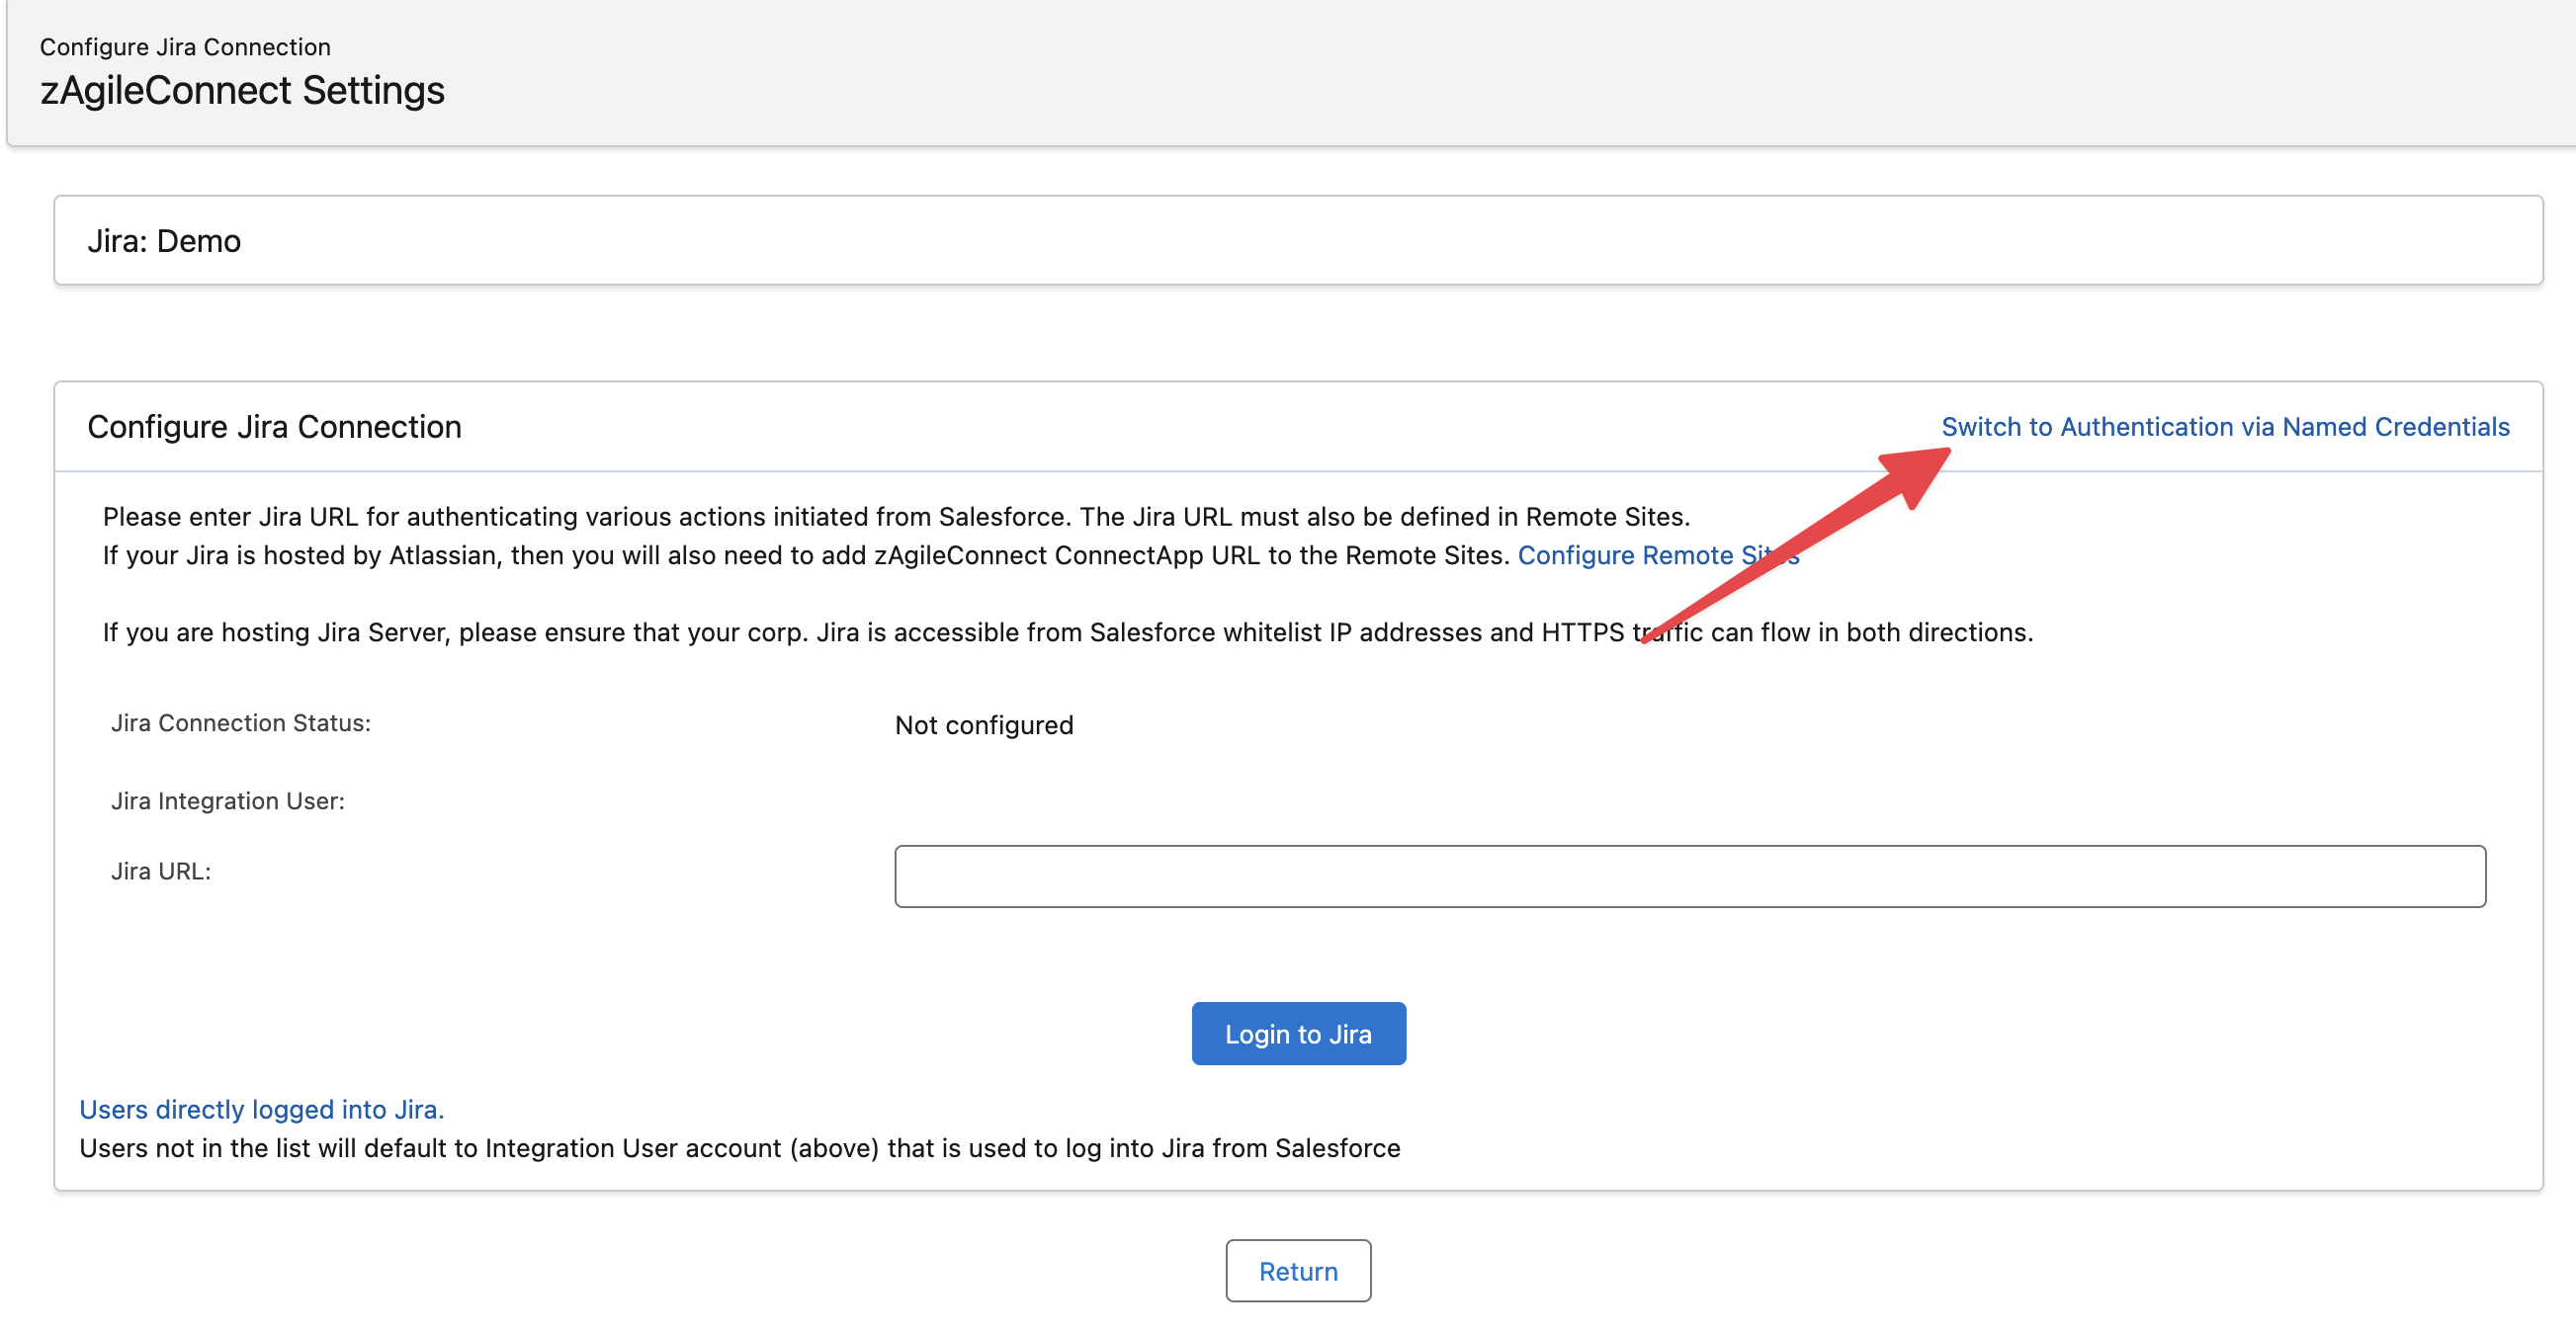
Select the Jira Product (Jira Cloud / Jira Data Center), if requested fill the Jira Base URL
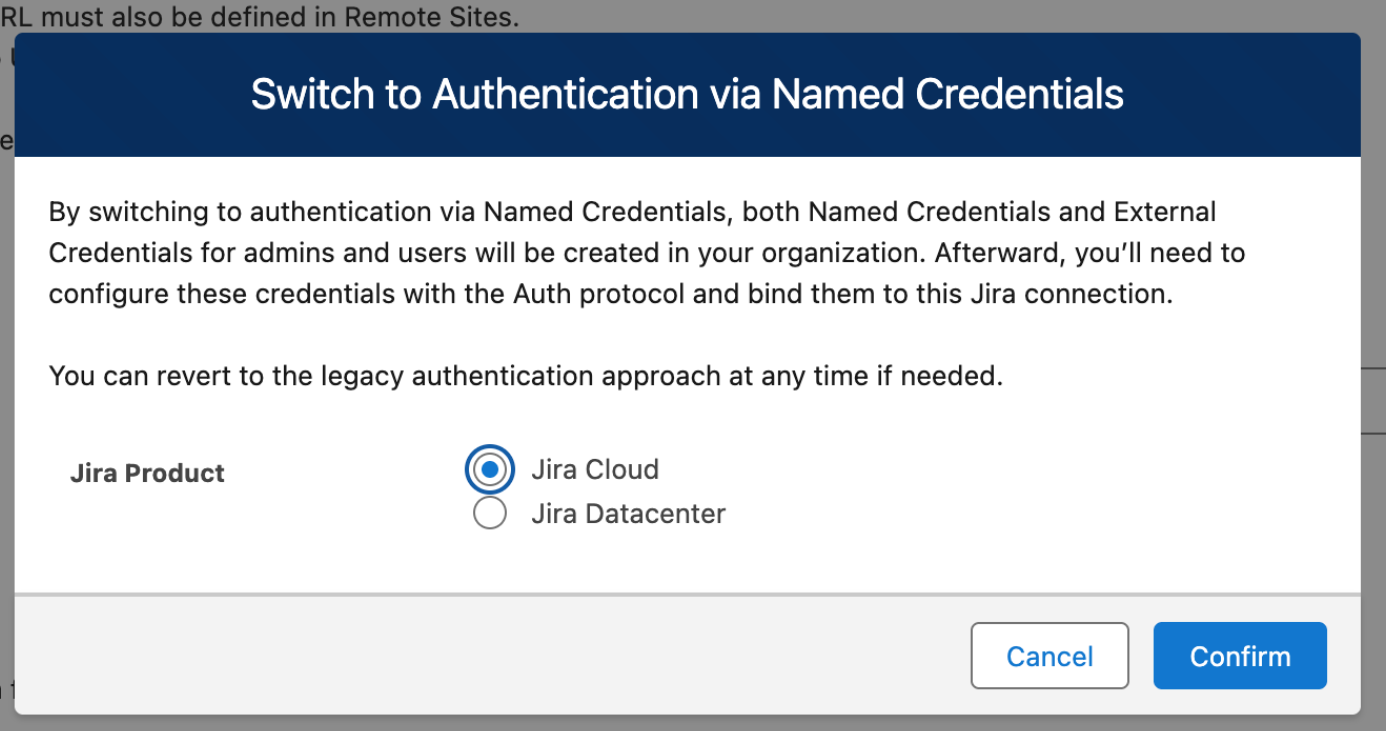
After confirming, new Named Credential and External Credentials will be created.
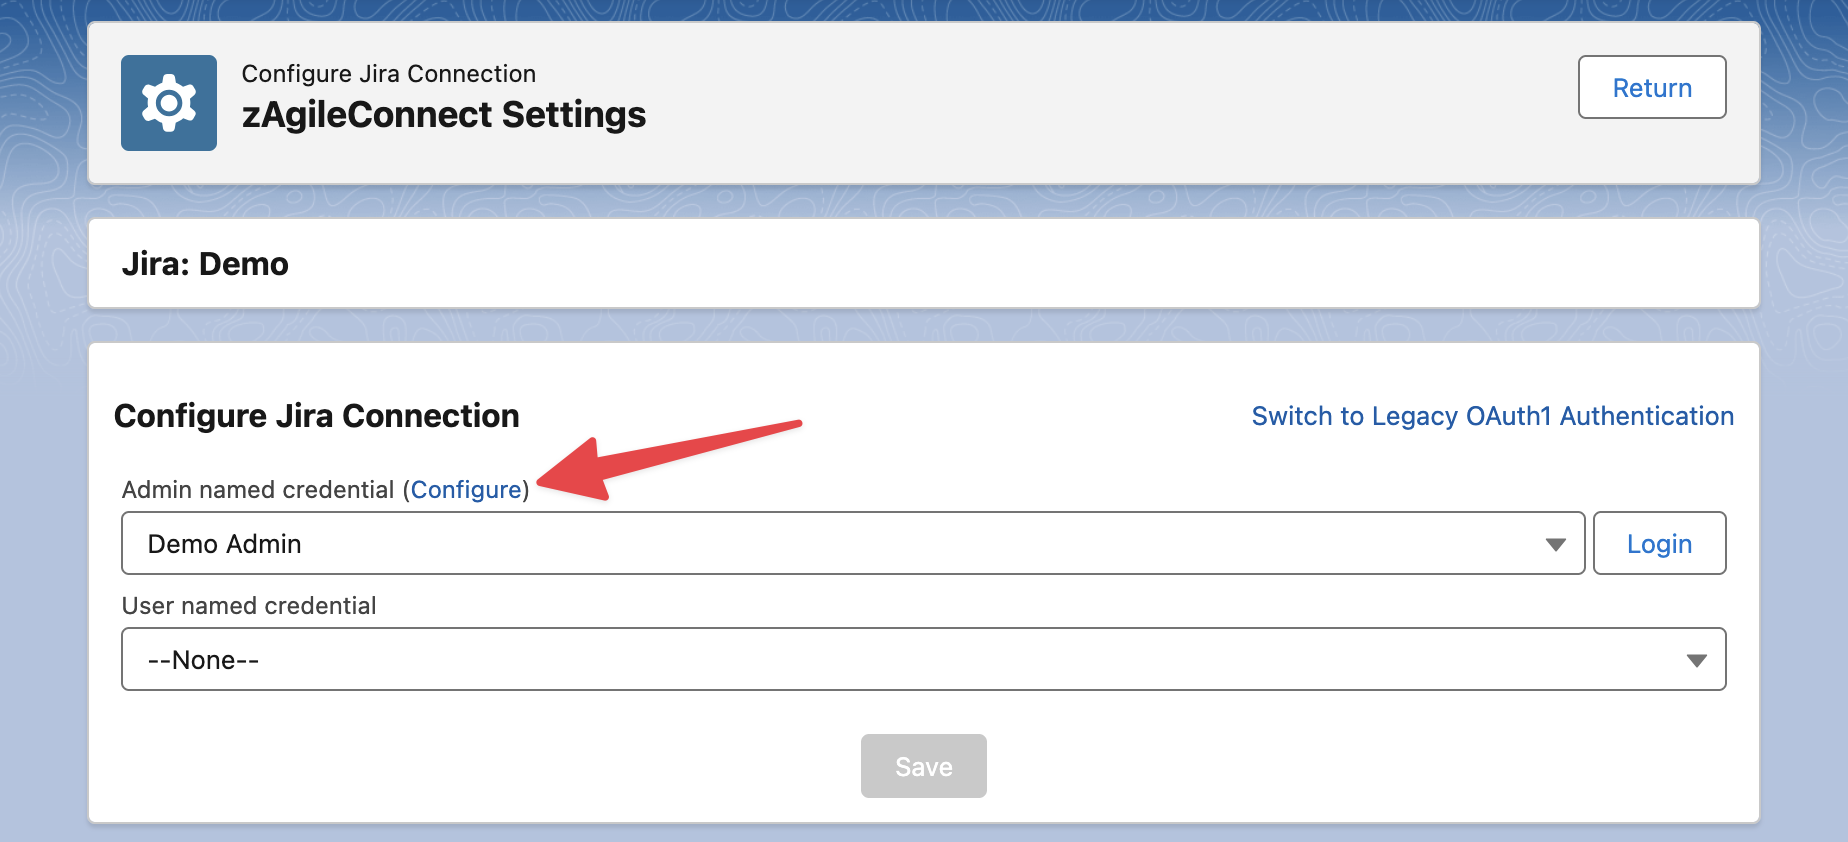
3. Enabling Named credential
To access the named credential configuration go to the “Configure” link for the Admin Named Credential
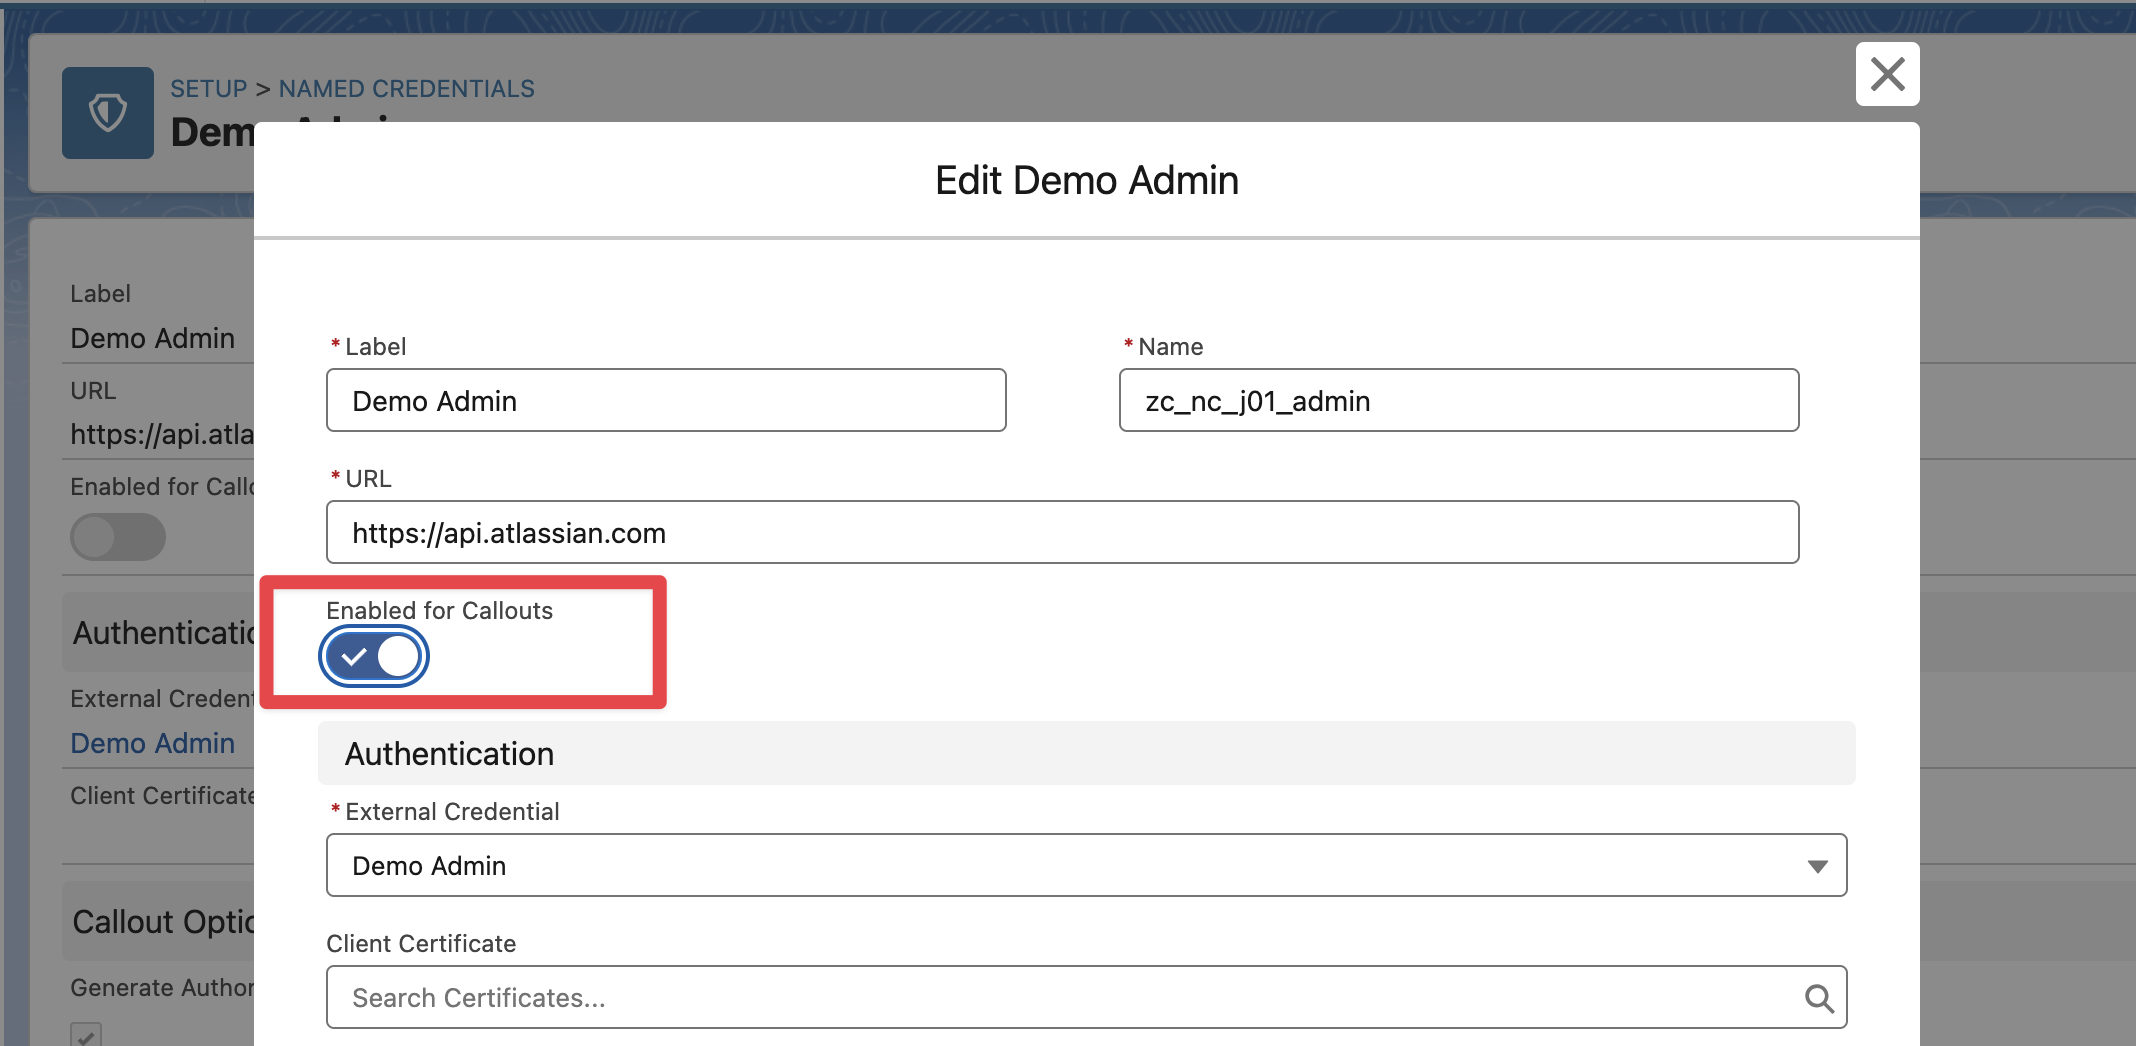
Edit the Named Credential, enable “Enable for Callouts“ option and Save.
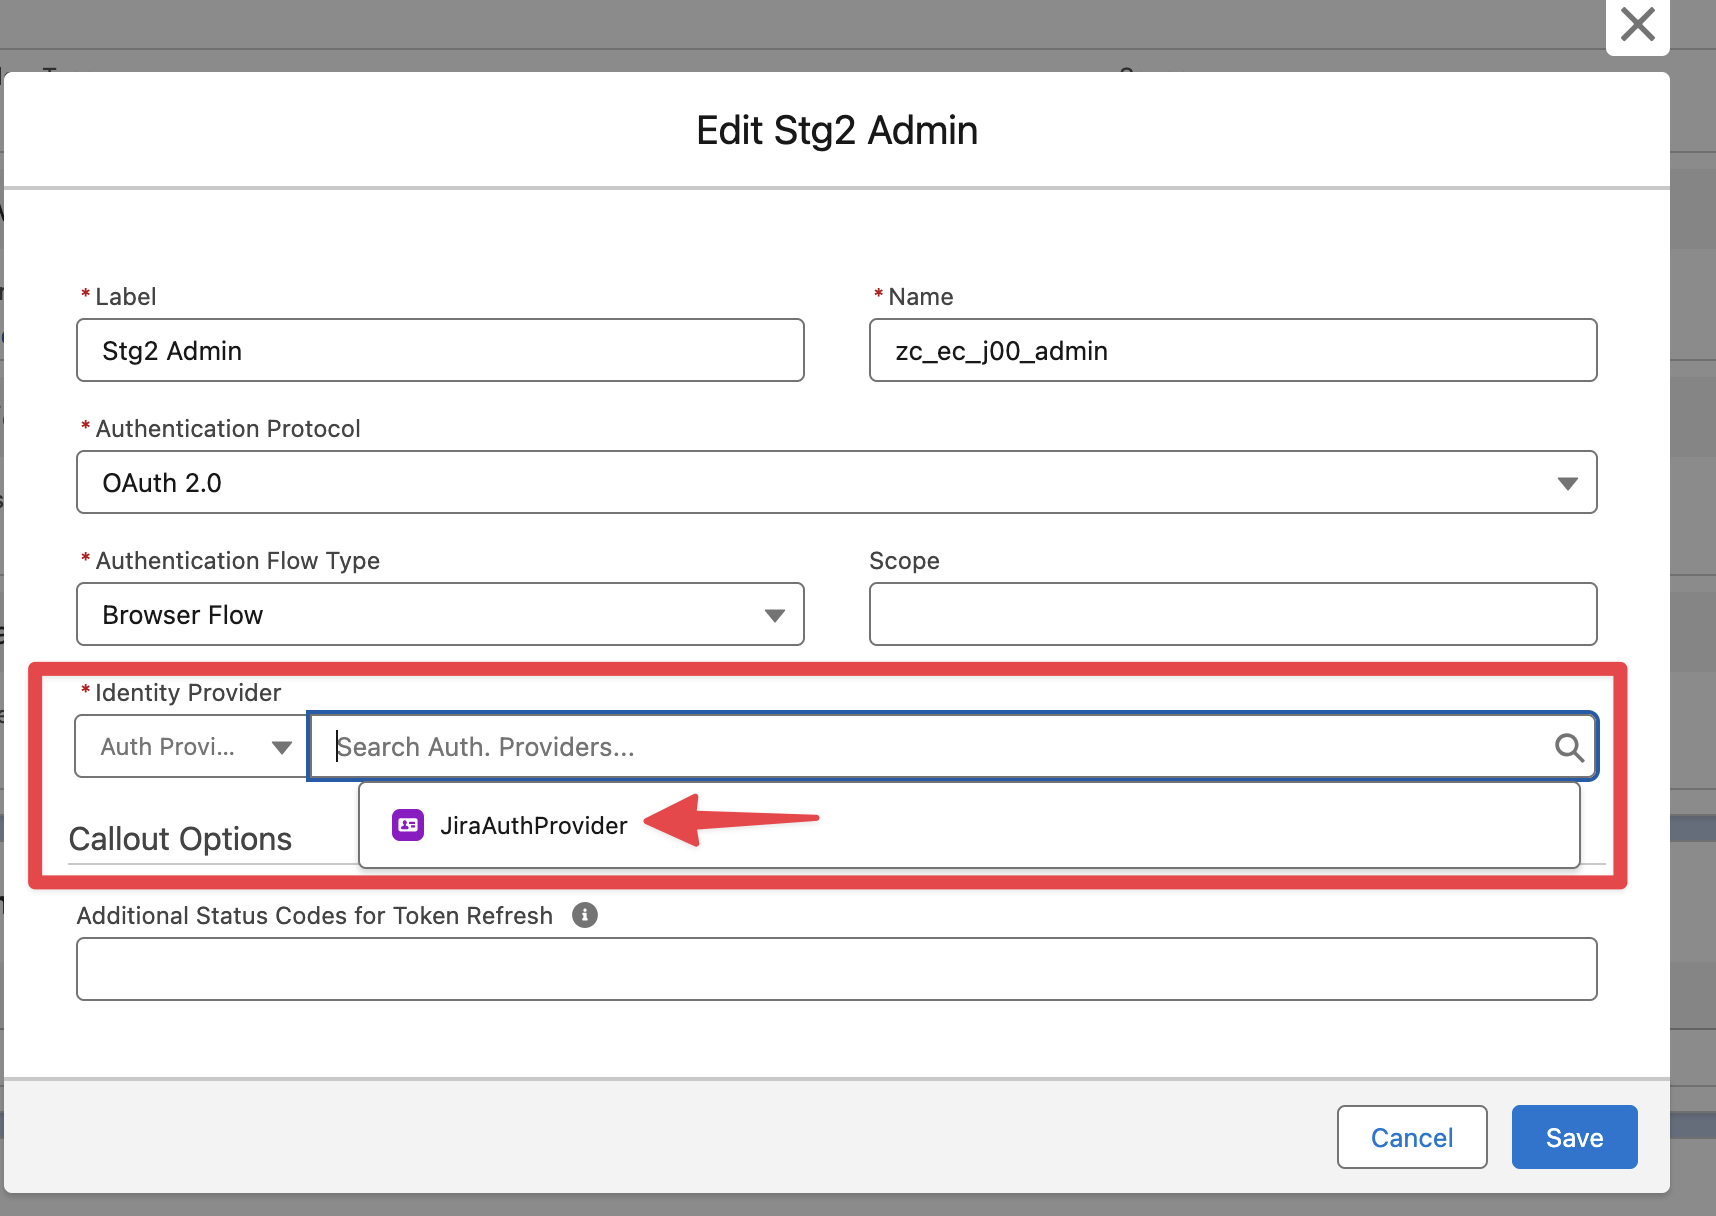
4. Linking the External Credential to the Auth. Provider
From the Named Credential page, go to the External Credential configuration

Edit the External Credential and set the Authentication Protocol to OAuth 2.0
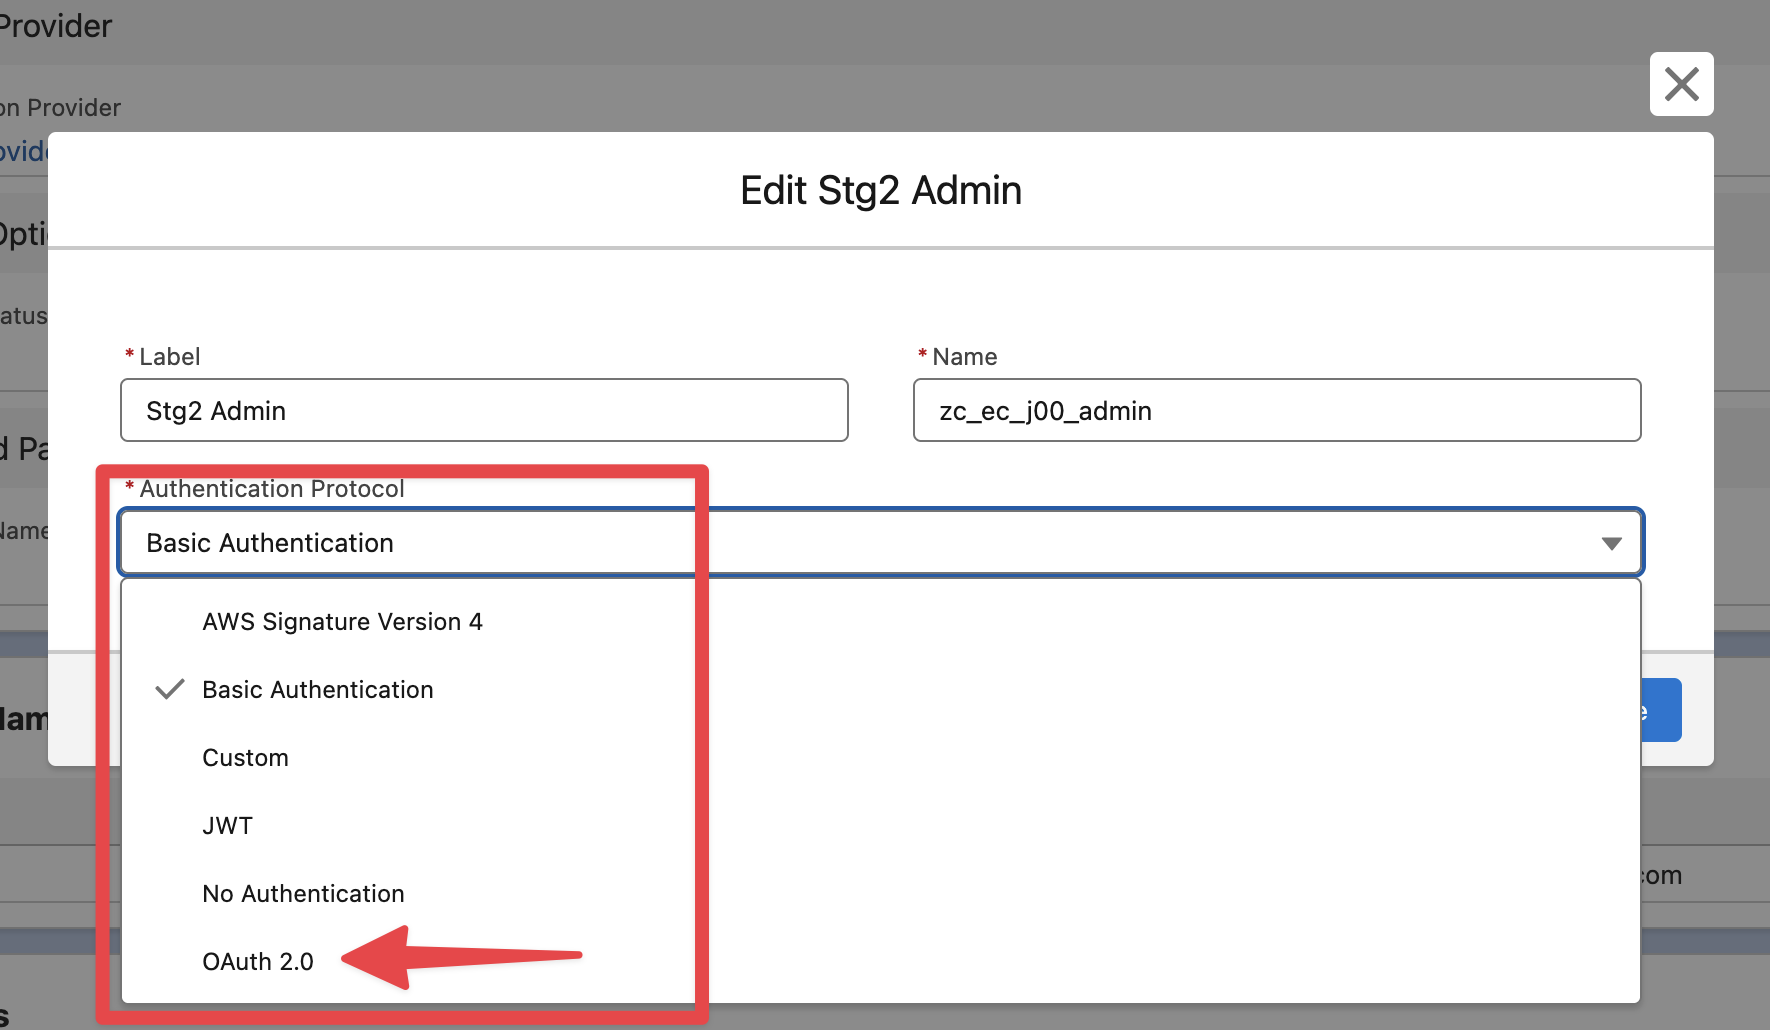
Set the Identity Provider to the Auth. Provider created earlier and Save