Creating Jira Issue from Salesforce
When you first start with a Case, the Related JIRA Issues section allows you to either create a new JIRA Issue or link to an existing one by providing the issue Key in the adjacent text window.
You can also automatically create a JIRA issue each time a Case is created. Defaults values for JIRA project, issue type and priority are used to create an issue in the background. You can specify JIRA Project/Issue Type via Case formula fields, based on specific Case criteria when the Issue is being created. For adding filter to auto-creation of JIRA Issues, please refer to Filters for Auto-creation of JIRA Issue on Case Creation.
When creating an issue manually, the default values for Project and Issue Type may be changed on the Issue Creation screen.
You can view Suggested Issues for a Case (an action that performs a search in JIRA using Case Subject for matching Issues) and even perform your own search for existing Issues that may be relevant for the Case. If there are already issues pertaining to the Case Subject, then it is possible to simply link them to the Case for the purpose of tracking their resolution. This is discussed in more detail later in this section. The screenshots below show both the classic version of the interface, as well as the same actions using zAgileConnect Lightning Web Components.

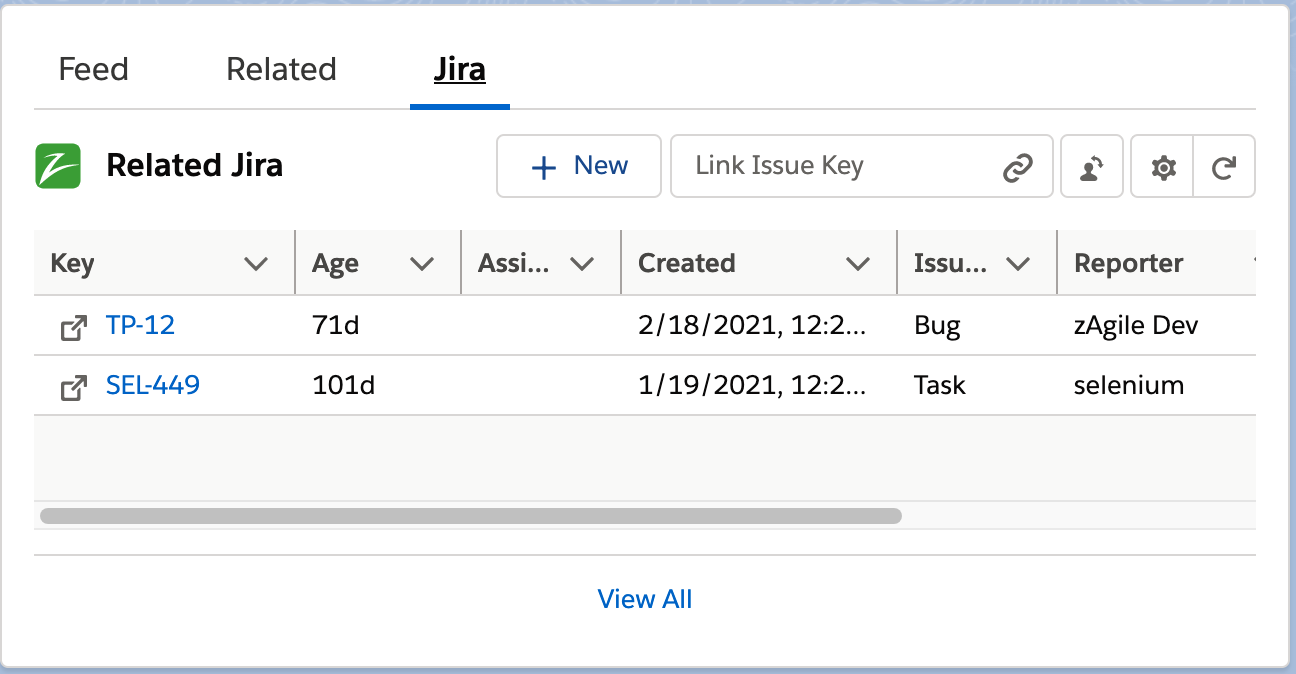
By clicking on ‘New‘, you can create a JIRA Issue from within Salesforce for a specific JIRA Project and issue type that has been pre-selected in JIRA plugin administration section. The list of these projects and issue types will be available in the issue creation window, along with other issue properties.
The default values for JIRA Project and Issue Type will be pre-selected on this page. However, you can change them as appropriate, prior to creating the issue. You can also update the issue summary, priority and description.
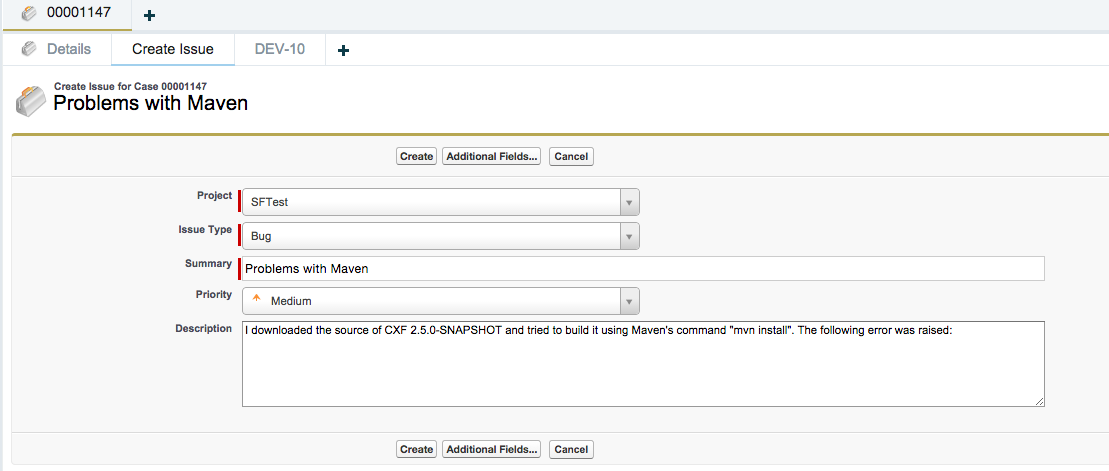
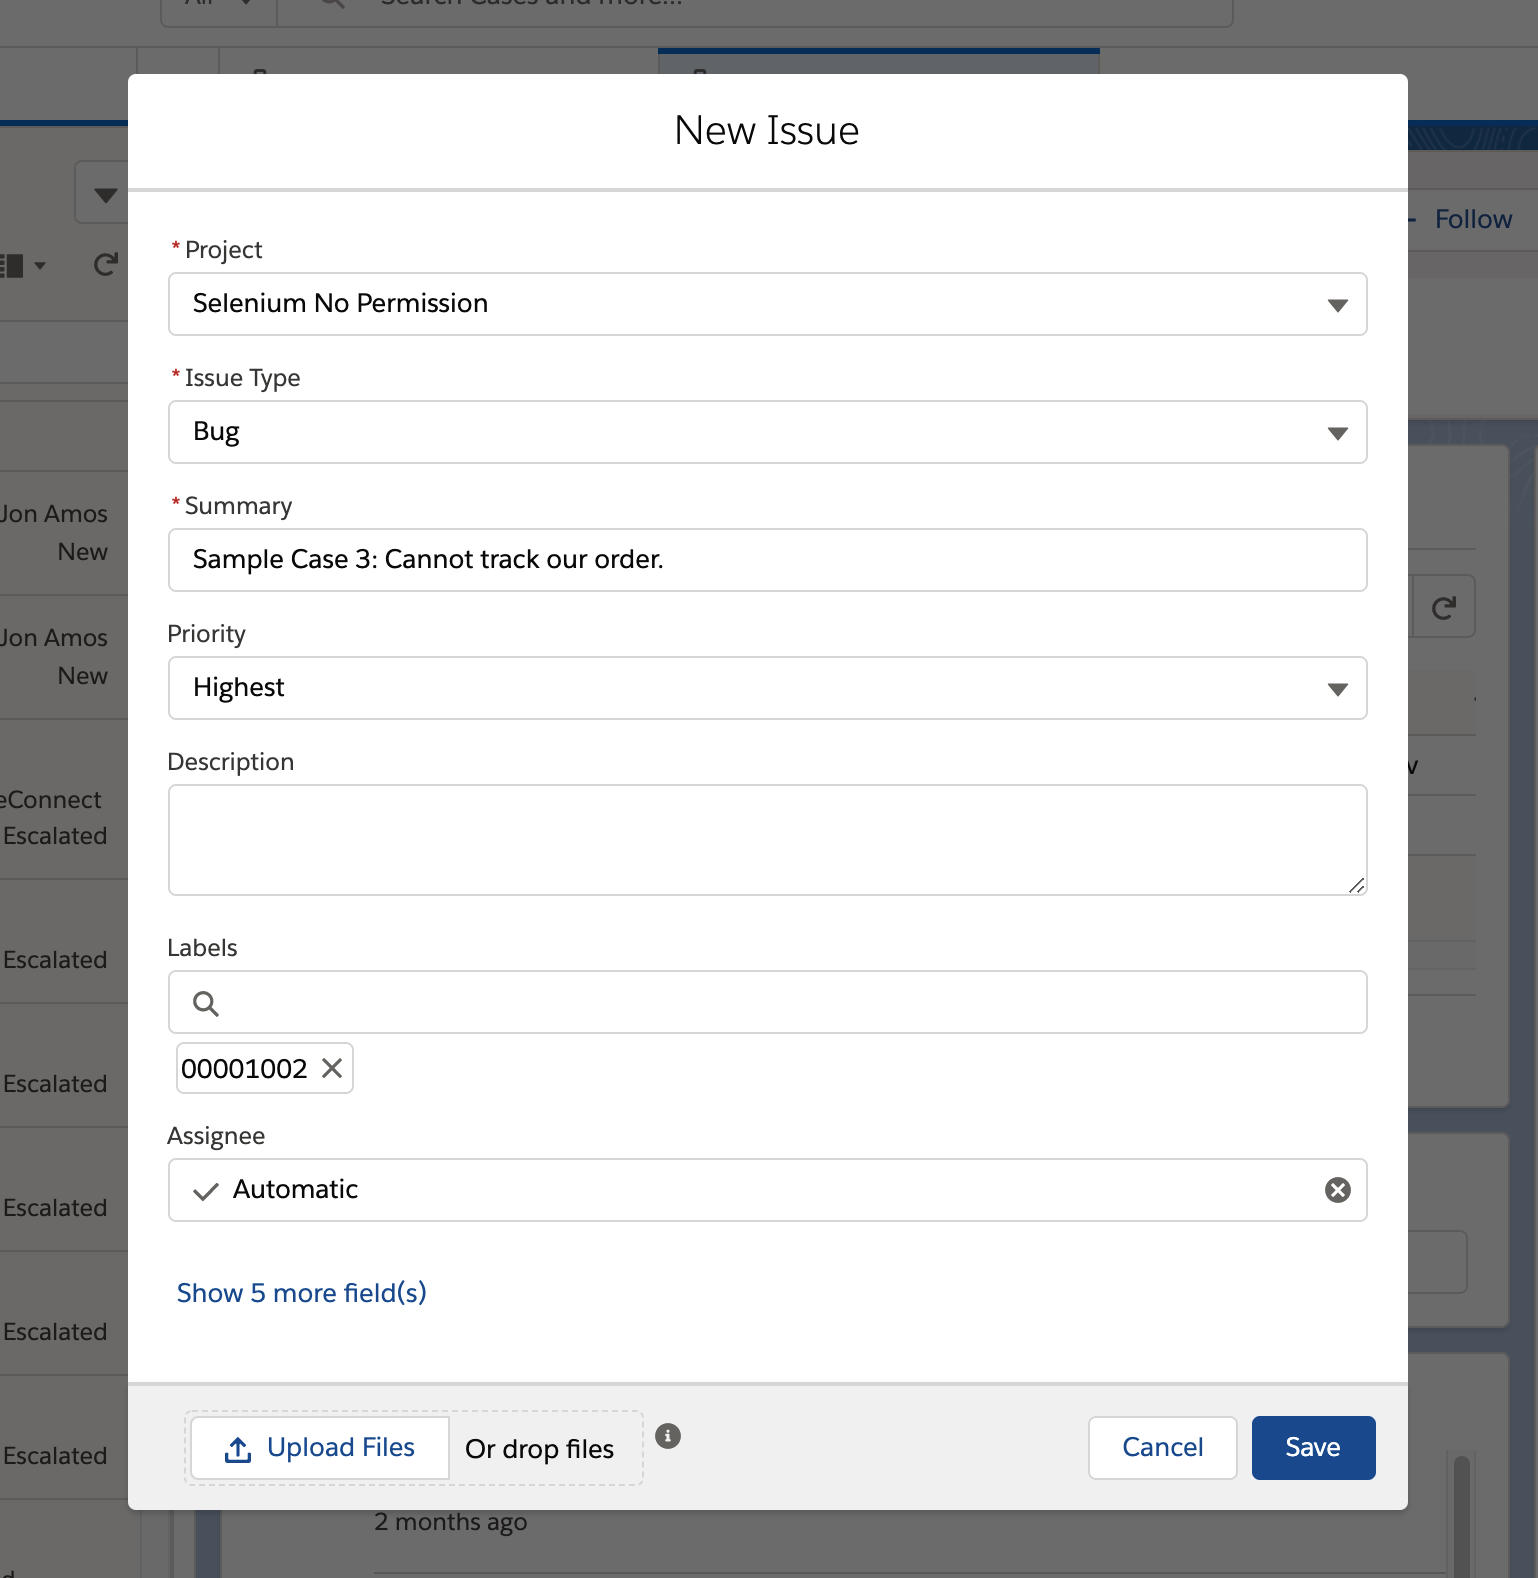
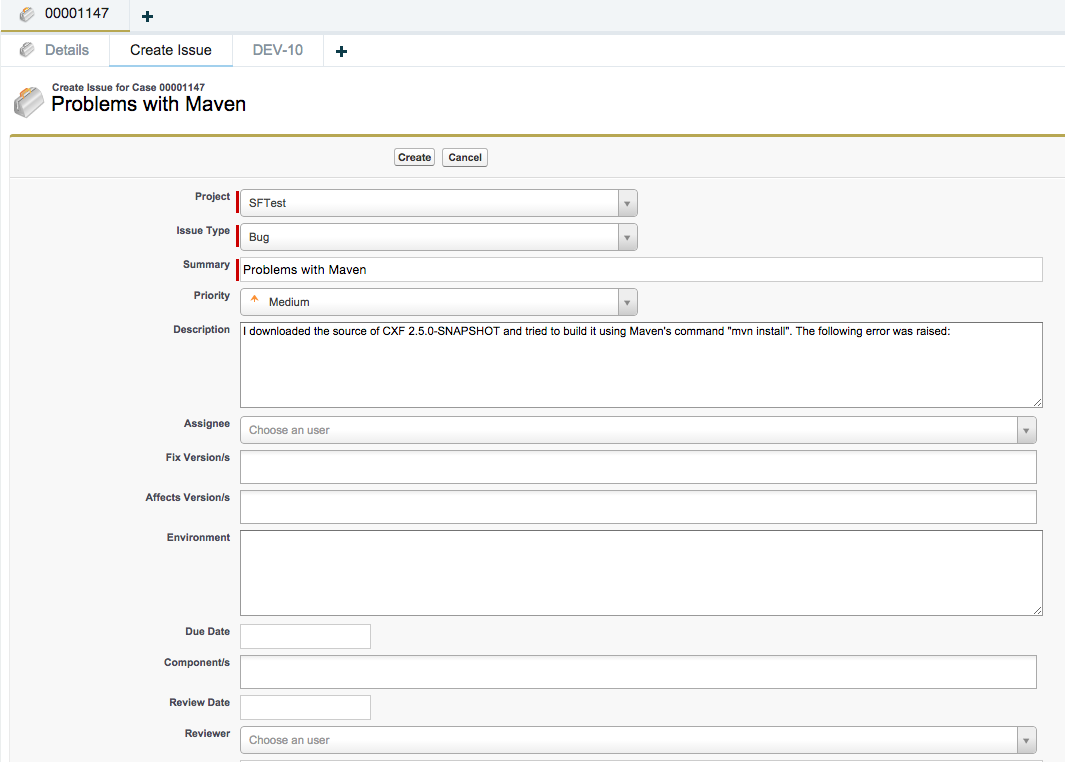
You can select Additional Details… button to provide additional values when creating an issue. This is especially relevant if the issue has required fields which cannot be populated via field mapping (they may not have corresponding values in Case). The Additional Details… option transitions to a full issue edit mode, displaying all editable fields for the issue, based upon its type and available permissions. It pre-populates values from JIRA for various single and multi-select fields. It also supports typeahead for fields such as Assignee and Reporter. Required fields are flagged, as shown in example below.
The created issue is displayed with a selected set of attributes on the Case page.

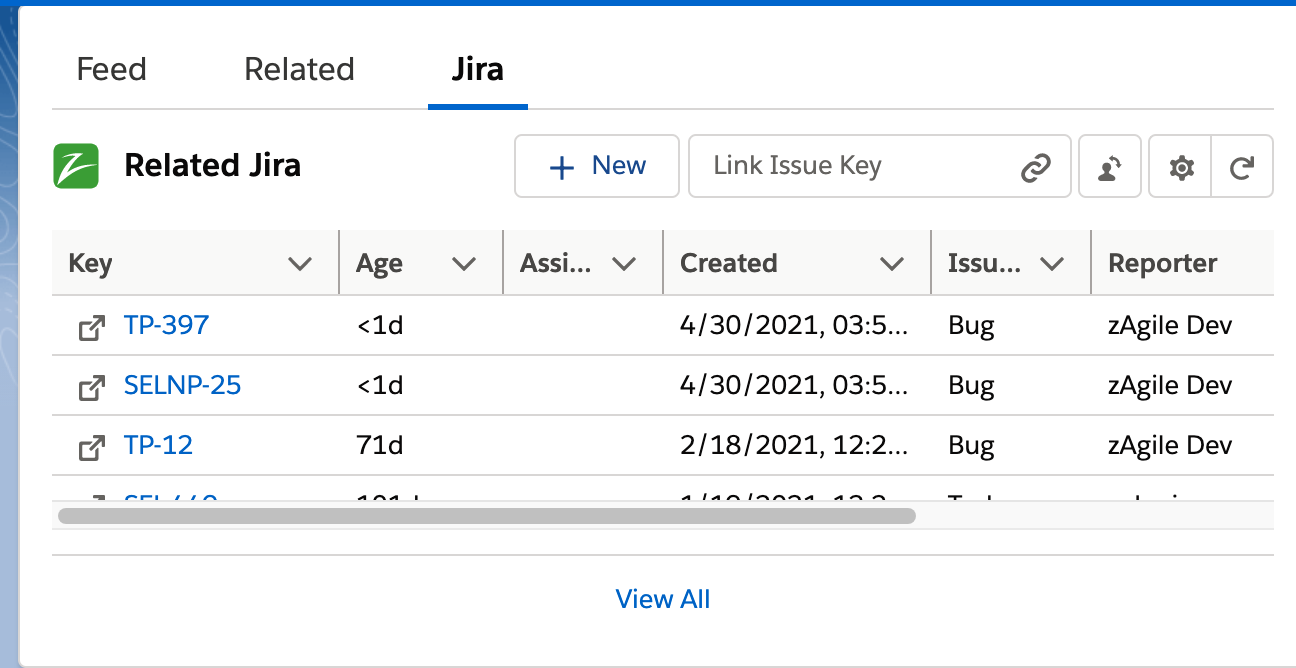
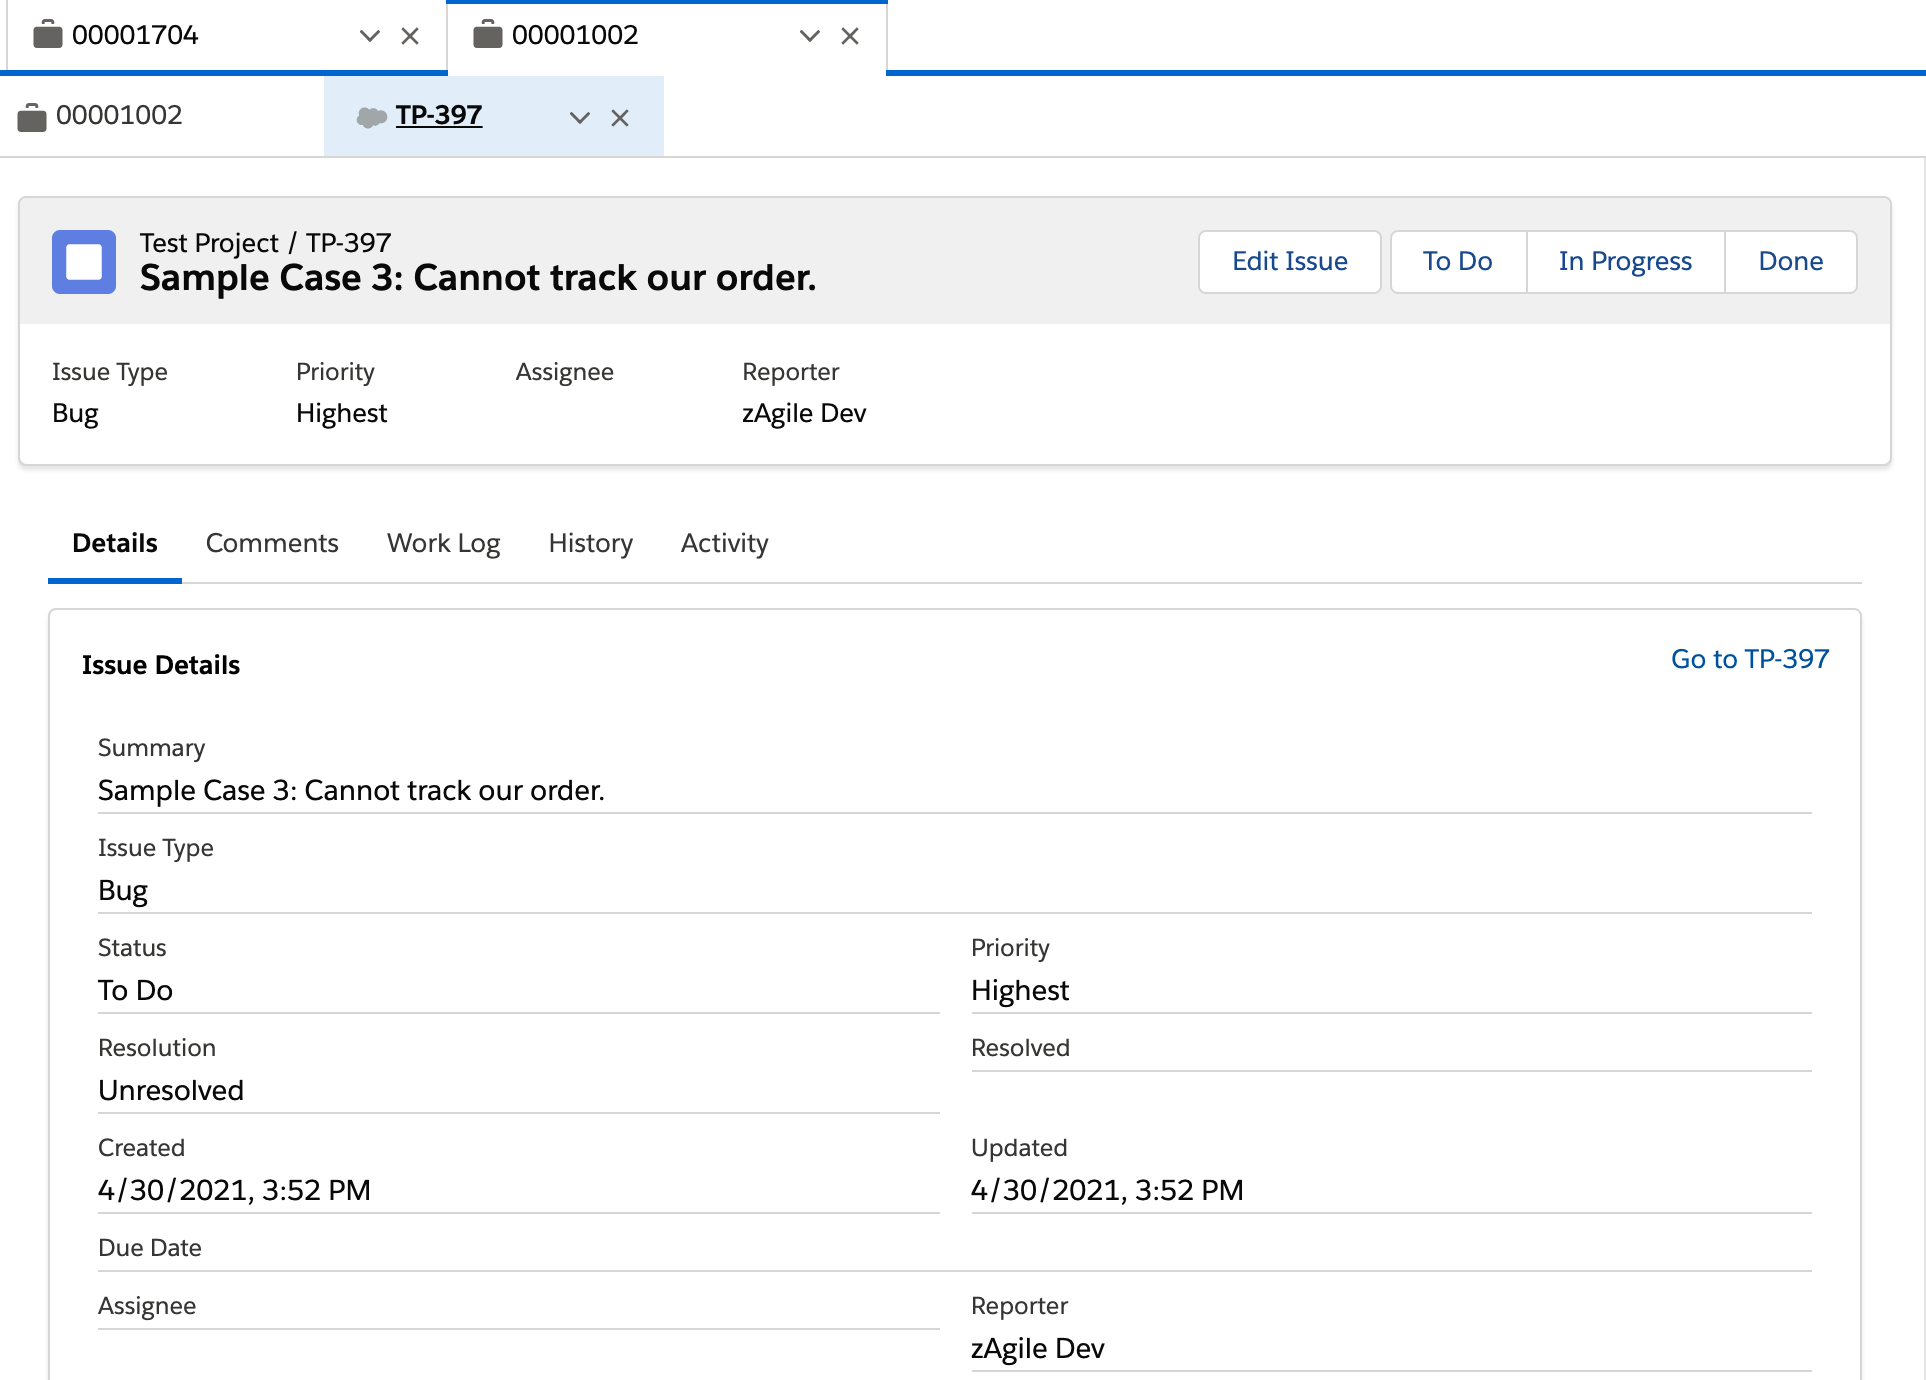
zAgileConnect also allows you to view JIRA Issue details from within Salesforce including Comments, Work Log, History and Activity.
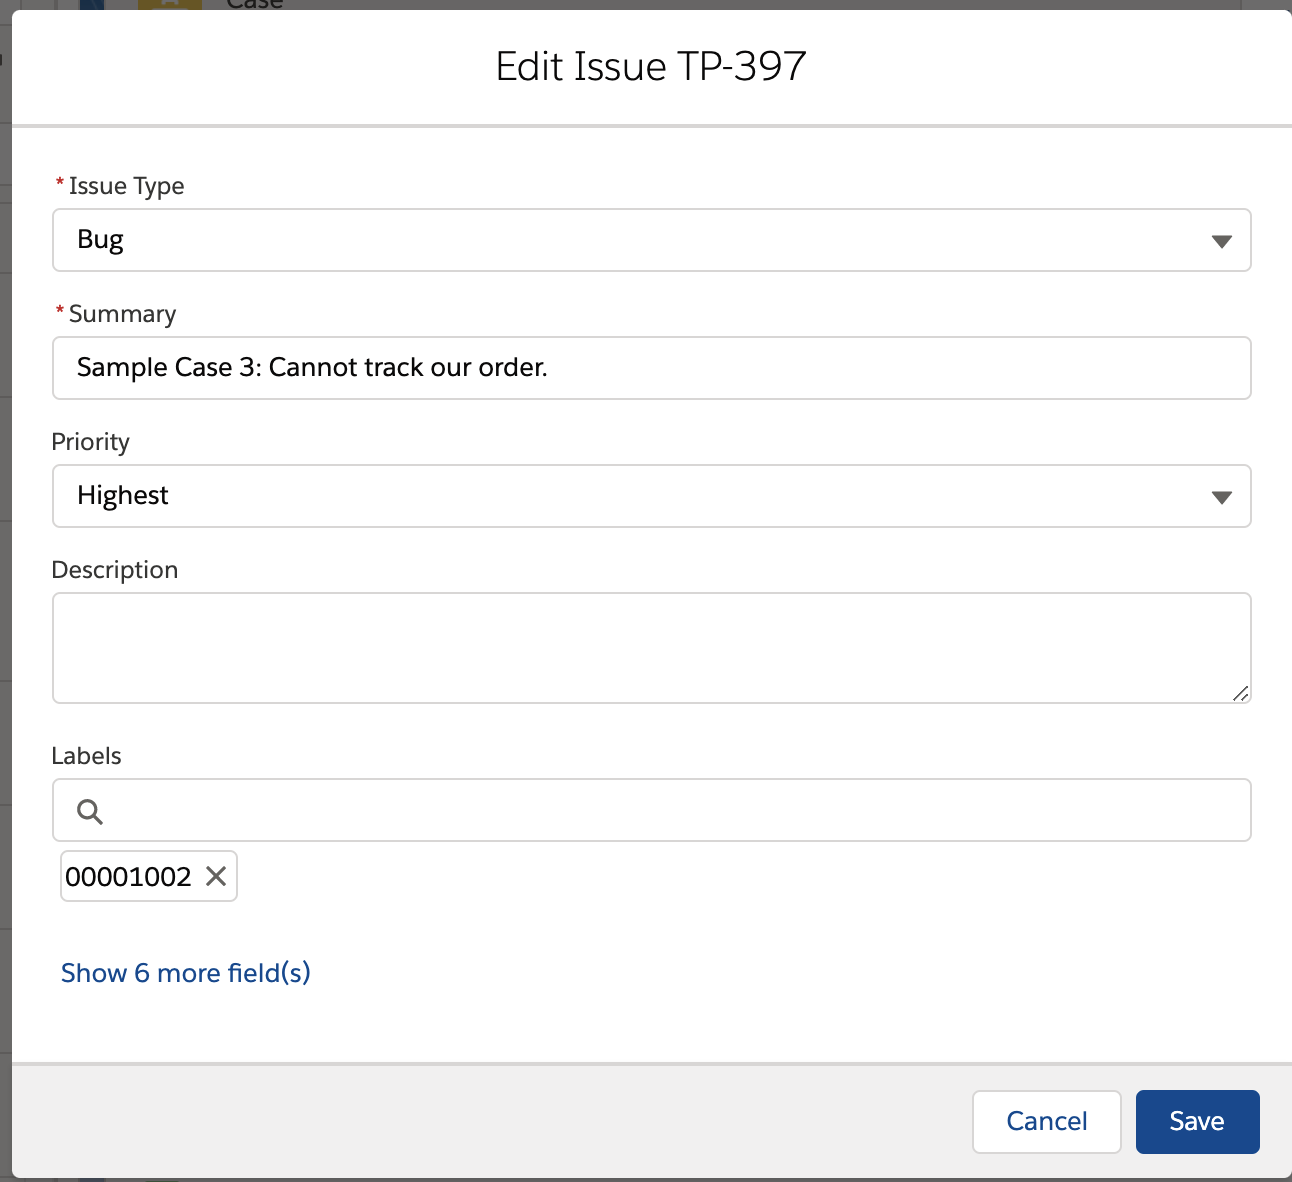
You can also edit the issue, as well as transition its workflow states in the detail view (as shown below).
By clicking on the Issue key above, you will be navigated to a page within Salesforce that displays JIRA Issue details, including any subtasks and linked issues.
You can also navigate to the Issue in JIRA by clicking on the Issue ID link on the top right of the screen, as shown below.
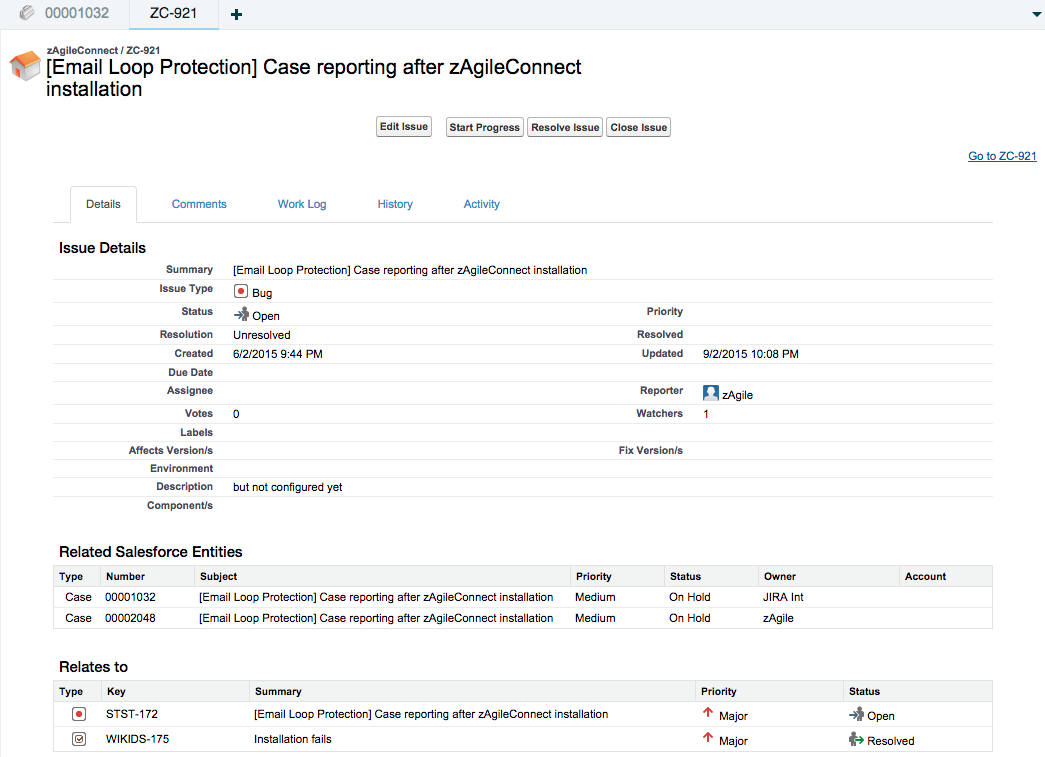
Similar to the display of selected issue attributes in Salesforce, JIRA users will also be able to see the Case context related to the issue in JIRA.

