The examples below requires zAgileConnect v1.17x or higher
Simple Create Bug Flow Screen
The following example will display a simple Create Bug Flow Screen that can be added to a Case Page Layout.
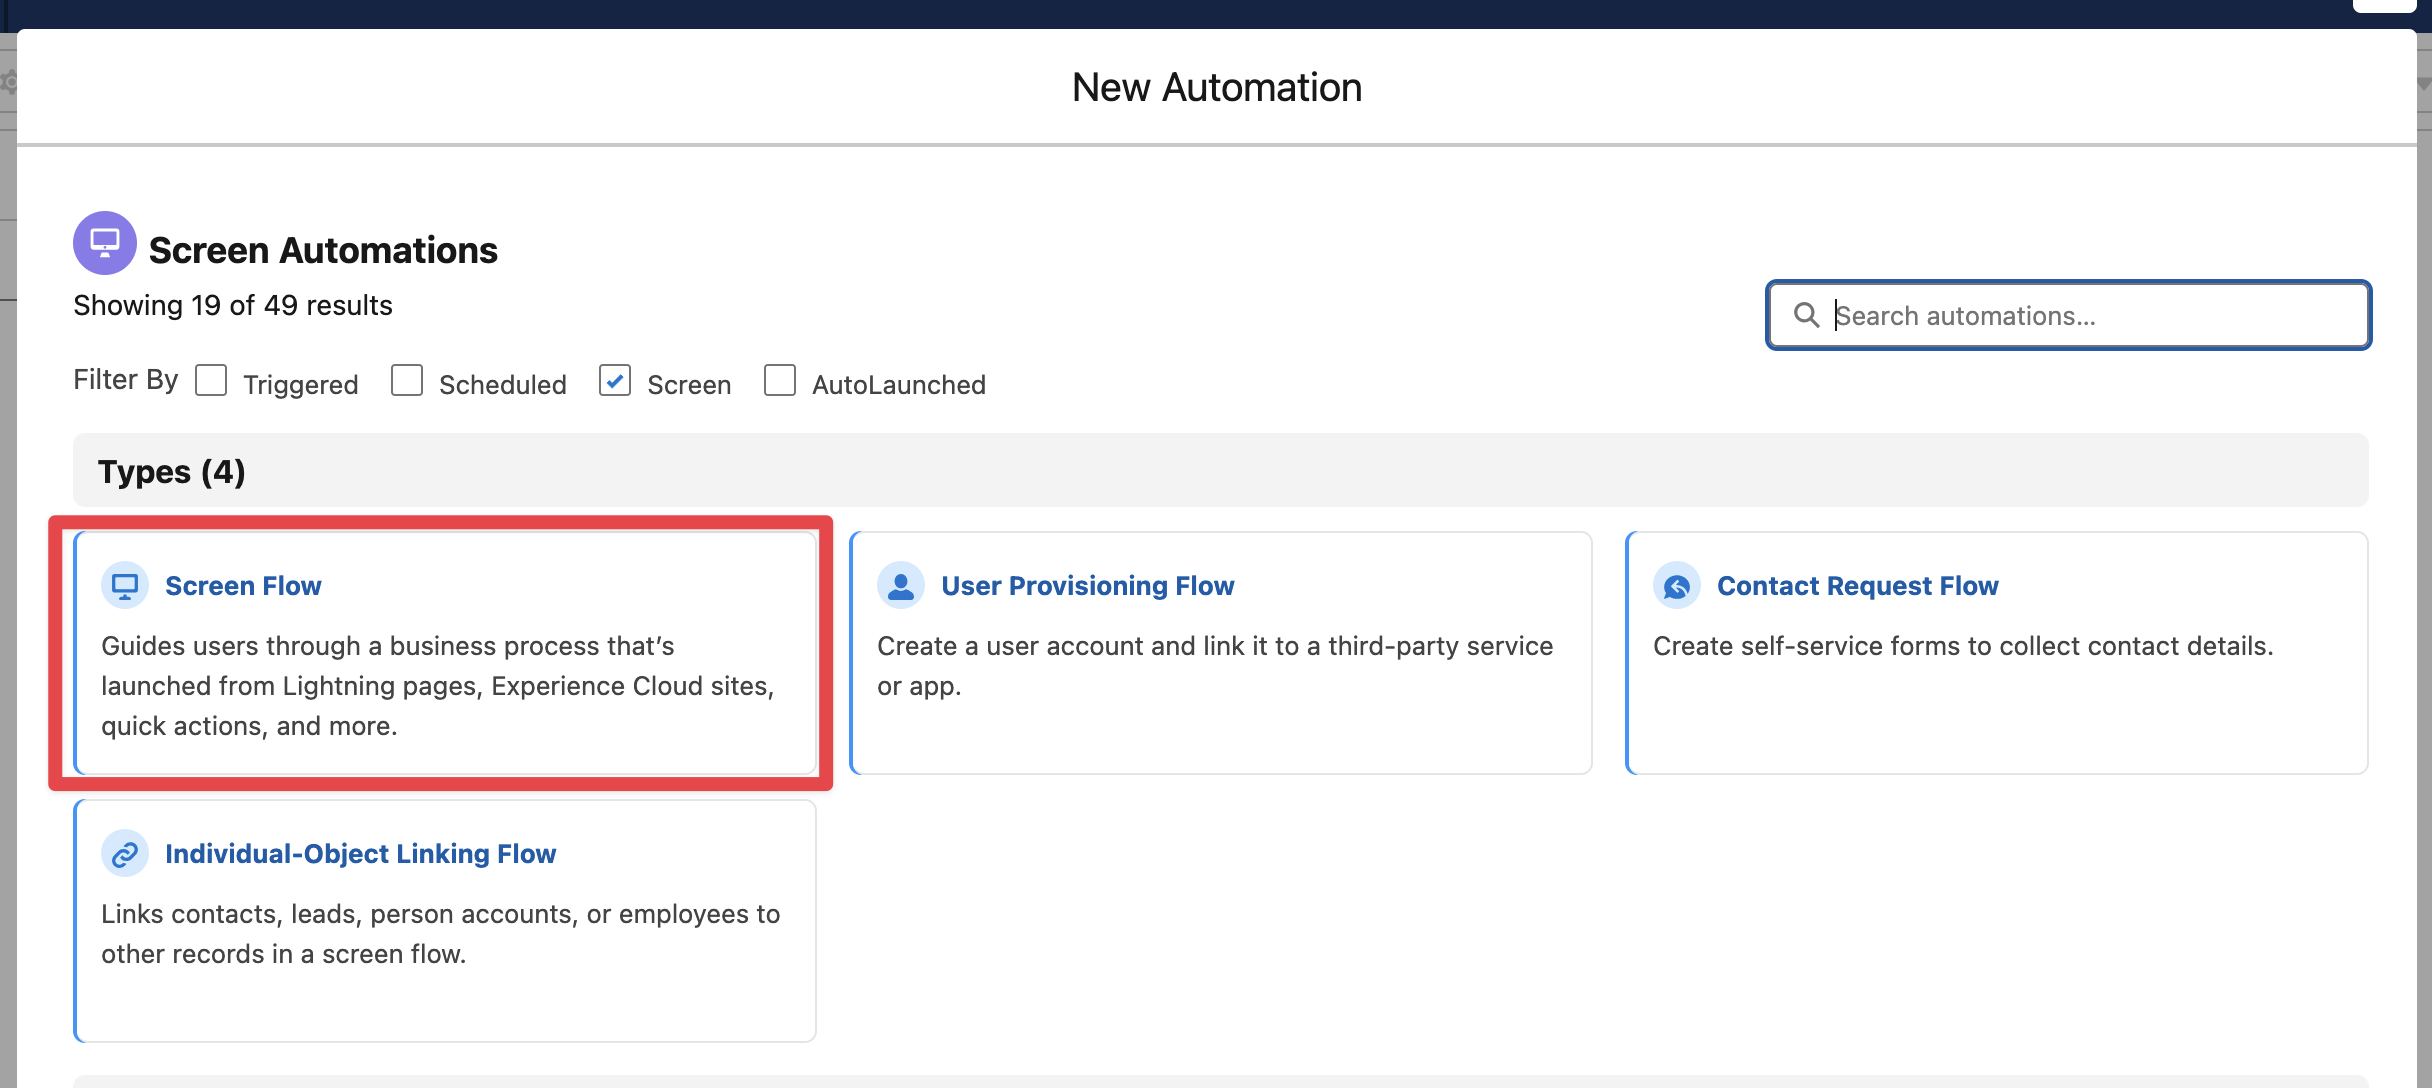
In Salesforce → Flows create a new Screen Flow
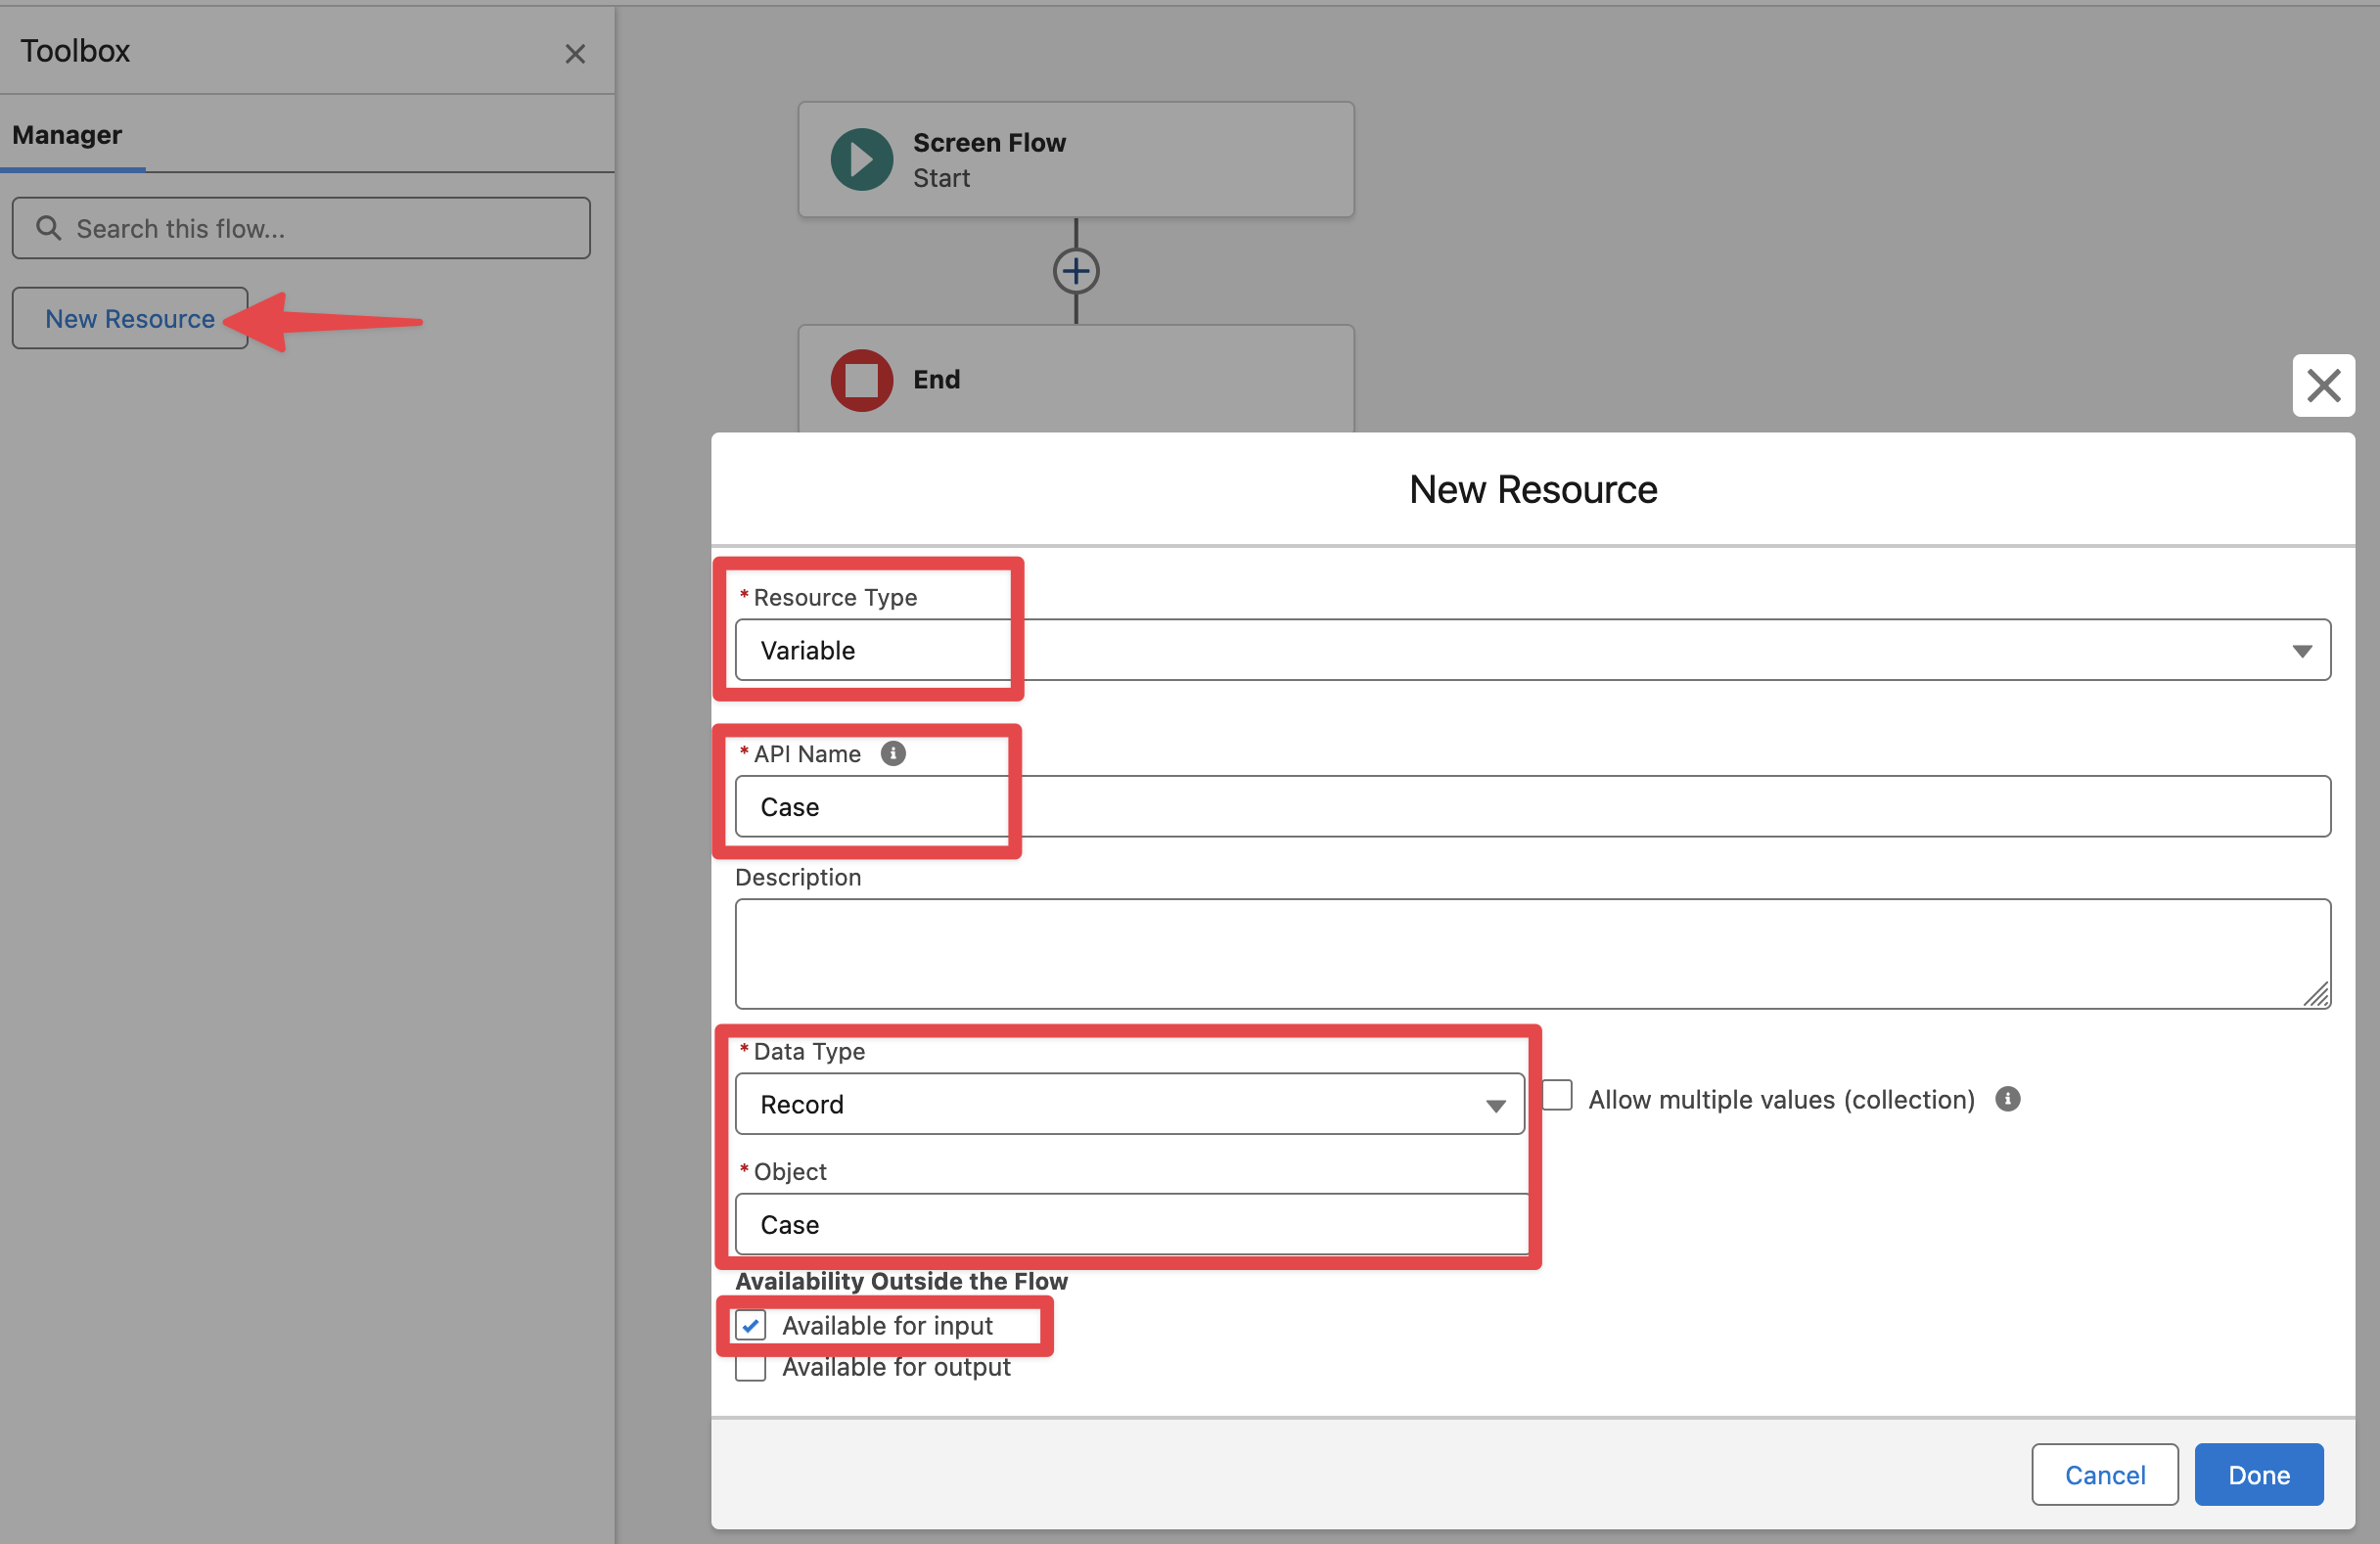
In the Toolbox add a new Resource Variable to receive the Case record
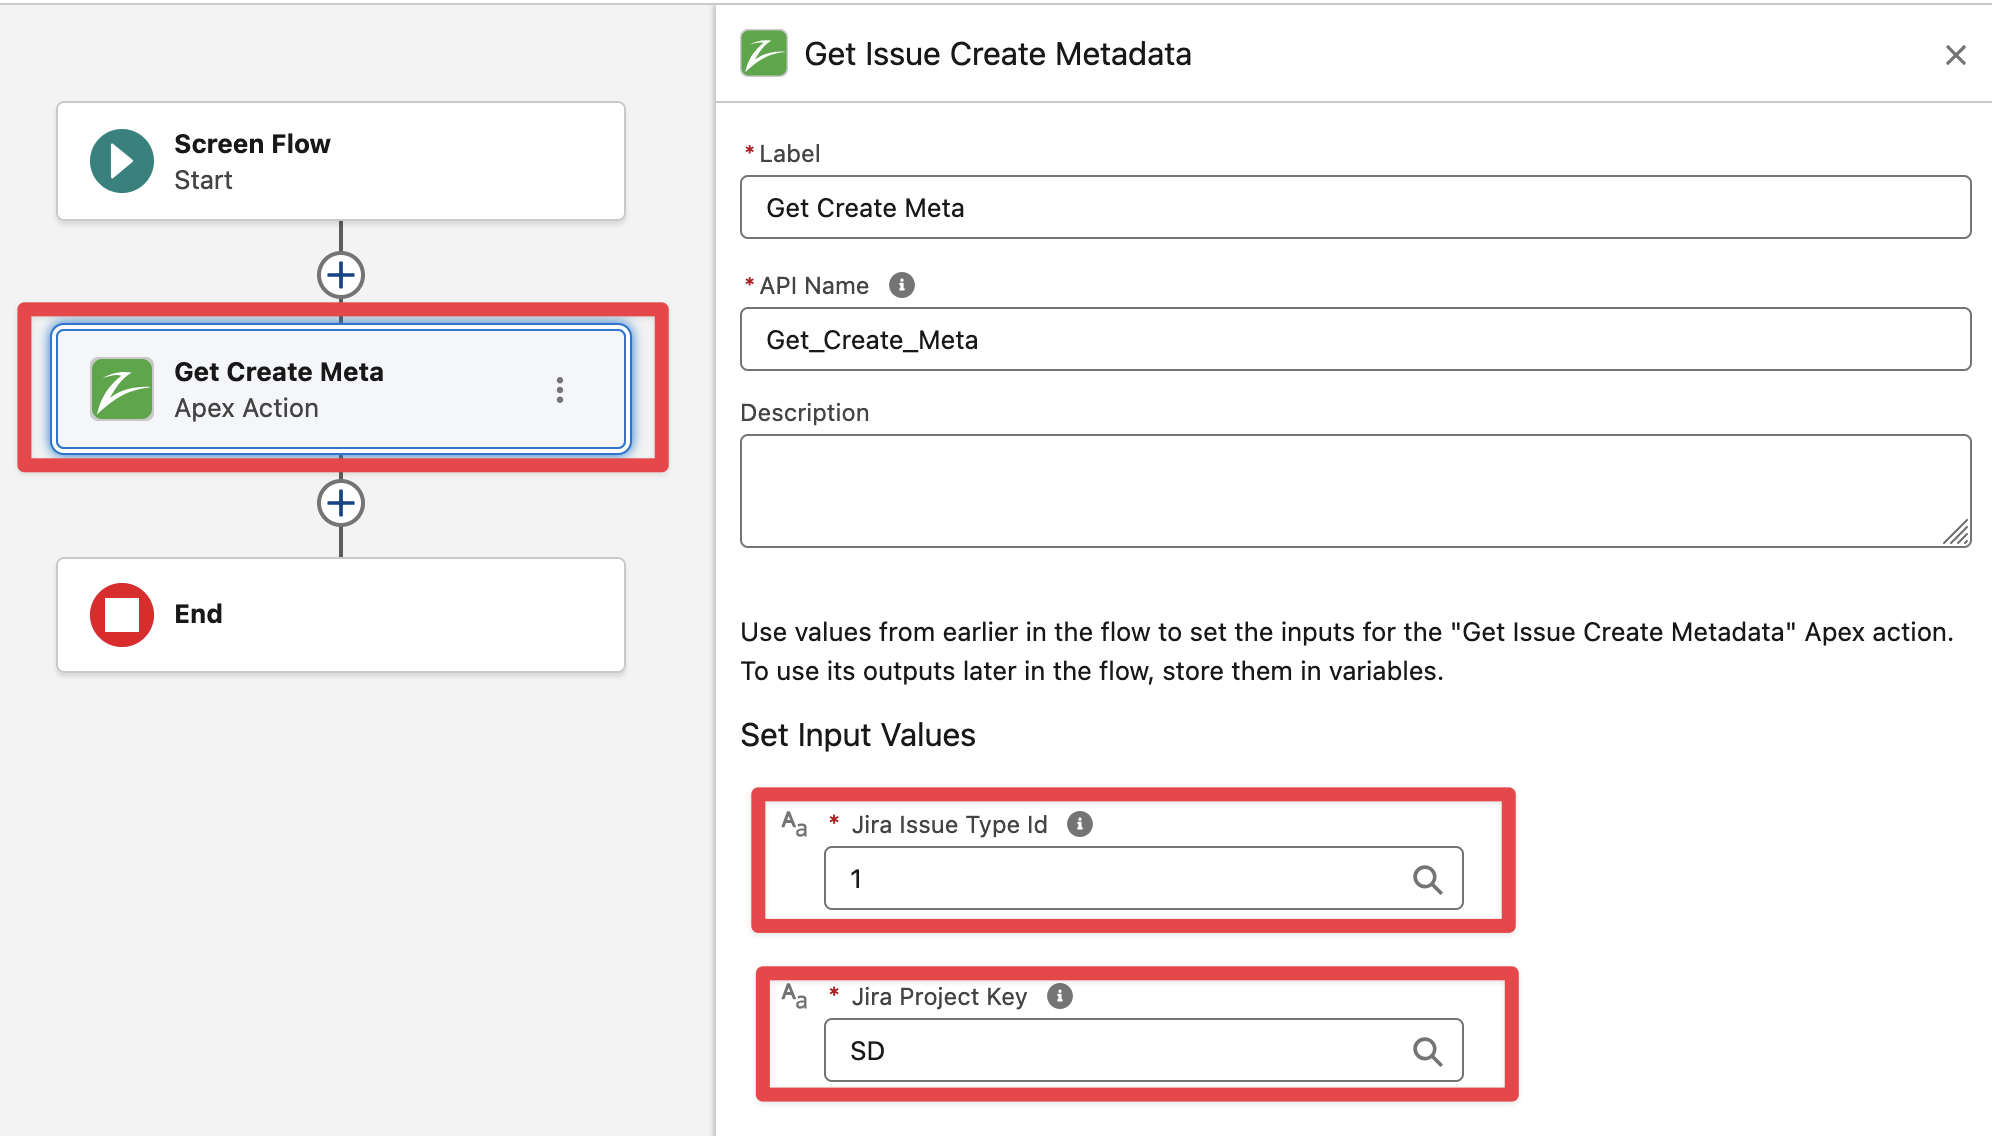
Add the “Get Issue Create Metadata“ Flow action, specify the Issue Type Id for Bug (see Finding the ID for Issue Types) and the Project Key (where the Issue will be created).
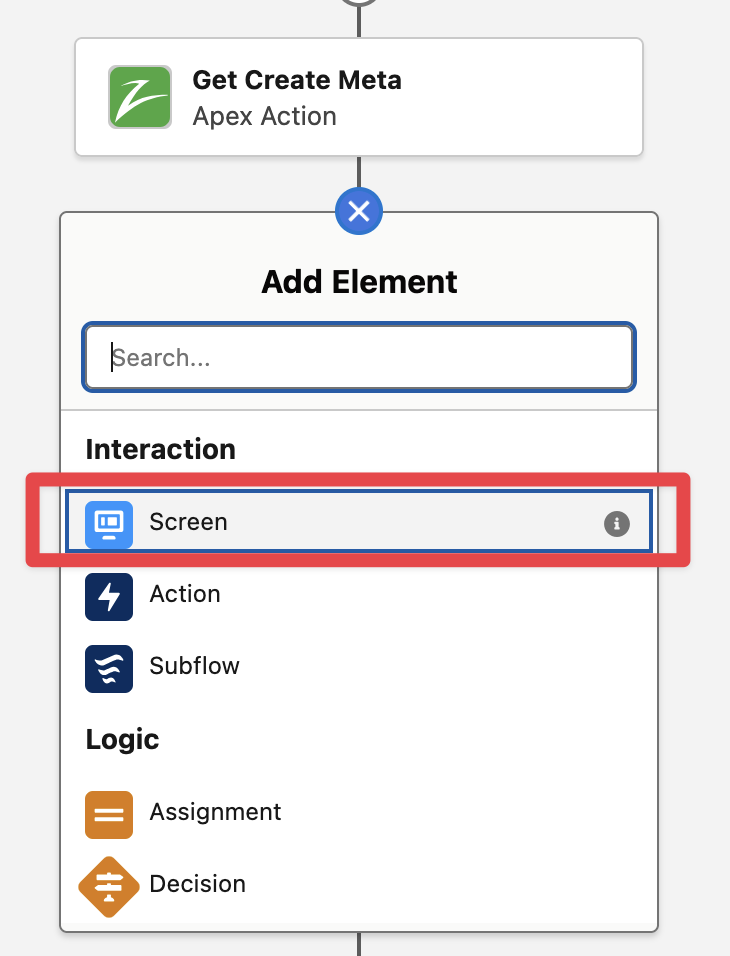
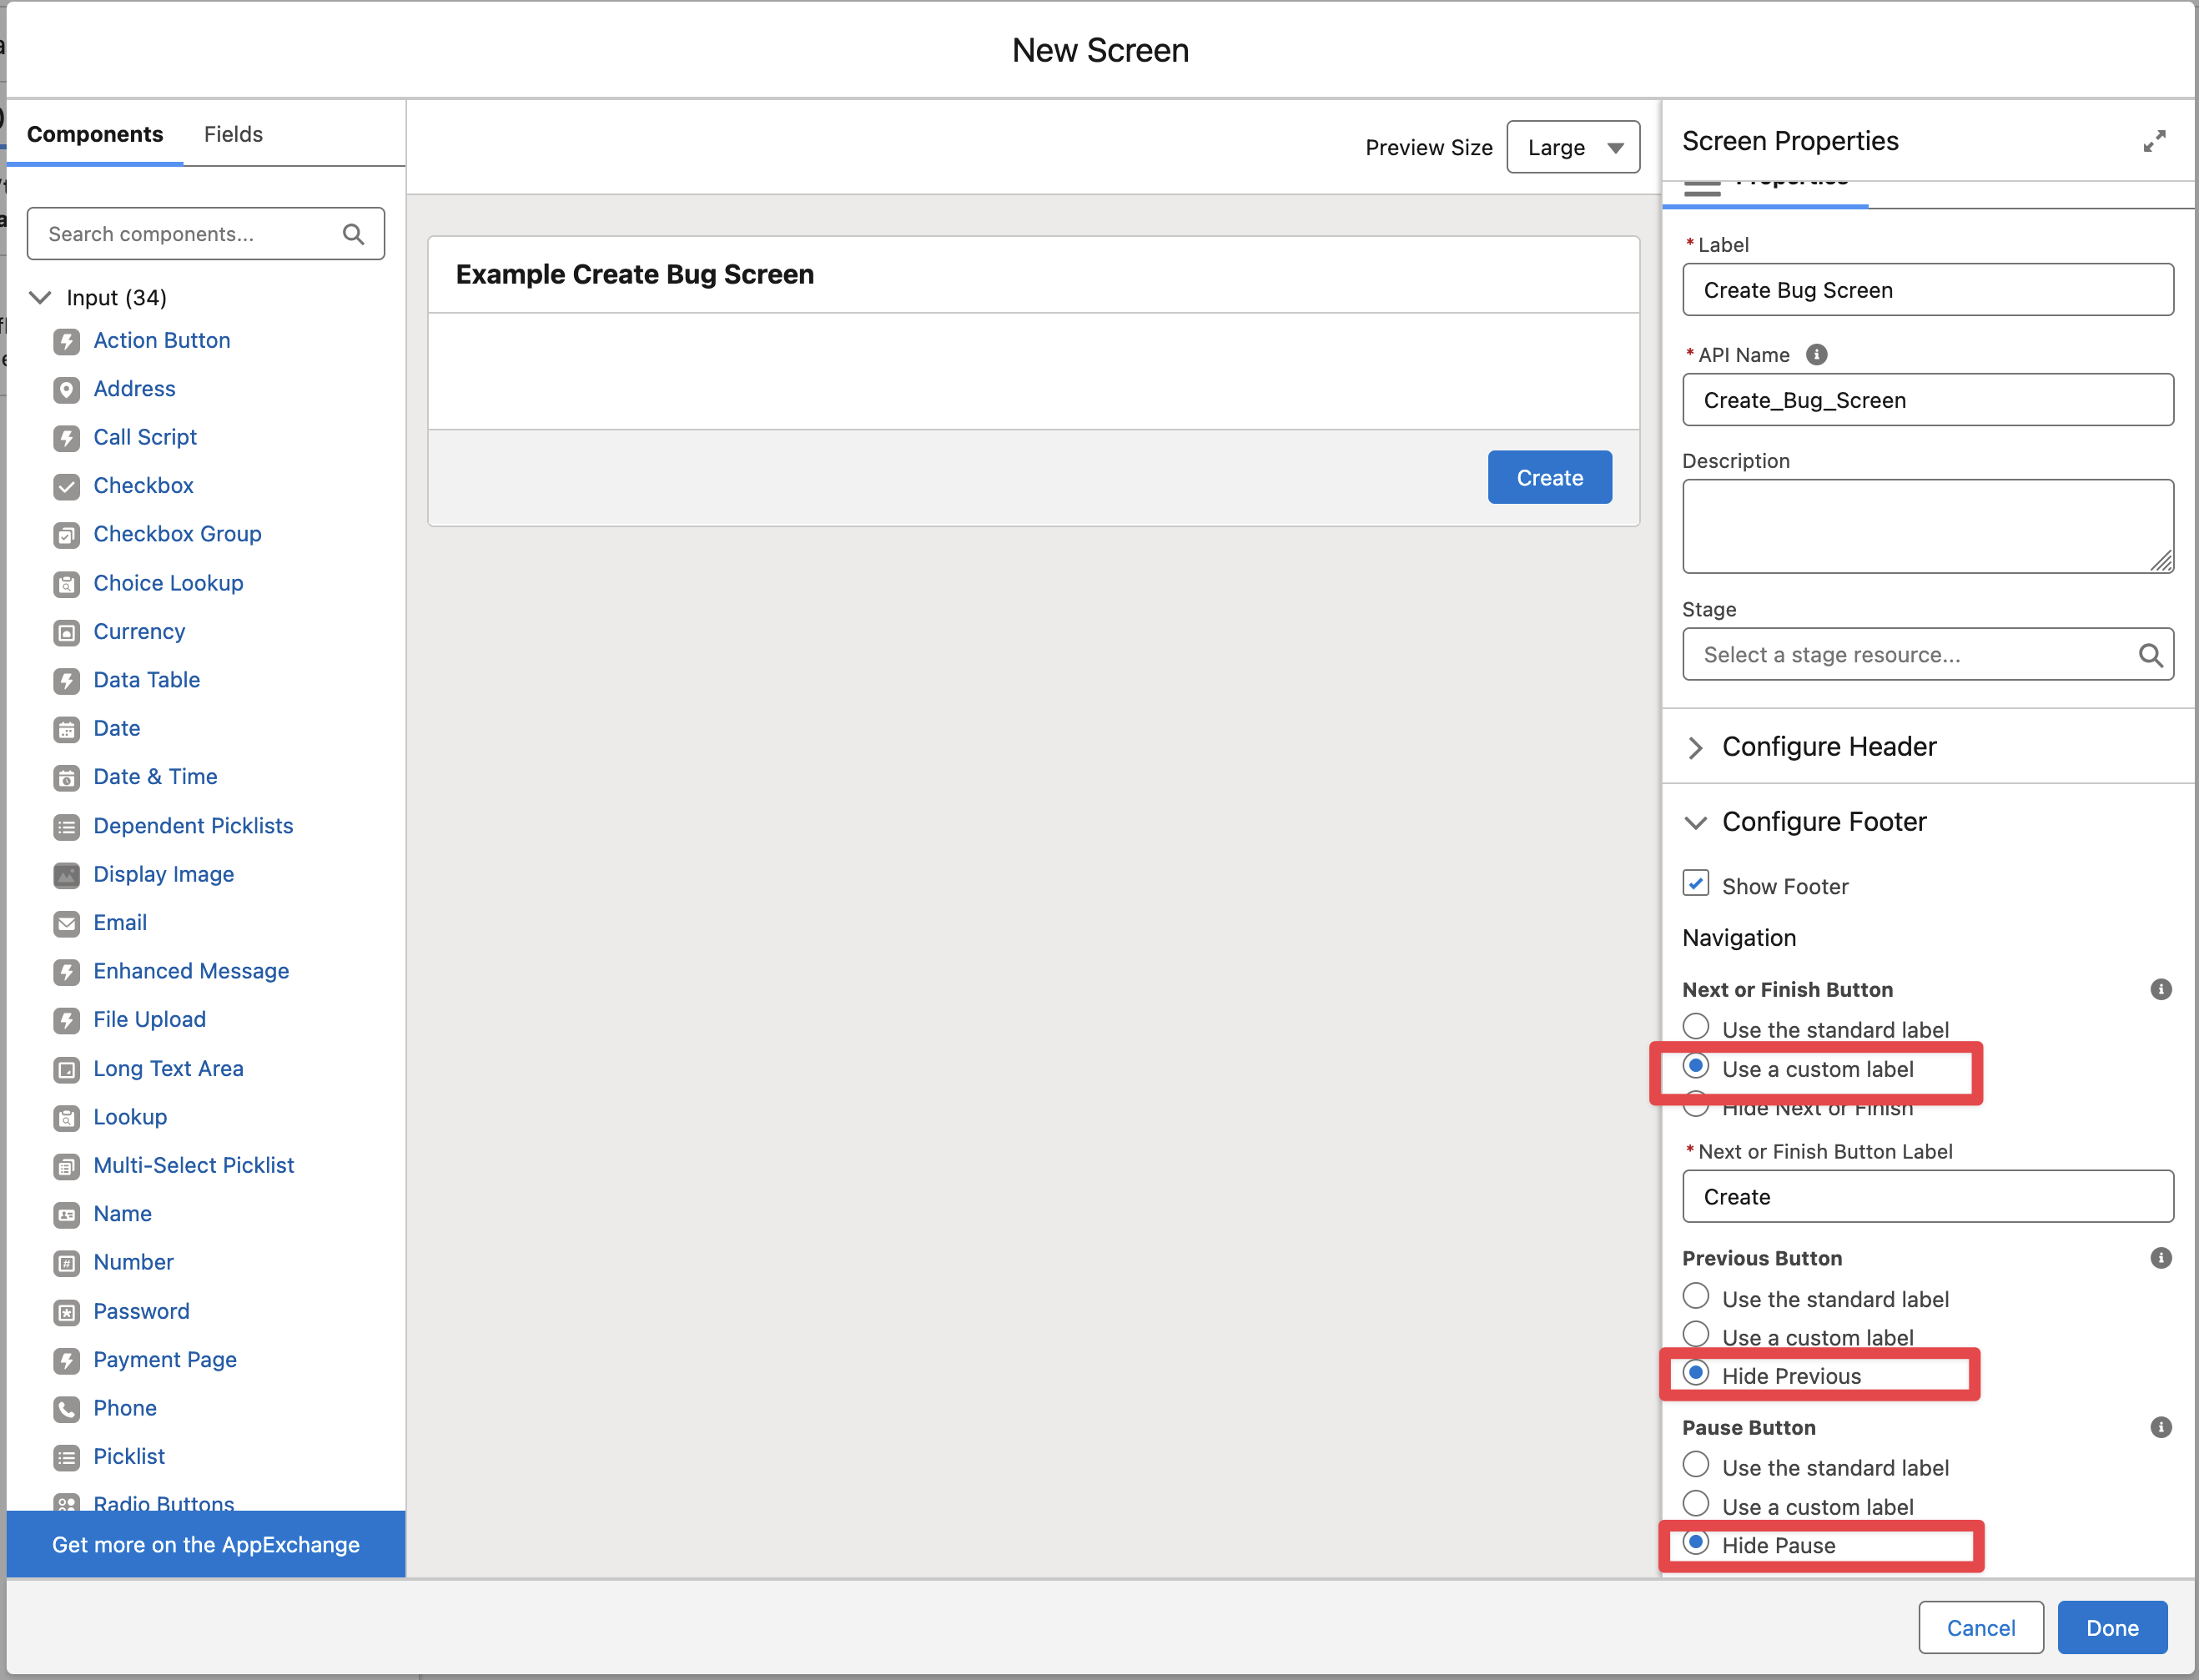
Add a Screen element
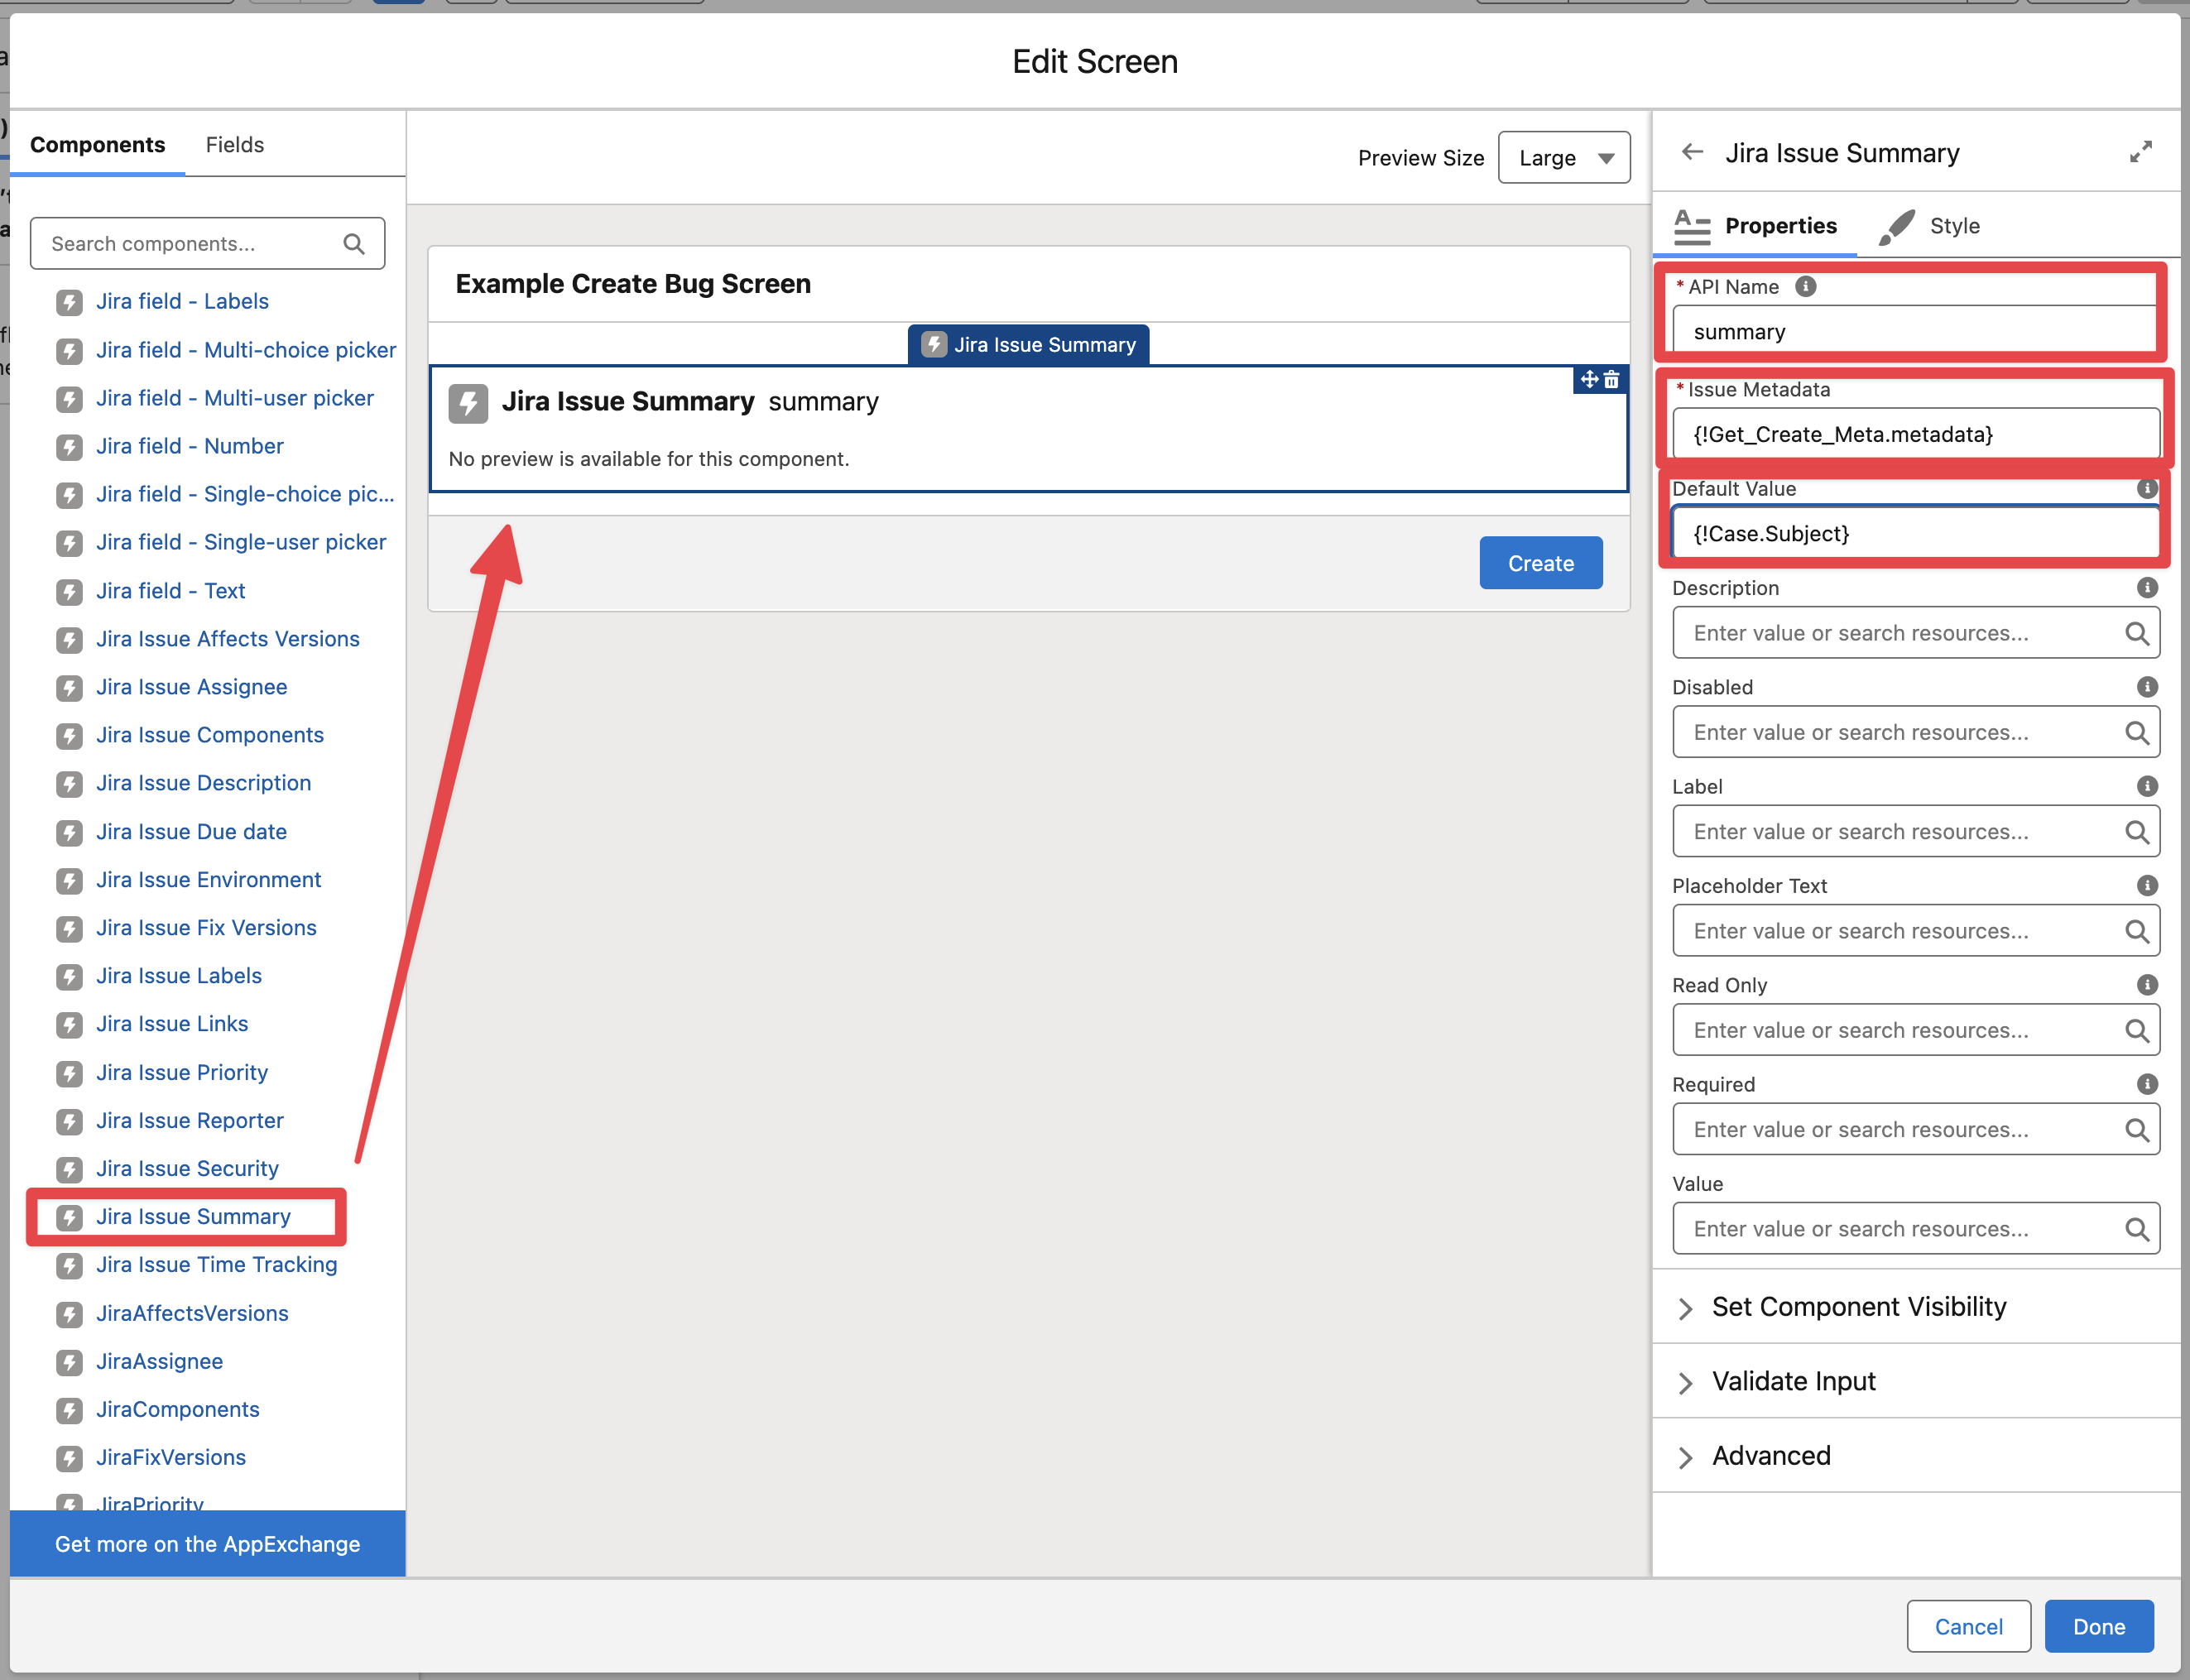
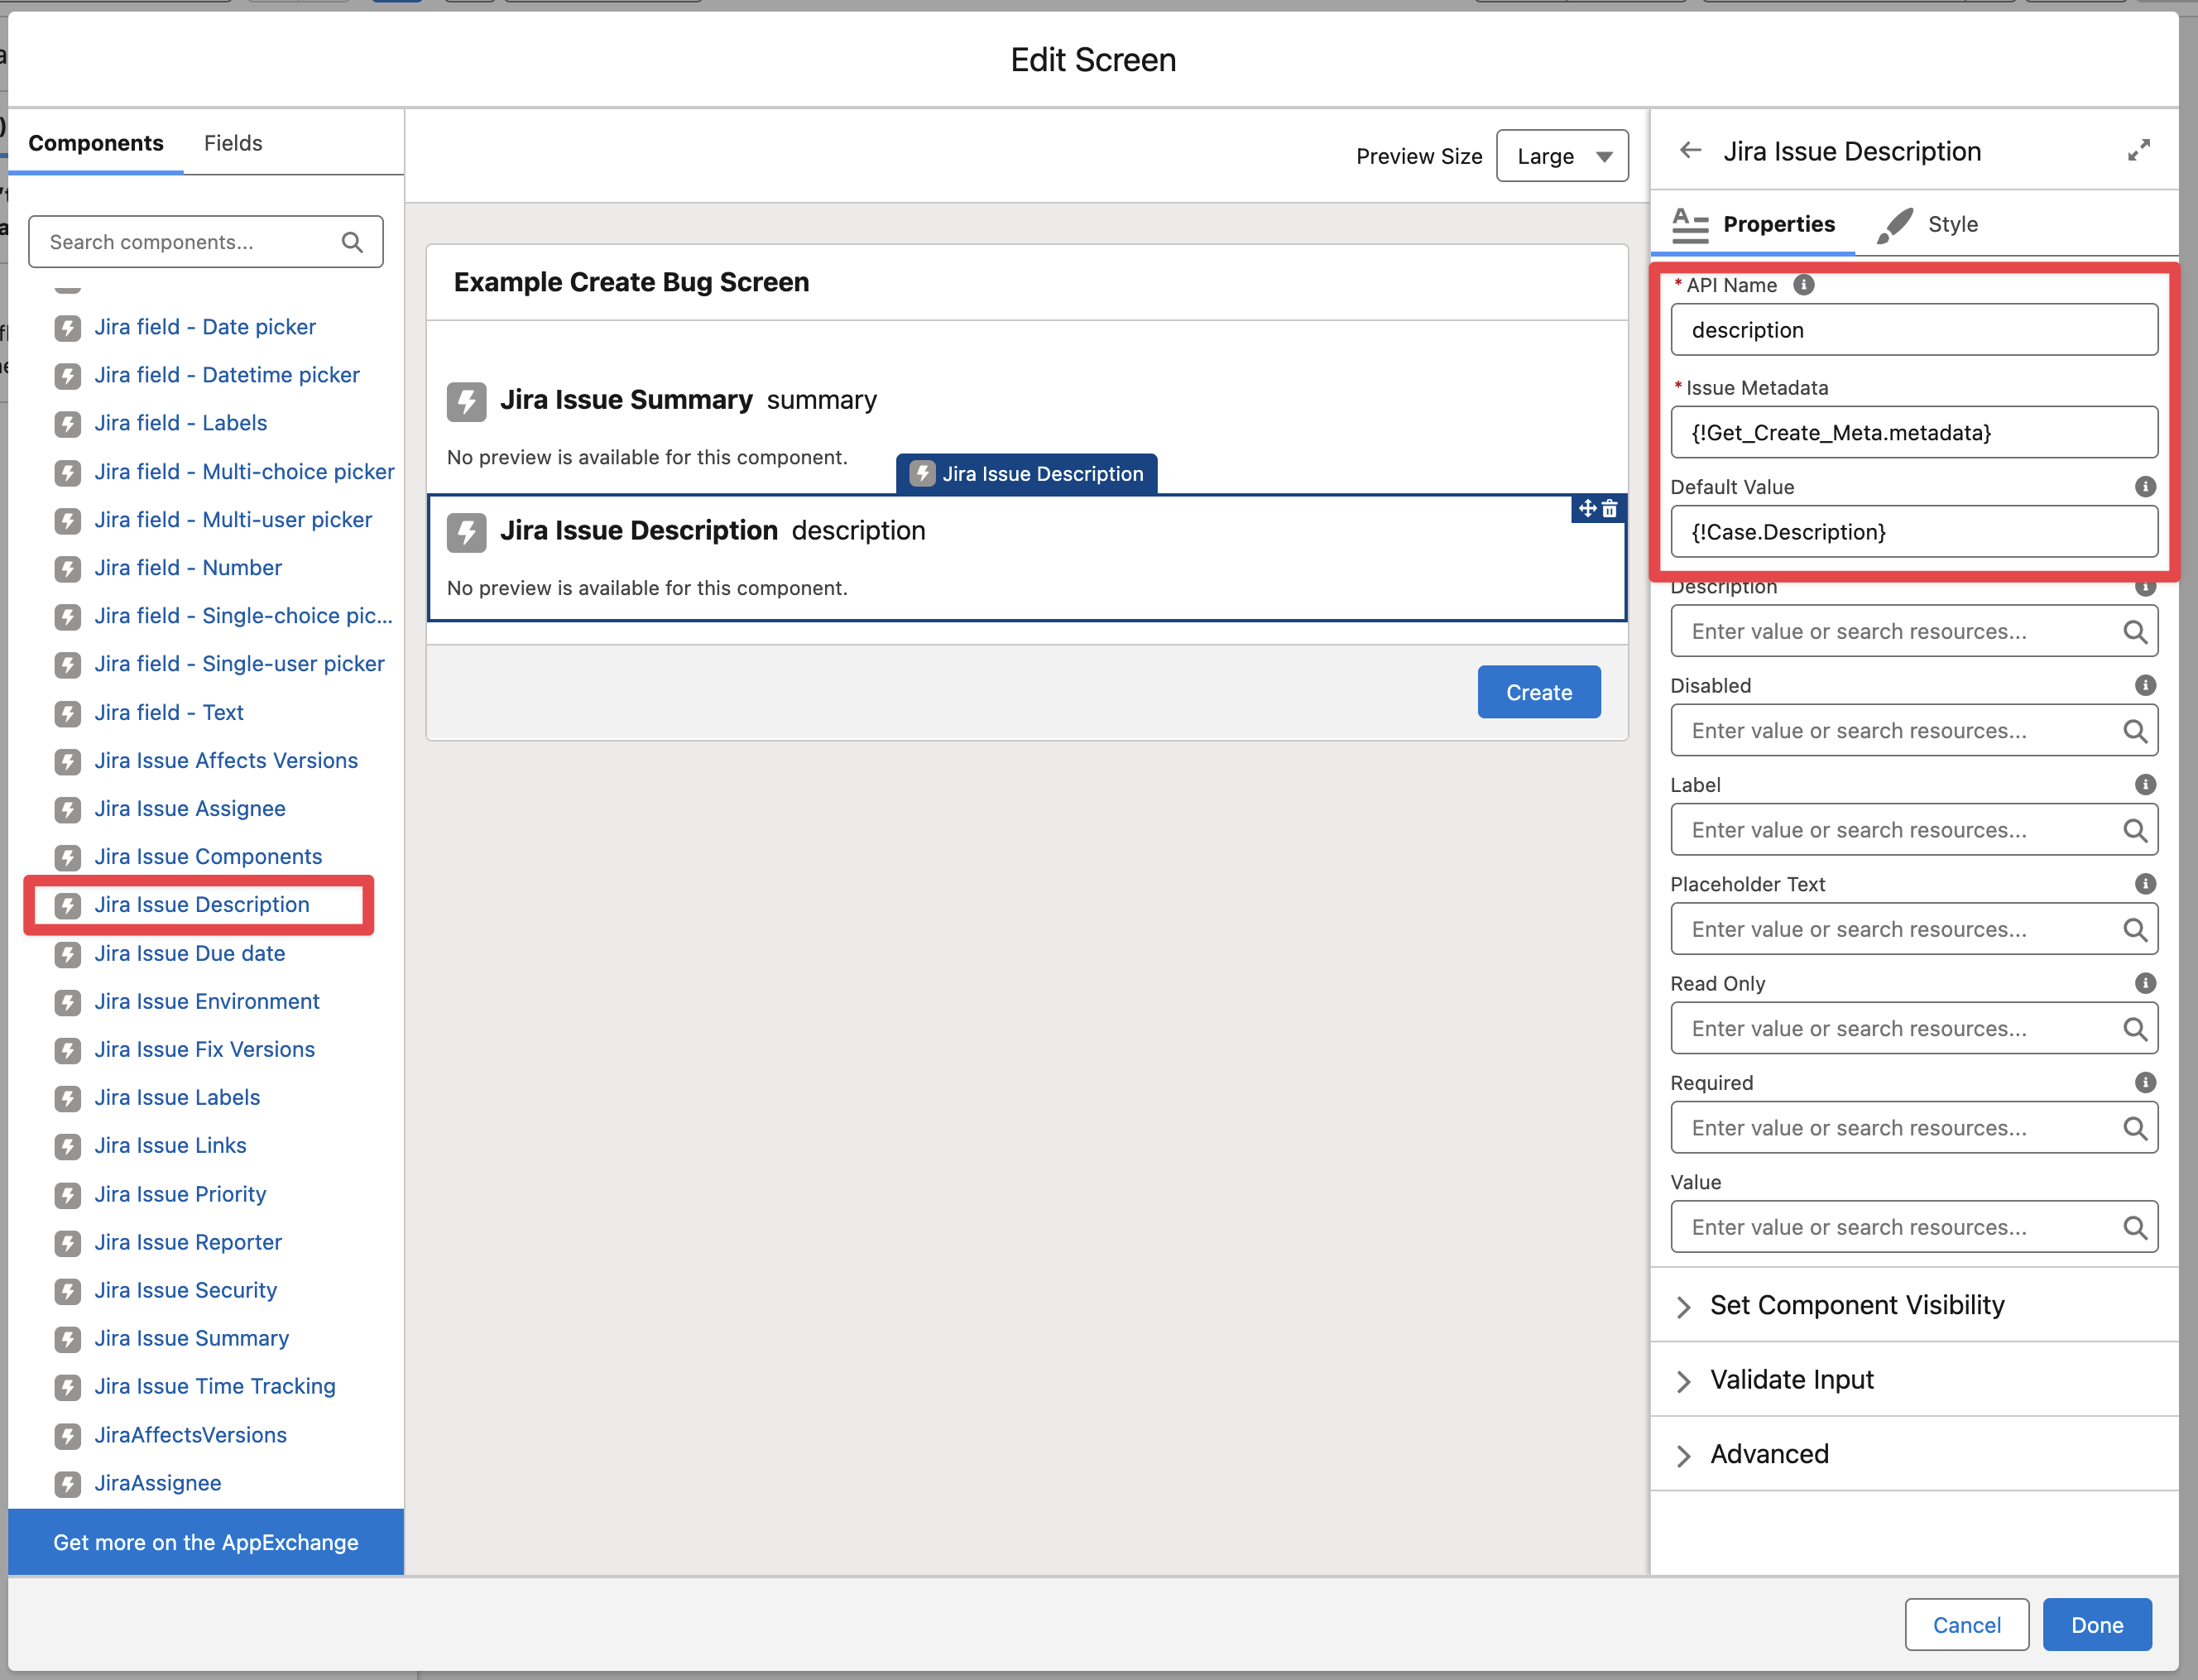
Drag and drop the “Jira Issue Summary“ component and pass the Create Issue Metadata retrieved before, also it is possible to map the default summary value to the Case Subject
Add the “Jira Issue Description“ component in the same way and click on Done to finish modifying the screen
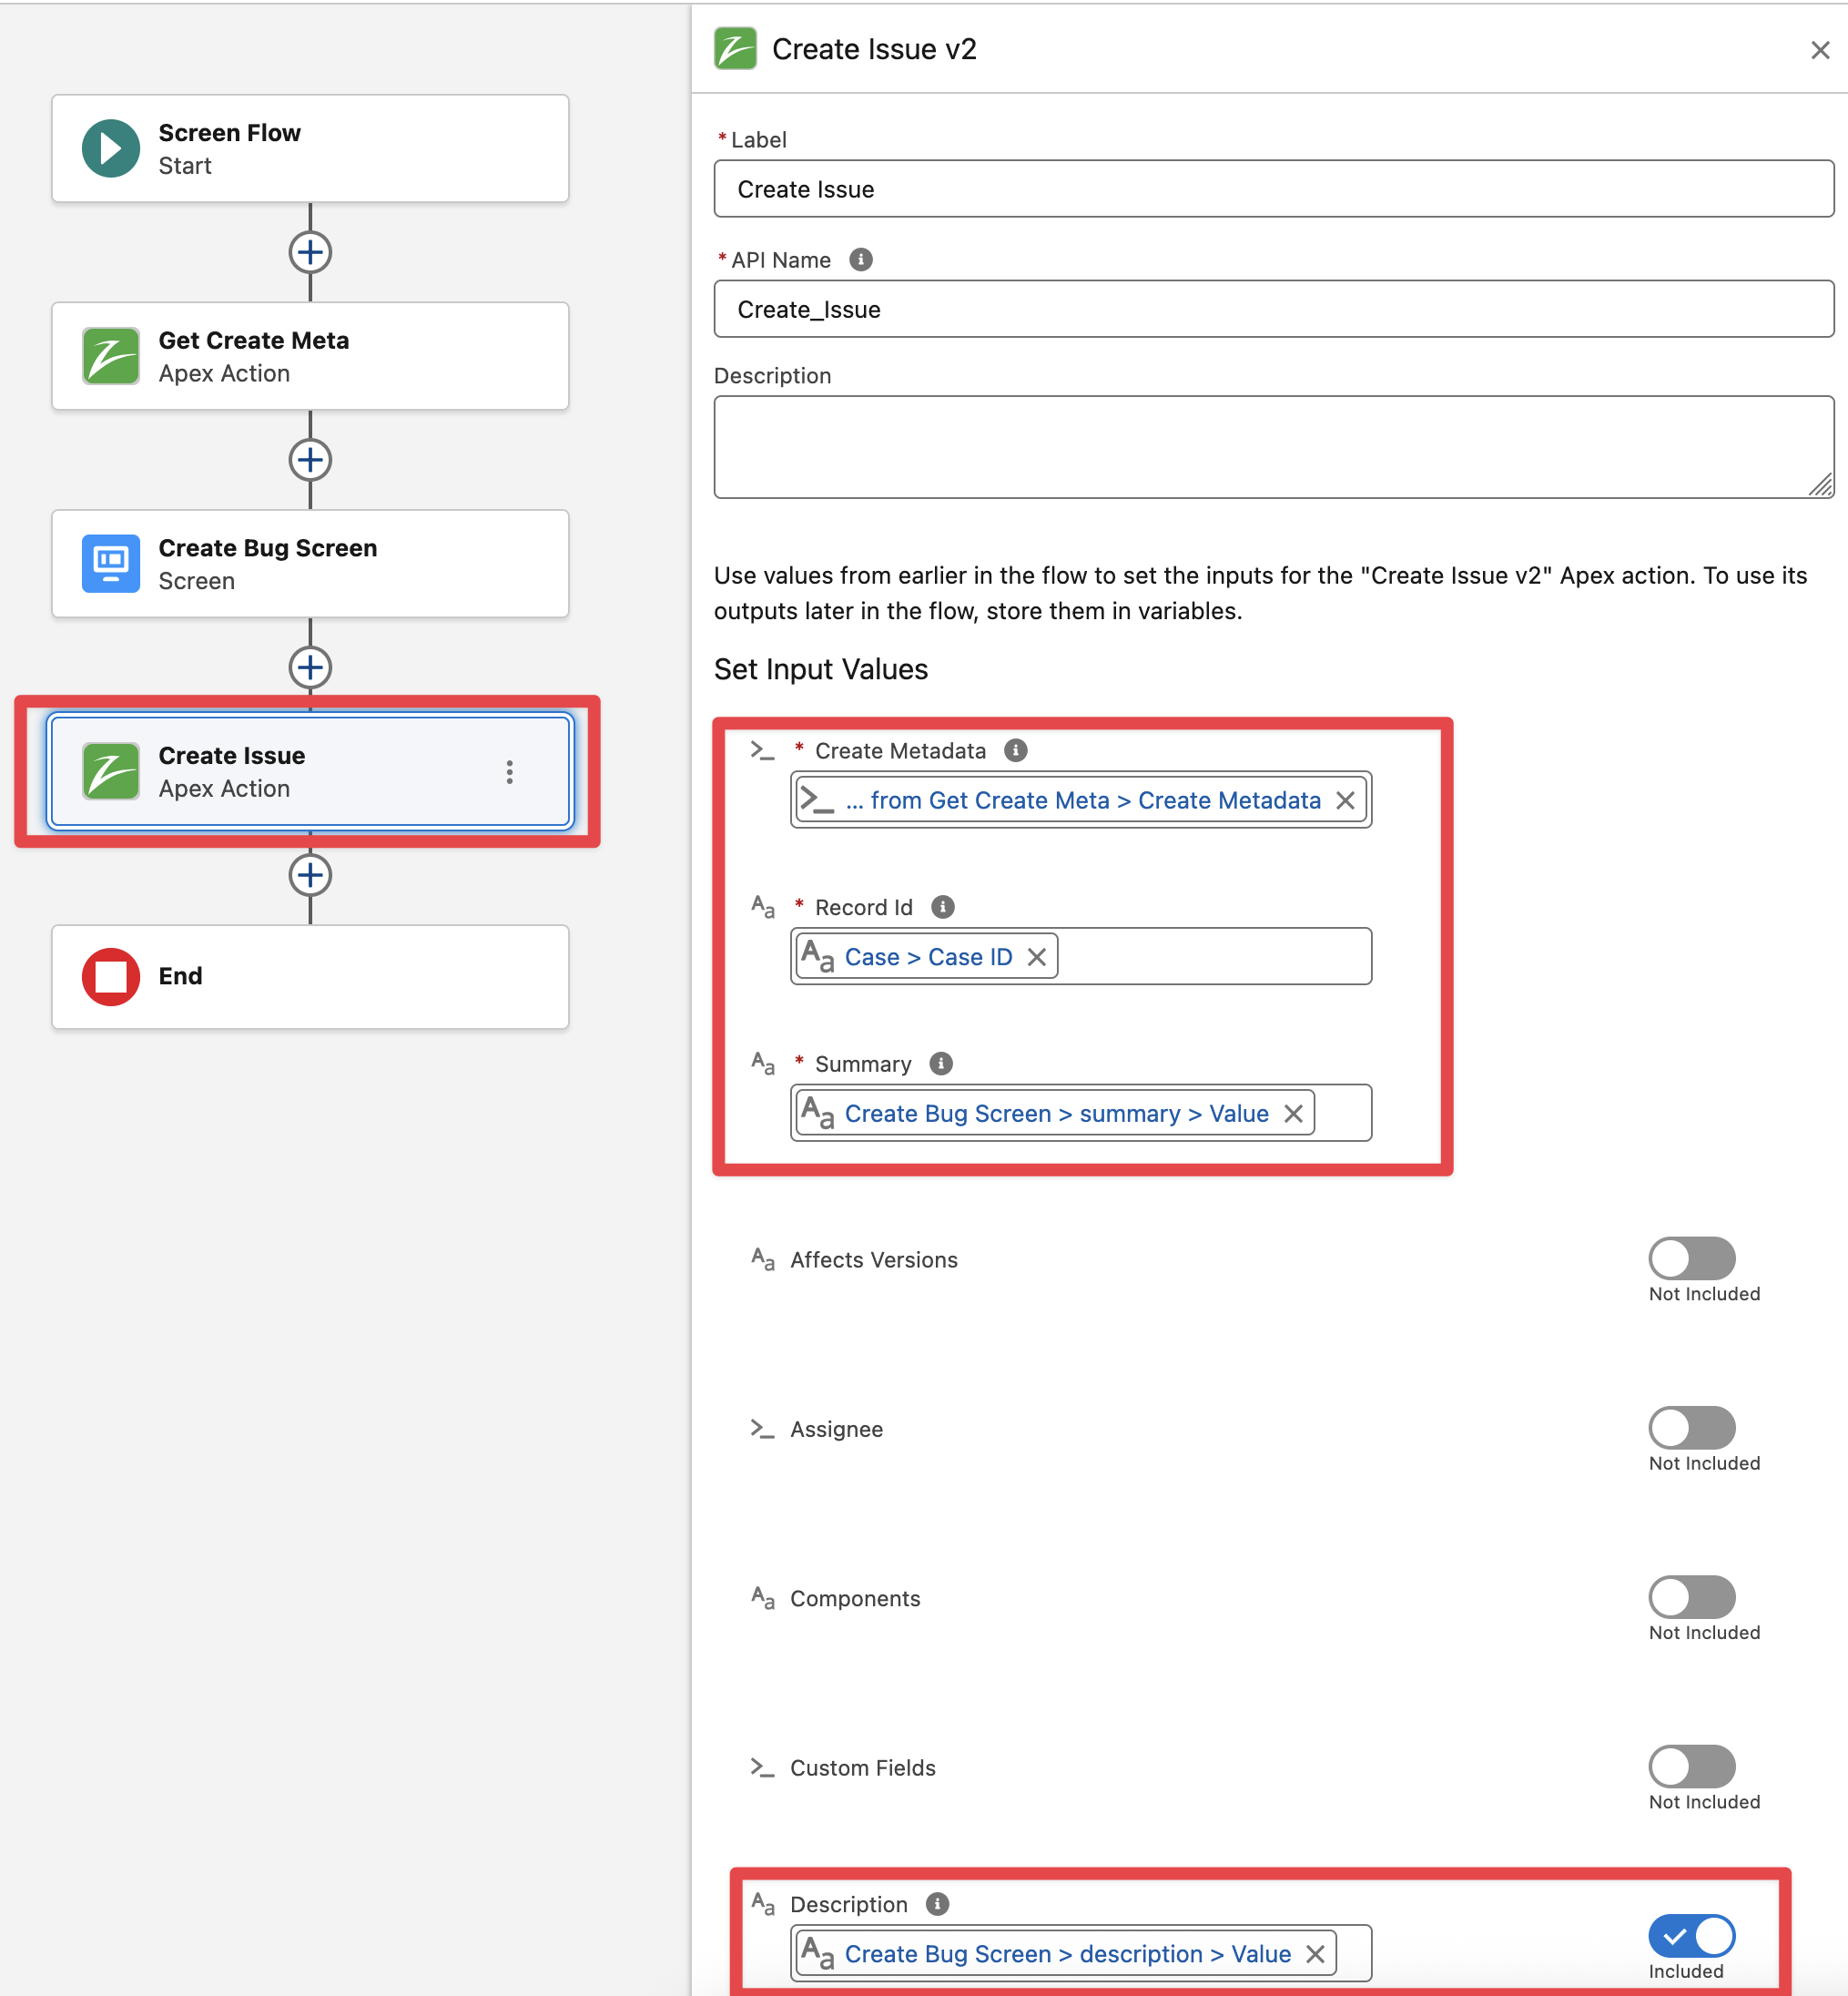
Add the “Create Issue v2“ flow action and pass the required Create Metadata (output from the Get Create Metadata action), Case Id (from Case record input variable) and Summary / Description fields (from the Screen components)
It is recommended to handle any error that may occur during Issue creation, for that we can validate the output of the “Create Issue v2” flow action with the addition of a “Decision” element

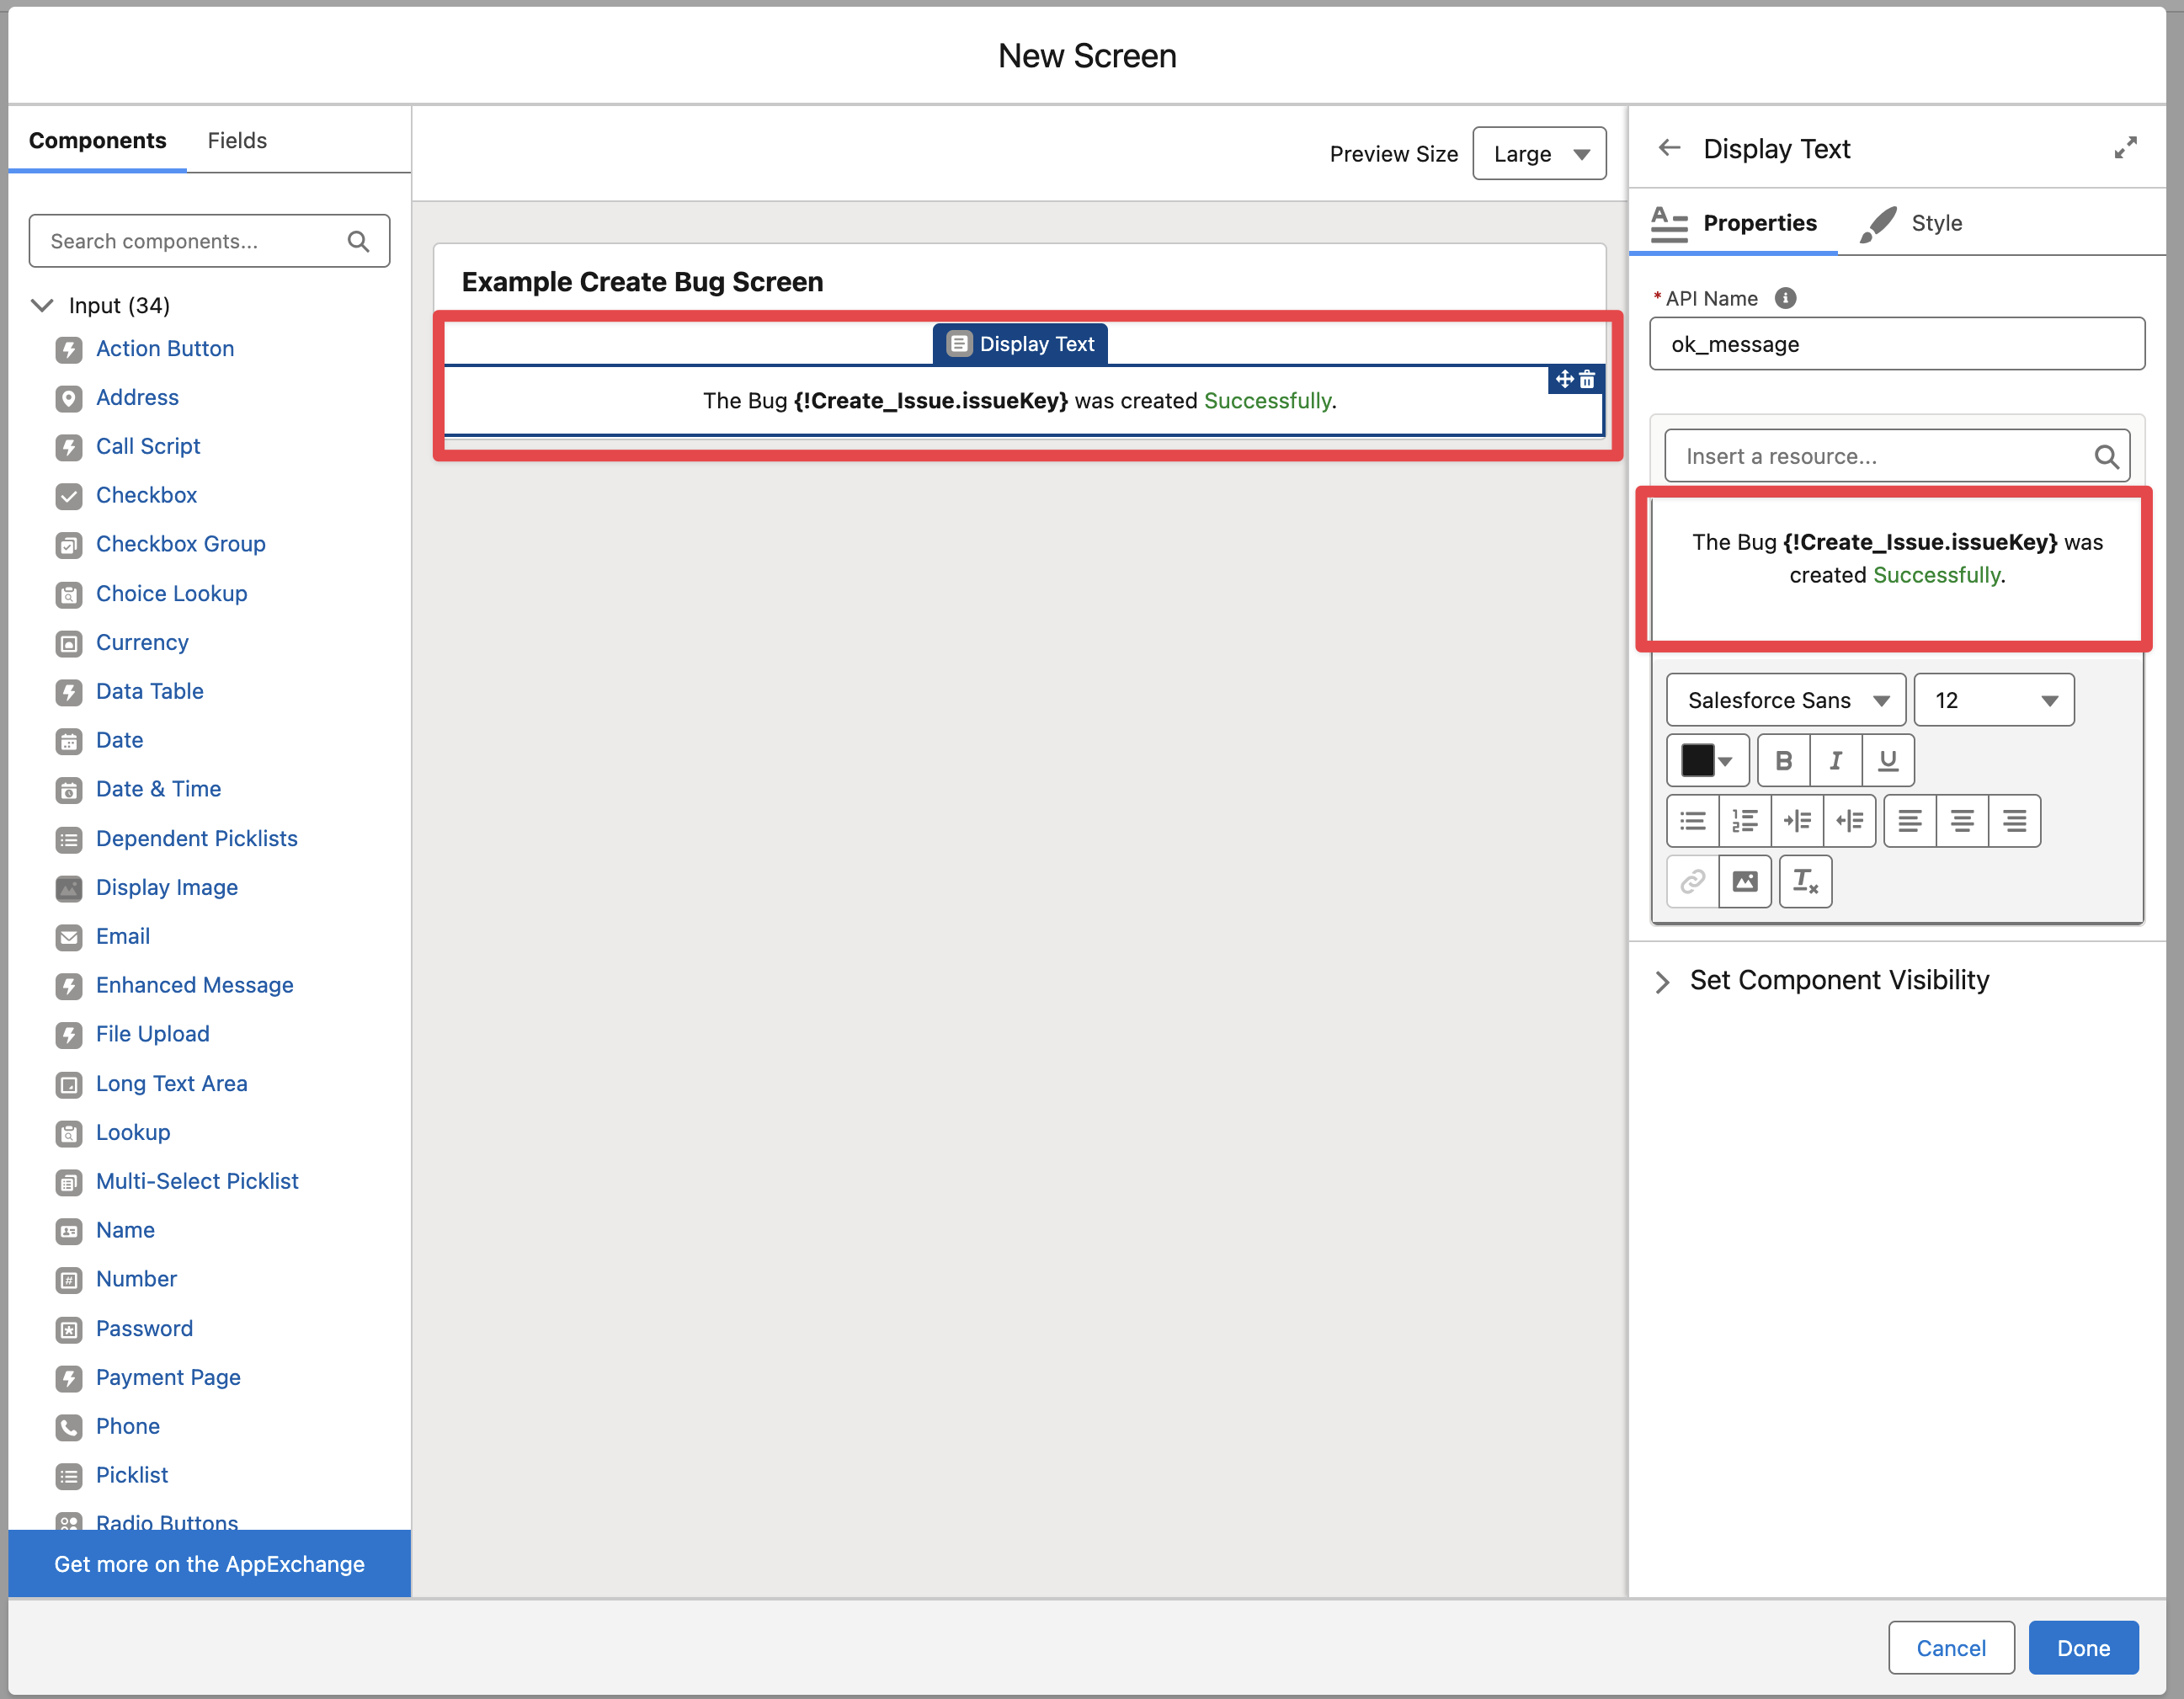
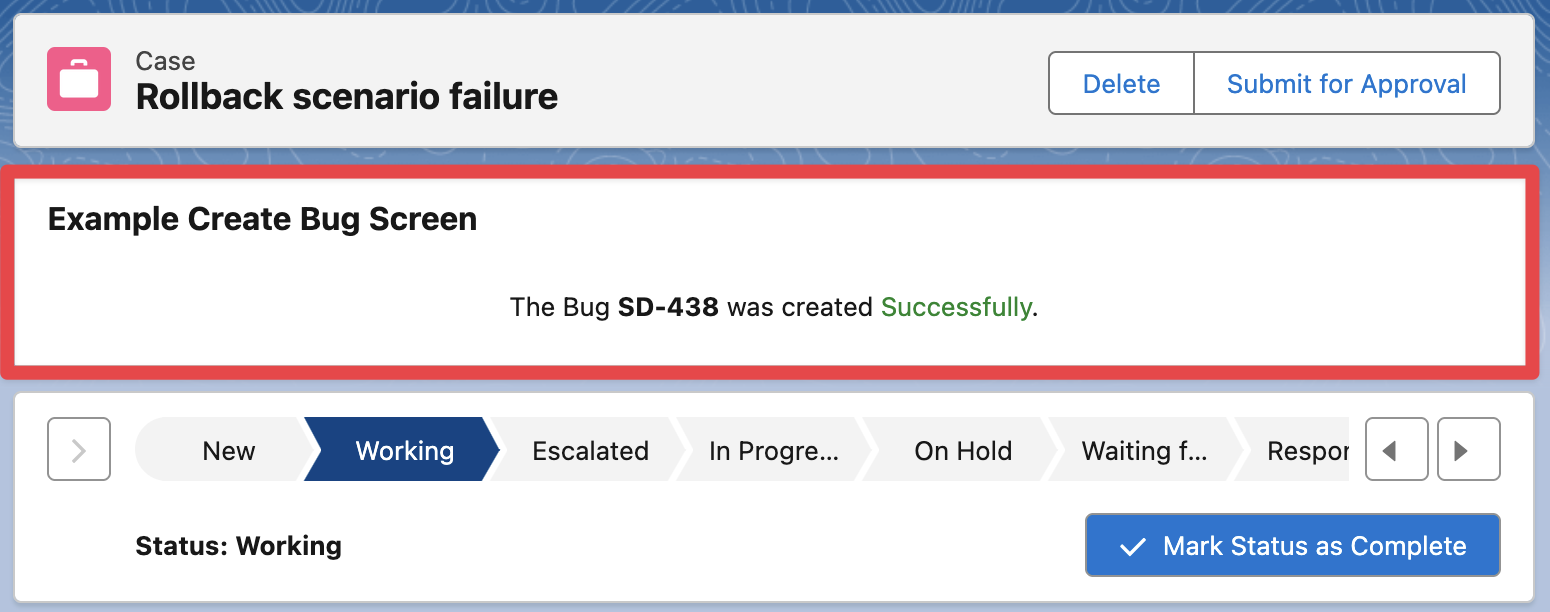
In the Yes outcome, add a new Screen element for a success message. In the screen add a Display Text component for the Success message
In the No outcome, add a new Screen element, then add a Display Text component for the Error message

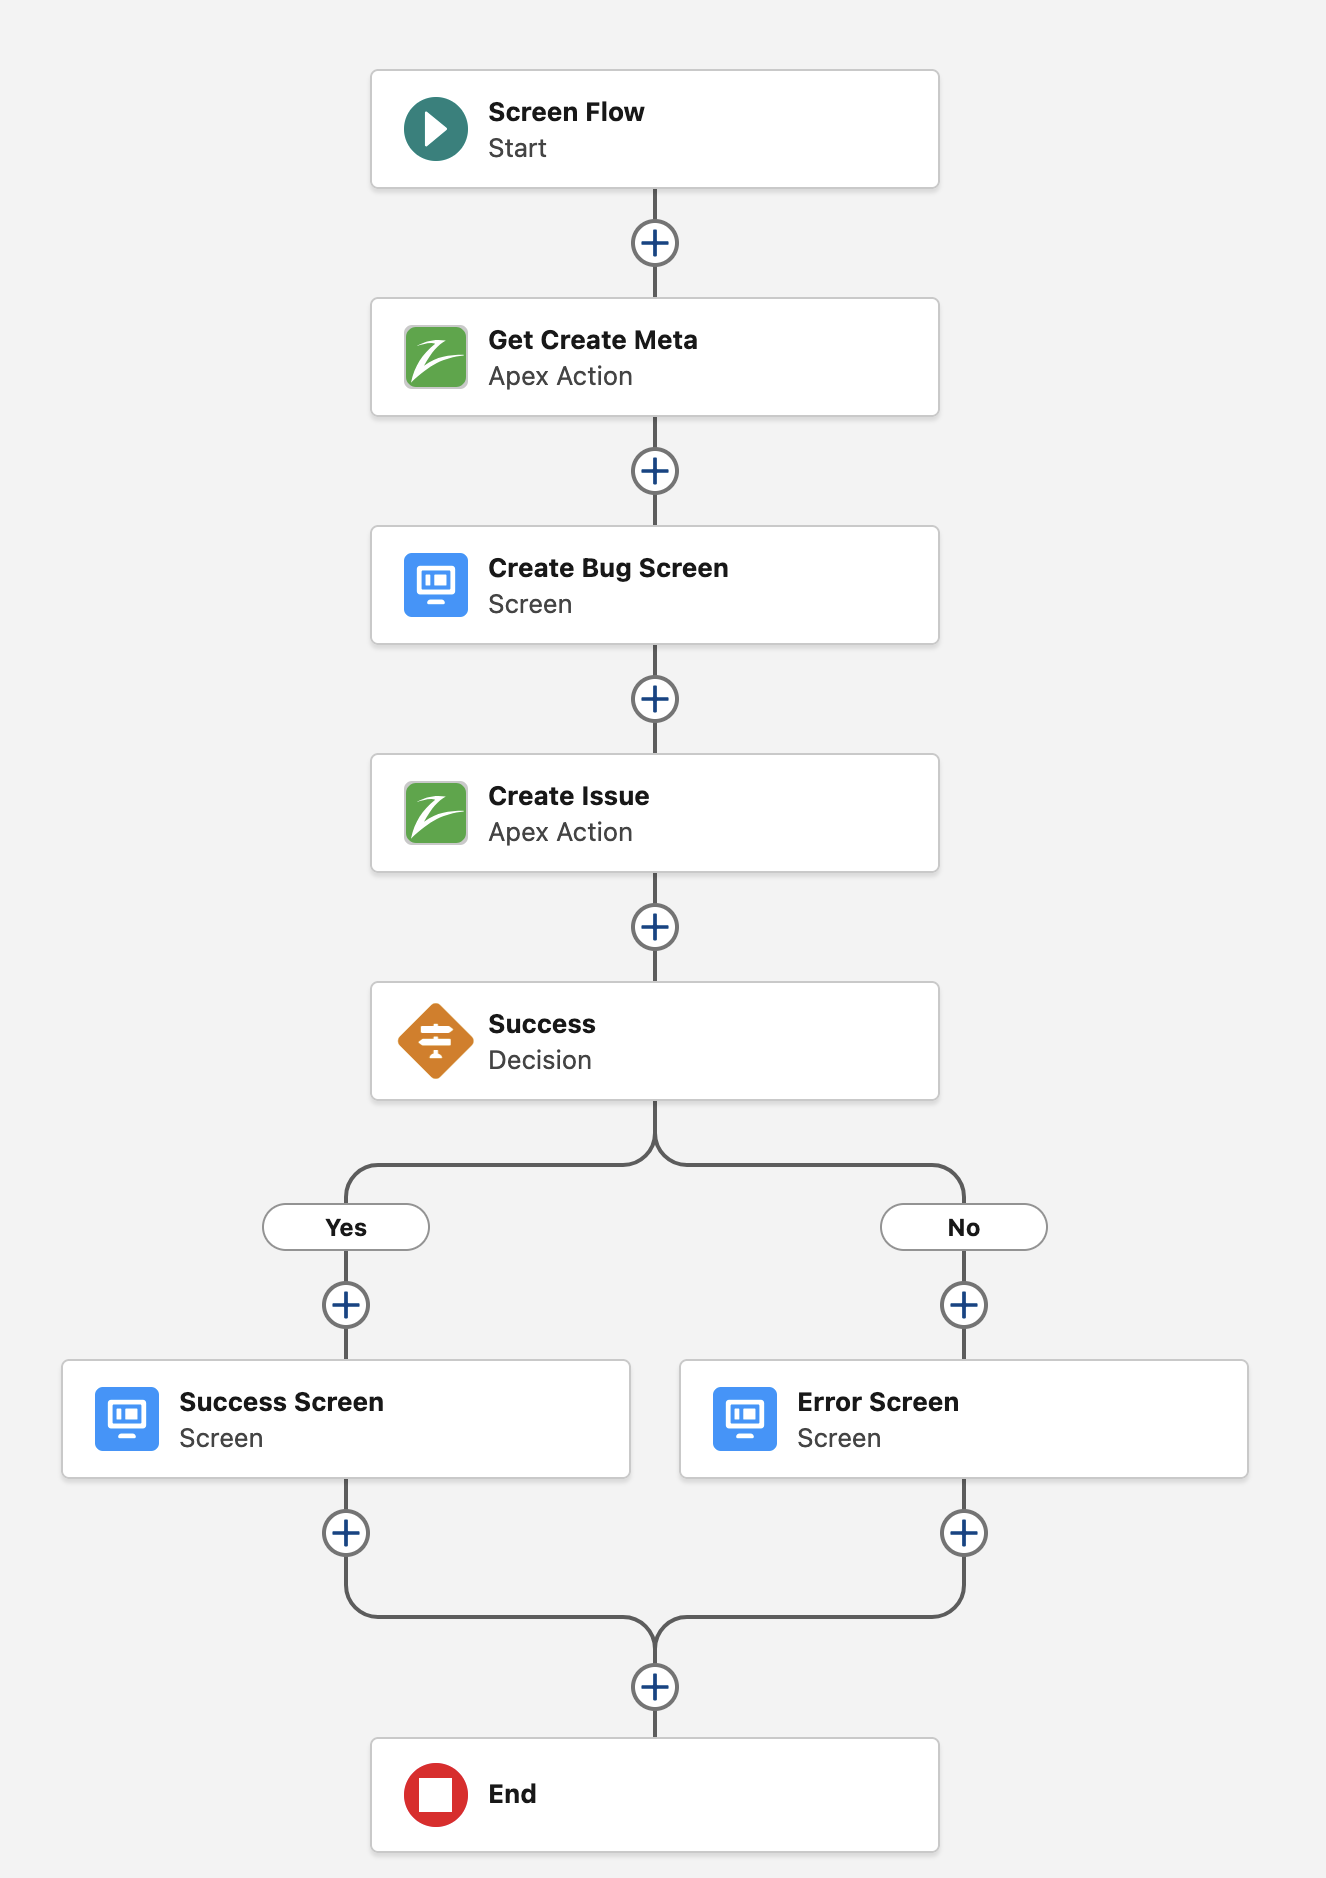
The Flow structure should look like this
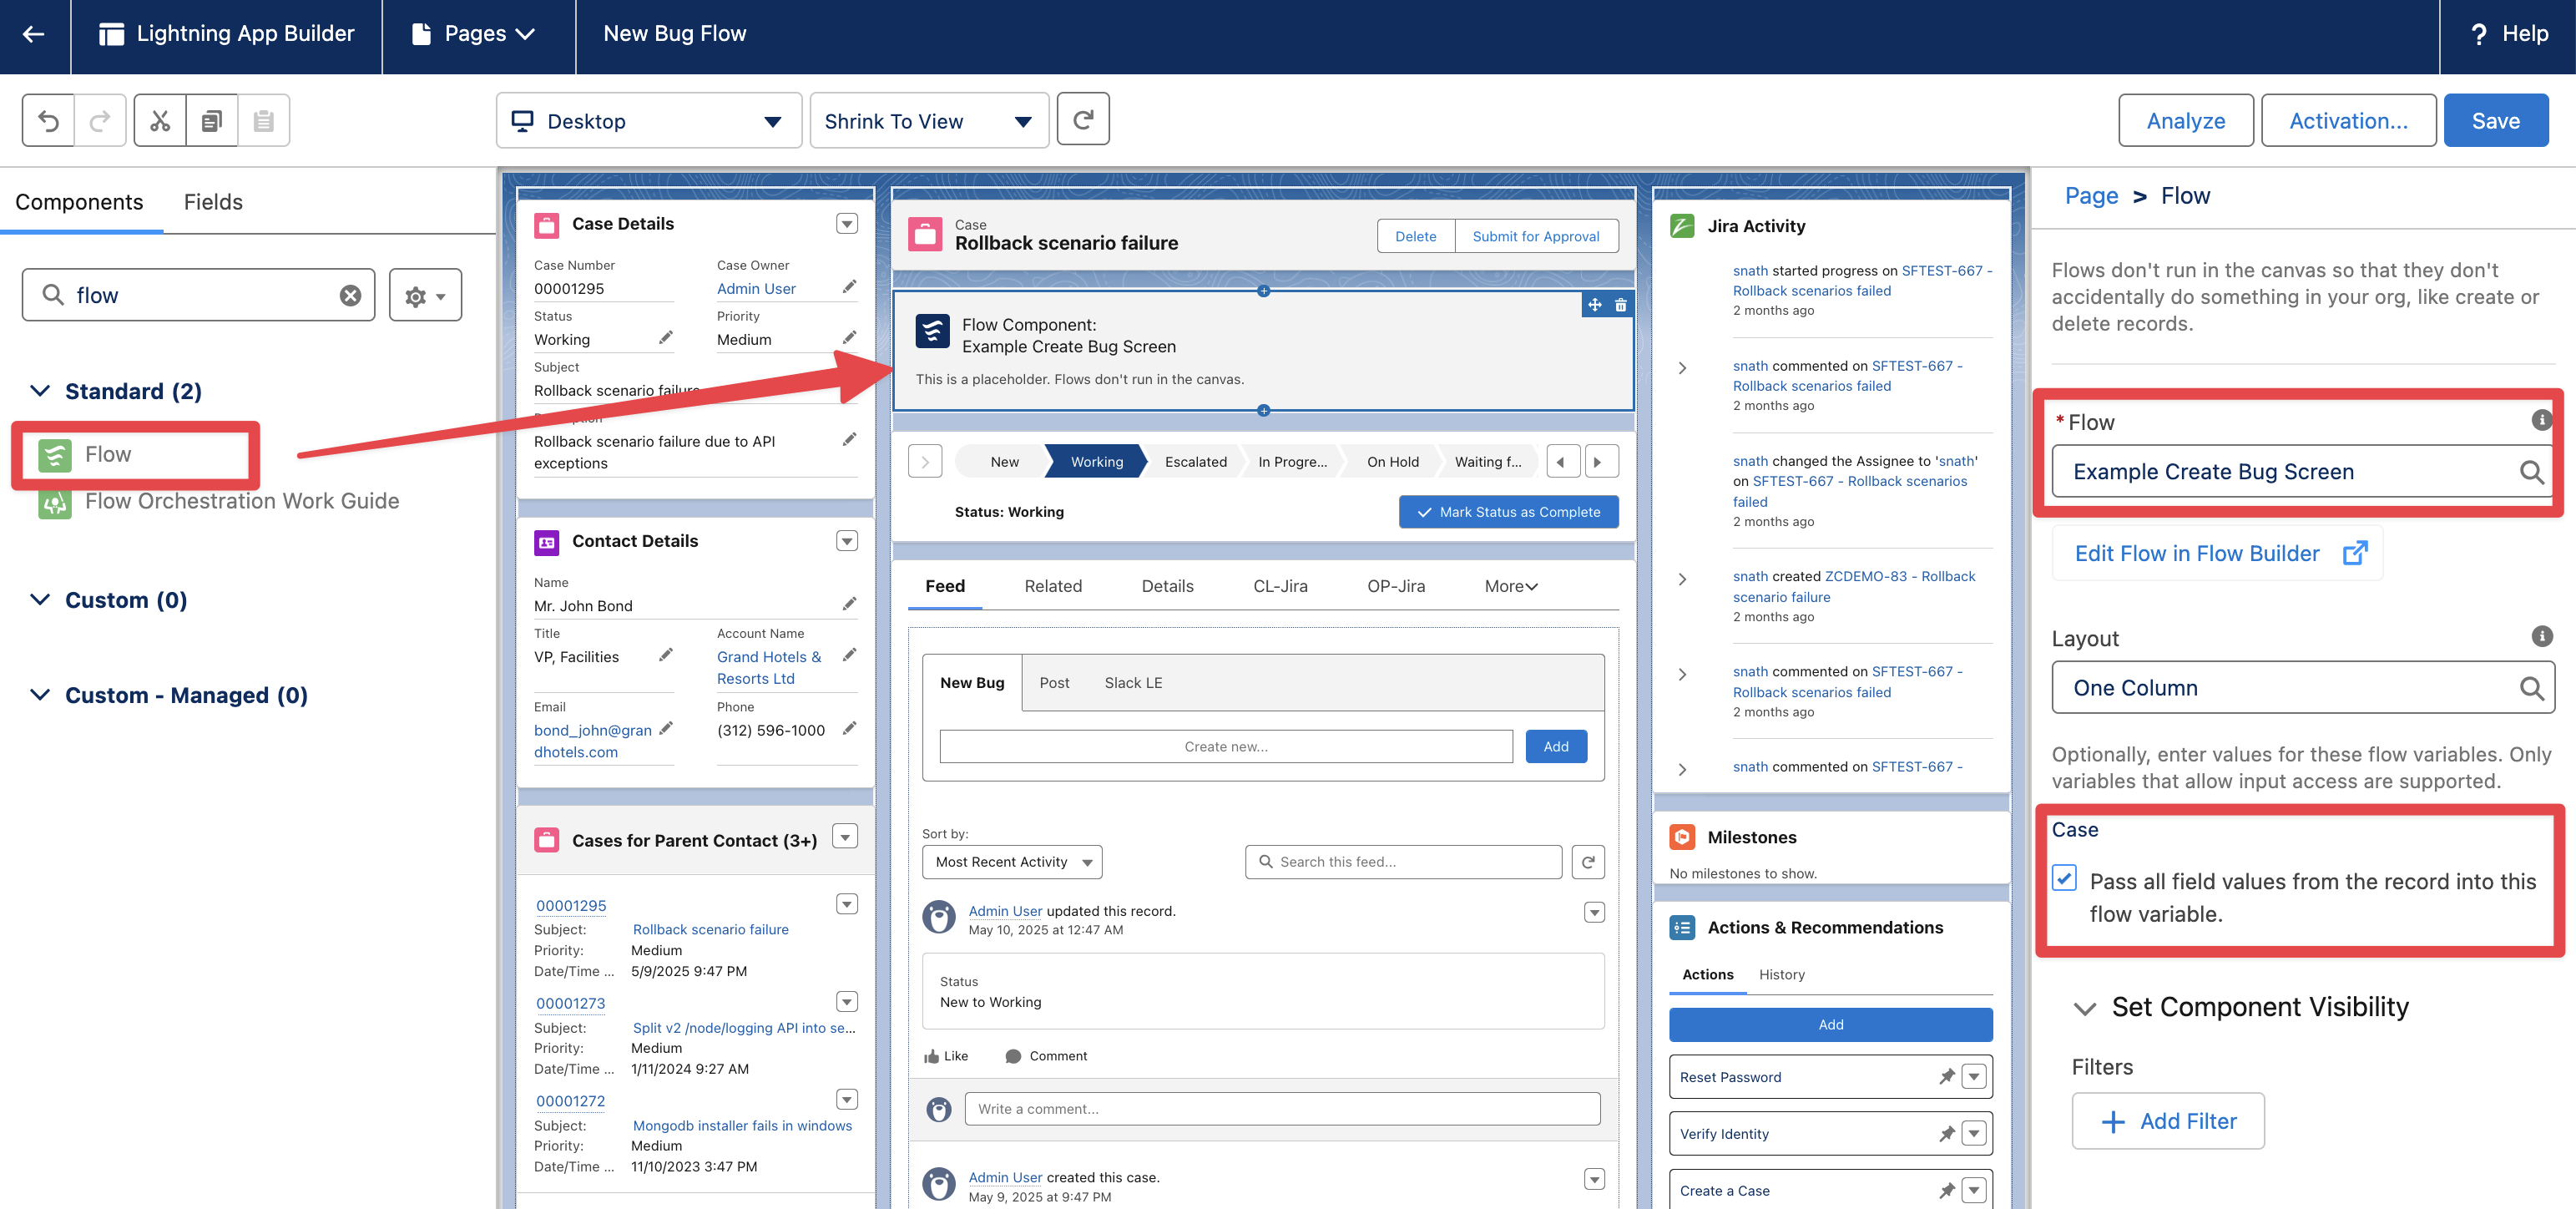
Finally Save and Activate the flow. Go to a Case and Edit Page to add the Flow component (make sure to pass the Case record fields into the flow variable)
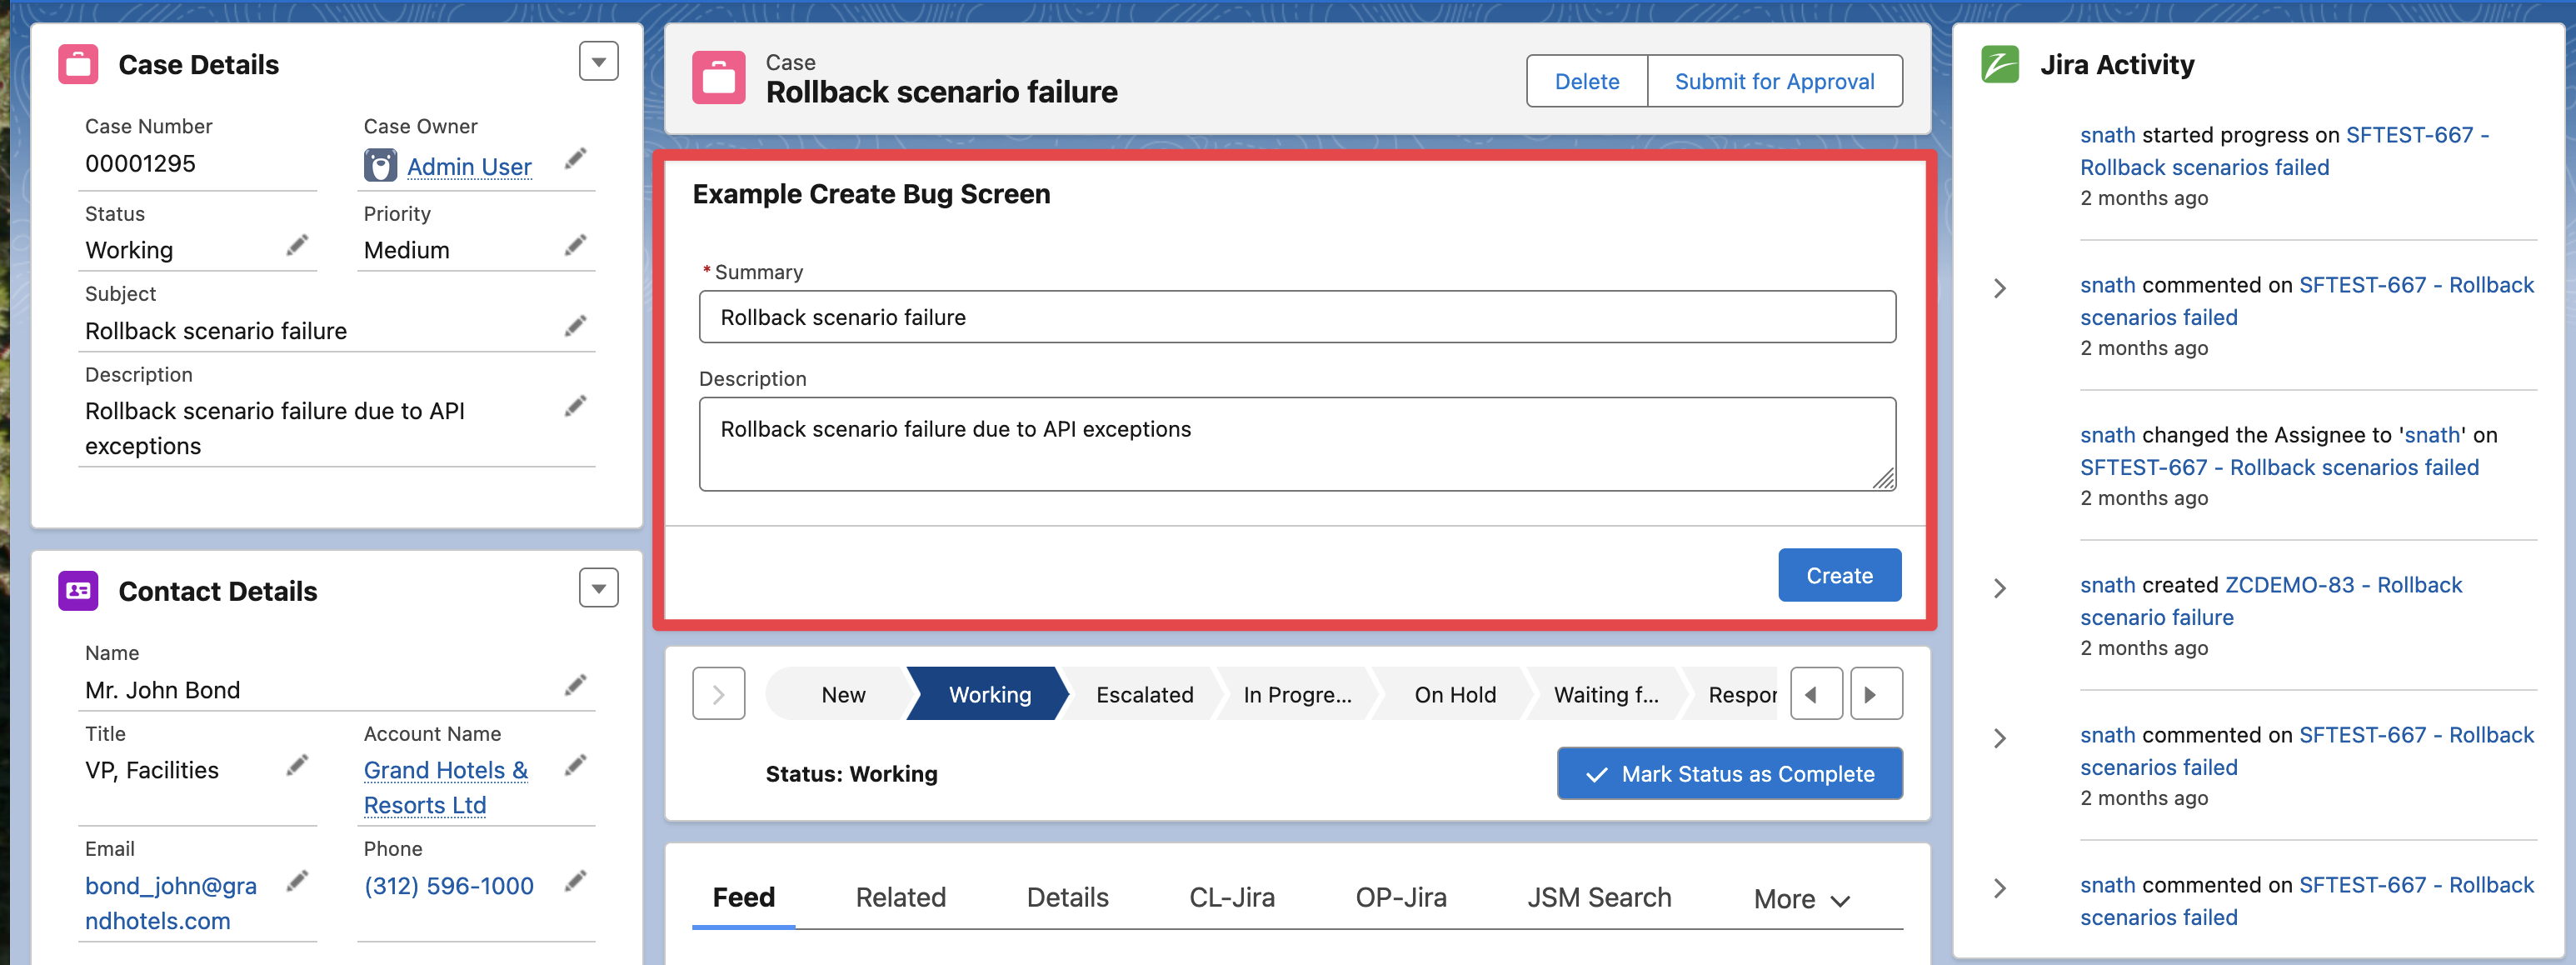
The Flow will look like this
Create Bug Screen with Custom Fields
The following example includes a Jira text custom field to the previous example.
Create a new Flow as described in the previous example “Simple Create Bug Flow Screen“
Assuming there is a custom text field defined in Jira (Product Code in our example) and associated with the Bug Issue type (see the “Settings Custom Fields Data“ section in zAgileConnect Flow Action - Create Issue v2 | Setting Custom Fields Data for more information on how to know the custom field Id for any Jira field).
Edit the “Create Bug Screen“ element in the Flow and add a “Jira field - Text“ component, pass the output of the Get Create Metadata (as in any other field component) and set the Jira custom field Id for Product Code.

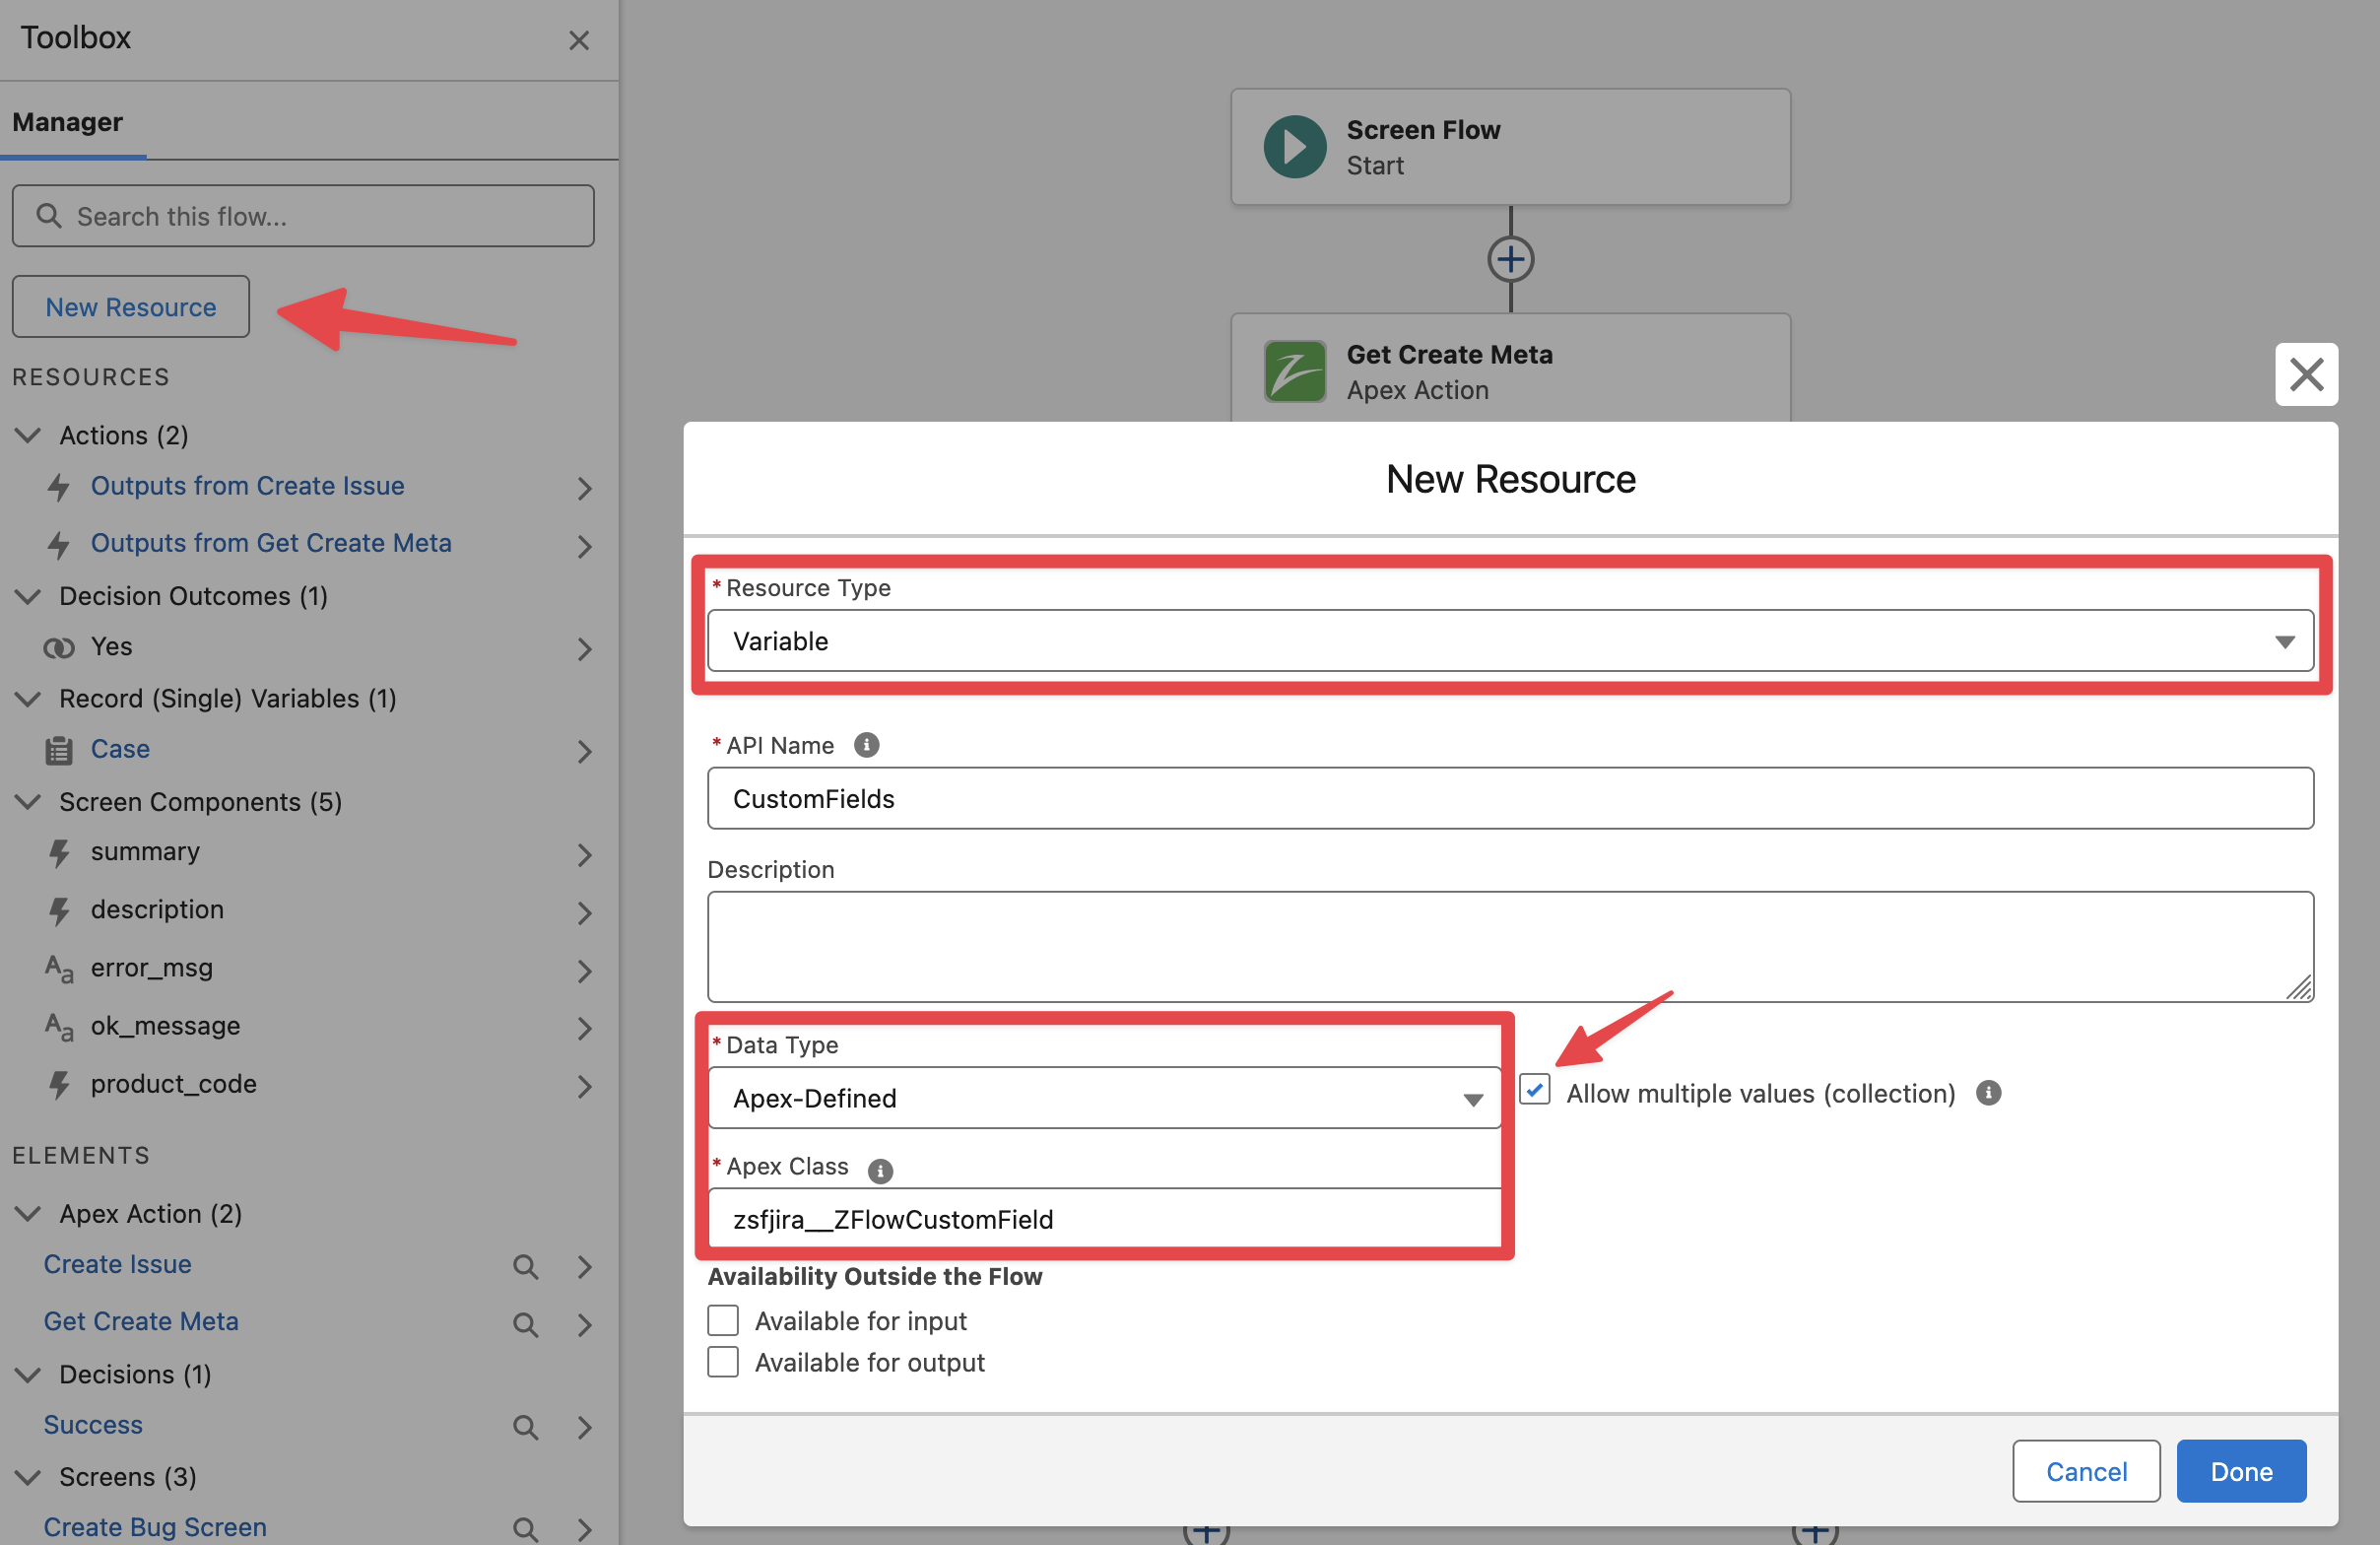
Add a New Resource Variable (collection) for the “ZFlowCustomField“ Apex-Defined type, this collection is always needed to group all custom fields that will be passed to the “Create Issue v2” action
Before the “Create Issue” action, add an Assignment element and add the output of the Jira field - Text > Value > field to the CustomFields variable collection
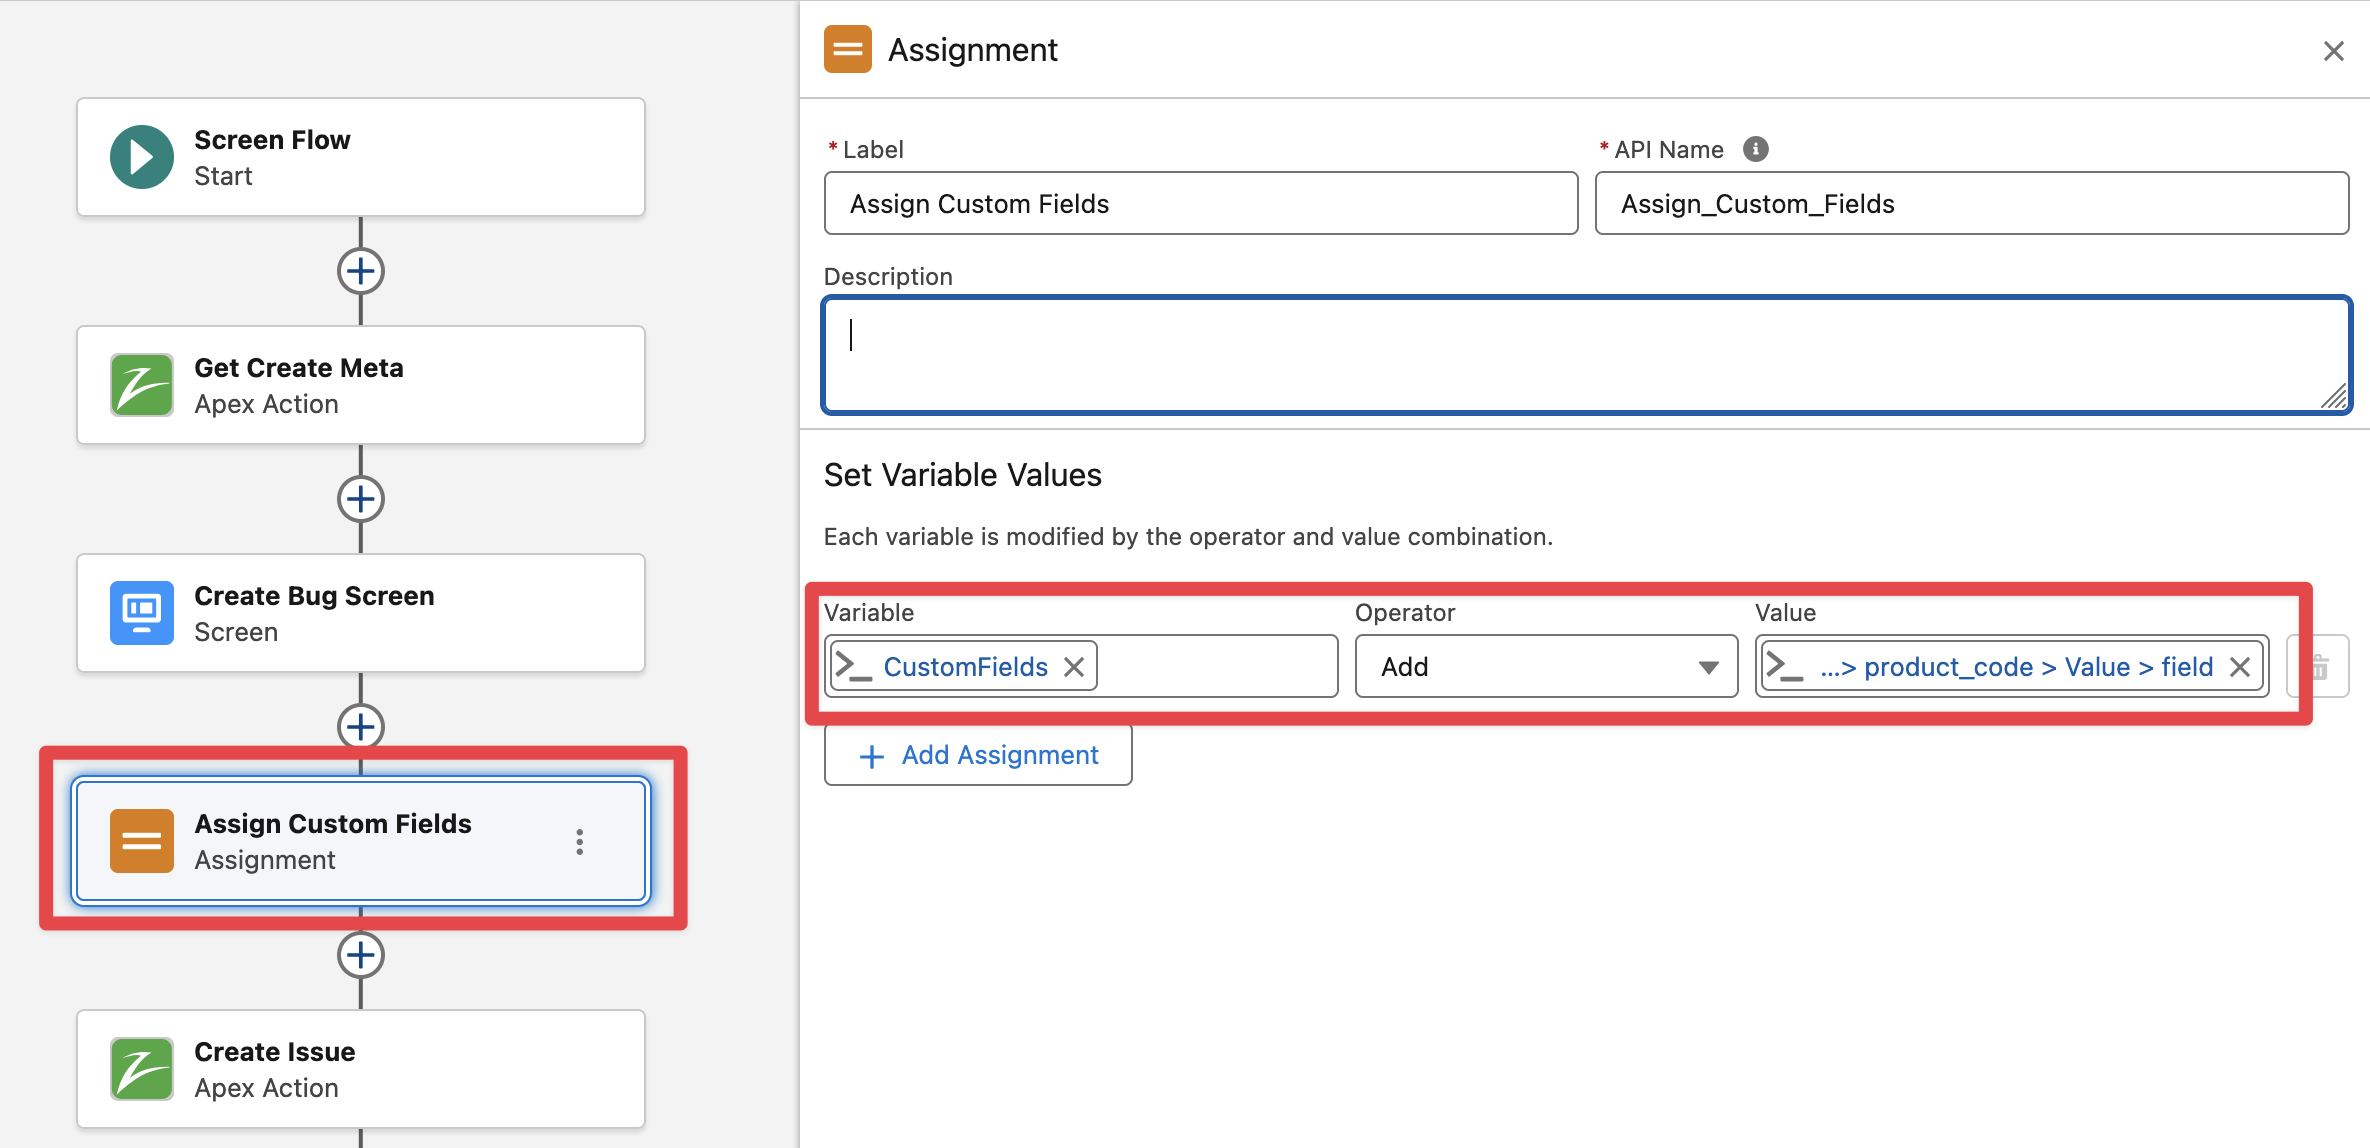
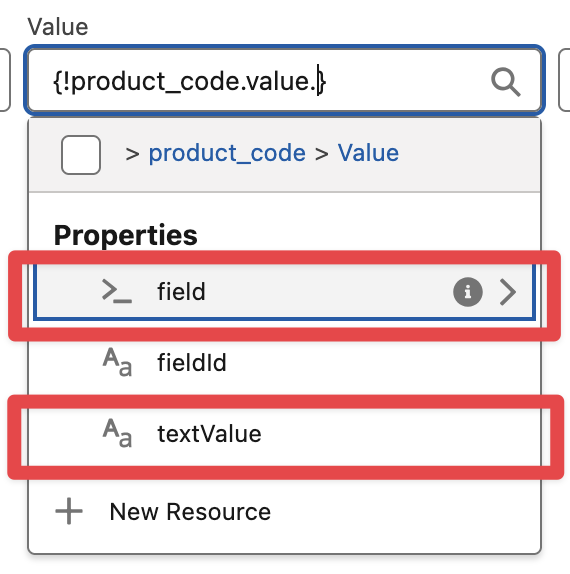
Note that all Jira custom fields flow screen types have an attribute called “field“ which is a reference to itself (as generic Custom Field type), this is the attribute that must be added to the CustomFields variable collection. The actual value of the field is available in the *value attribute (for example textValue for Jira field - Text type).
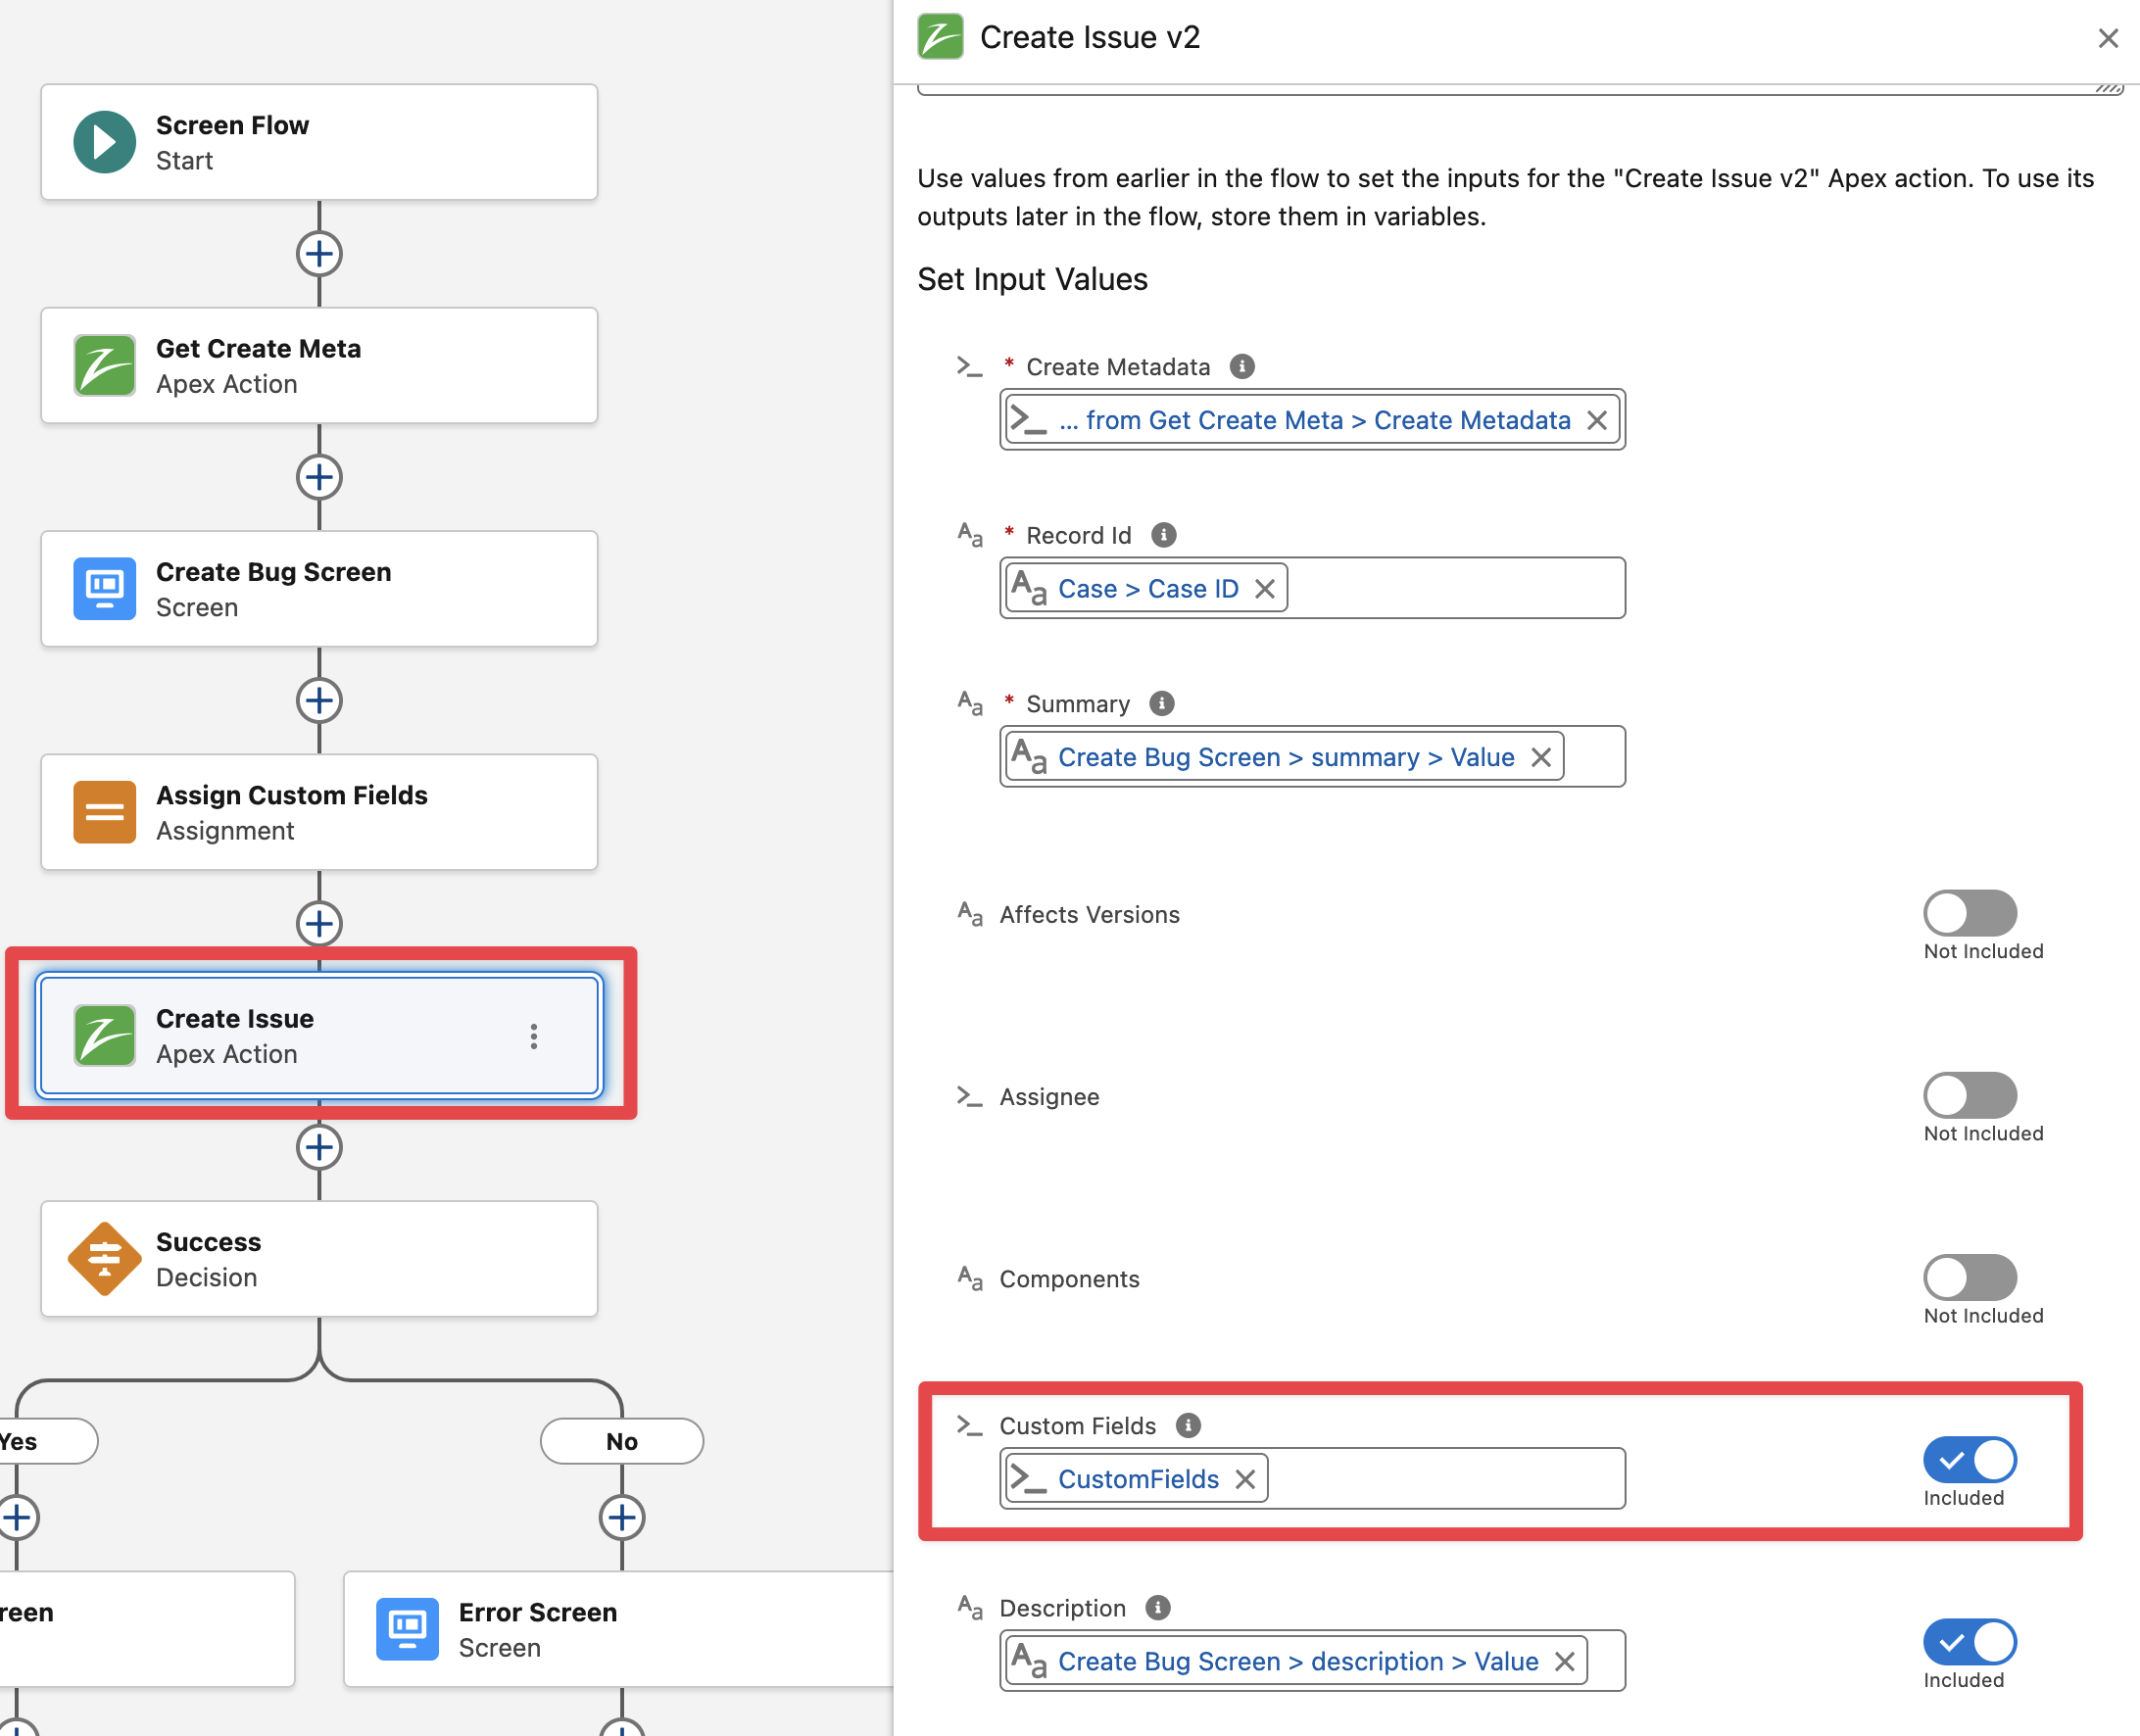
Edit the “Create Issue v2“ action and pass the “CustomFields” collection
Finally Save and Activate the flow. It is recommended to Debug the flow to confirm the custom field is present in the Create Issue Metadata returned from Jira and that it has the correct custom field Id (note the Product Code field is present in the JSON metadata and its id is customfield_10200)
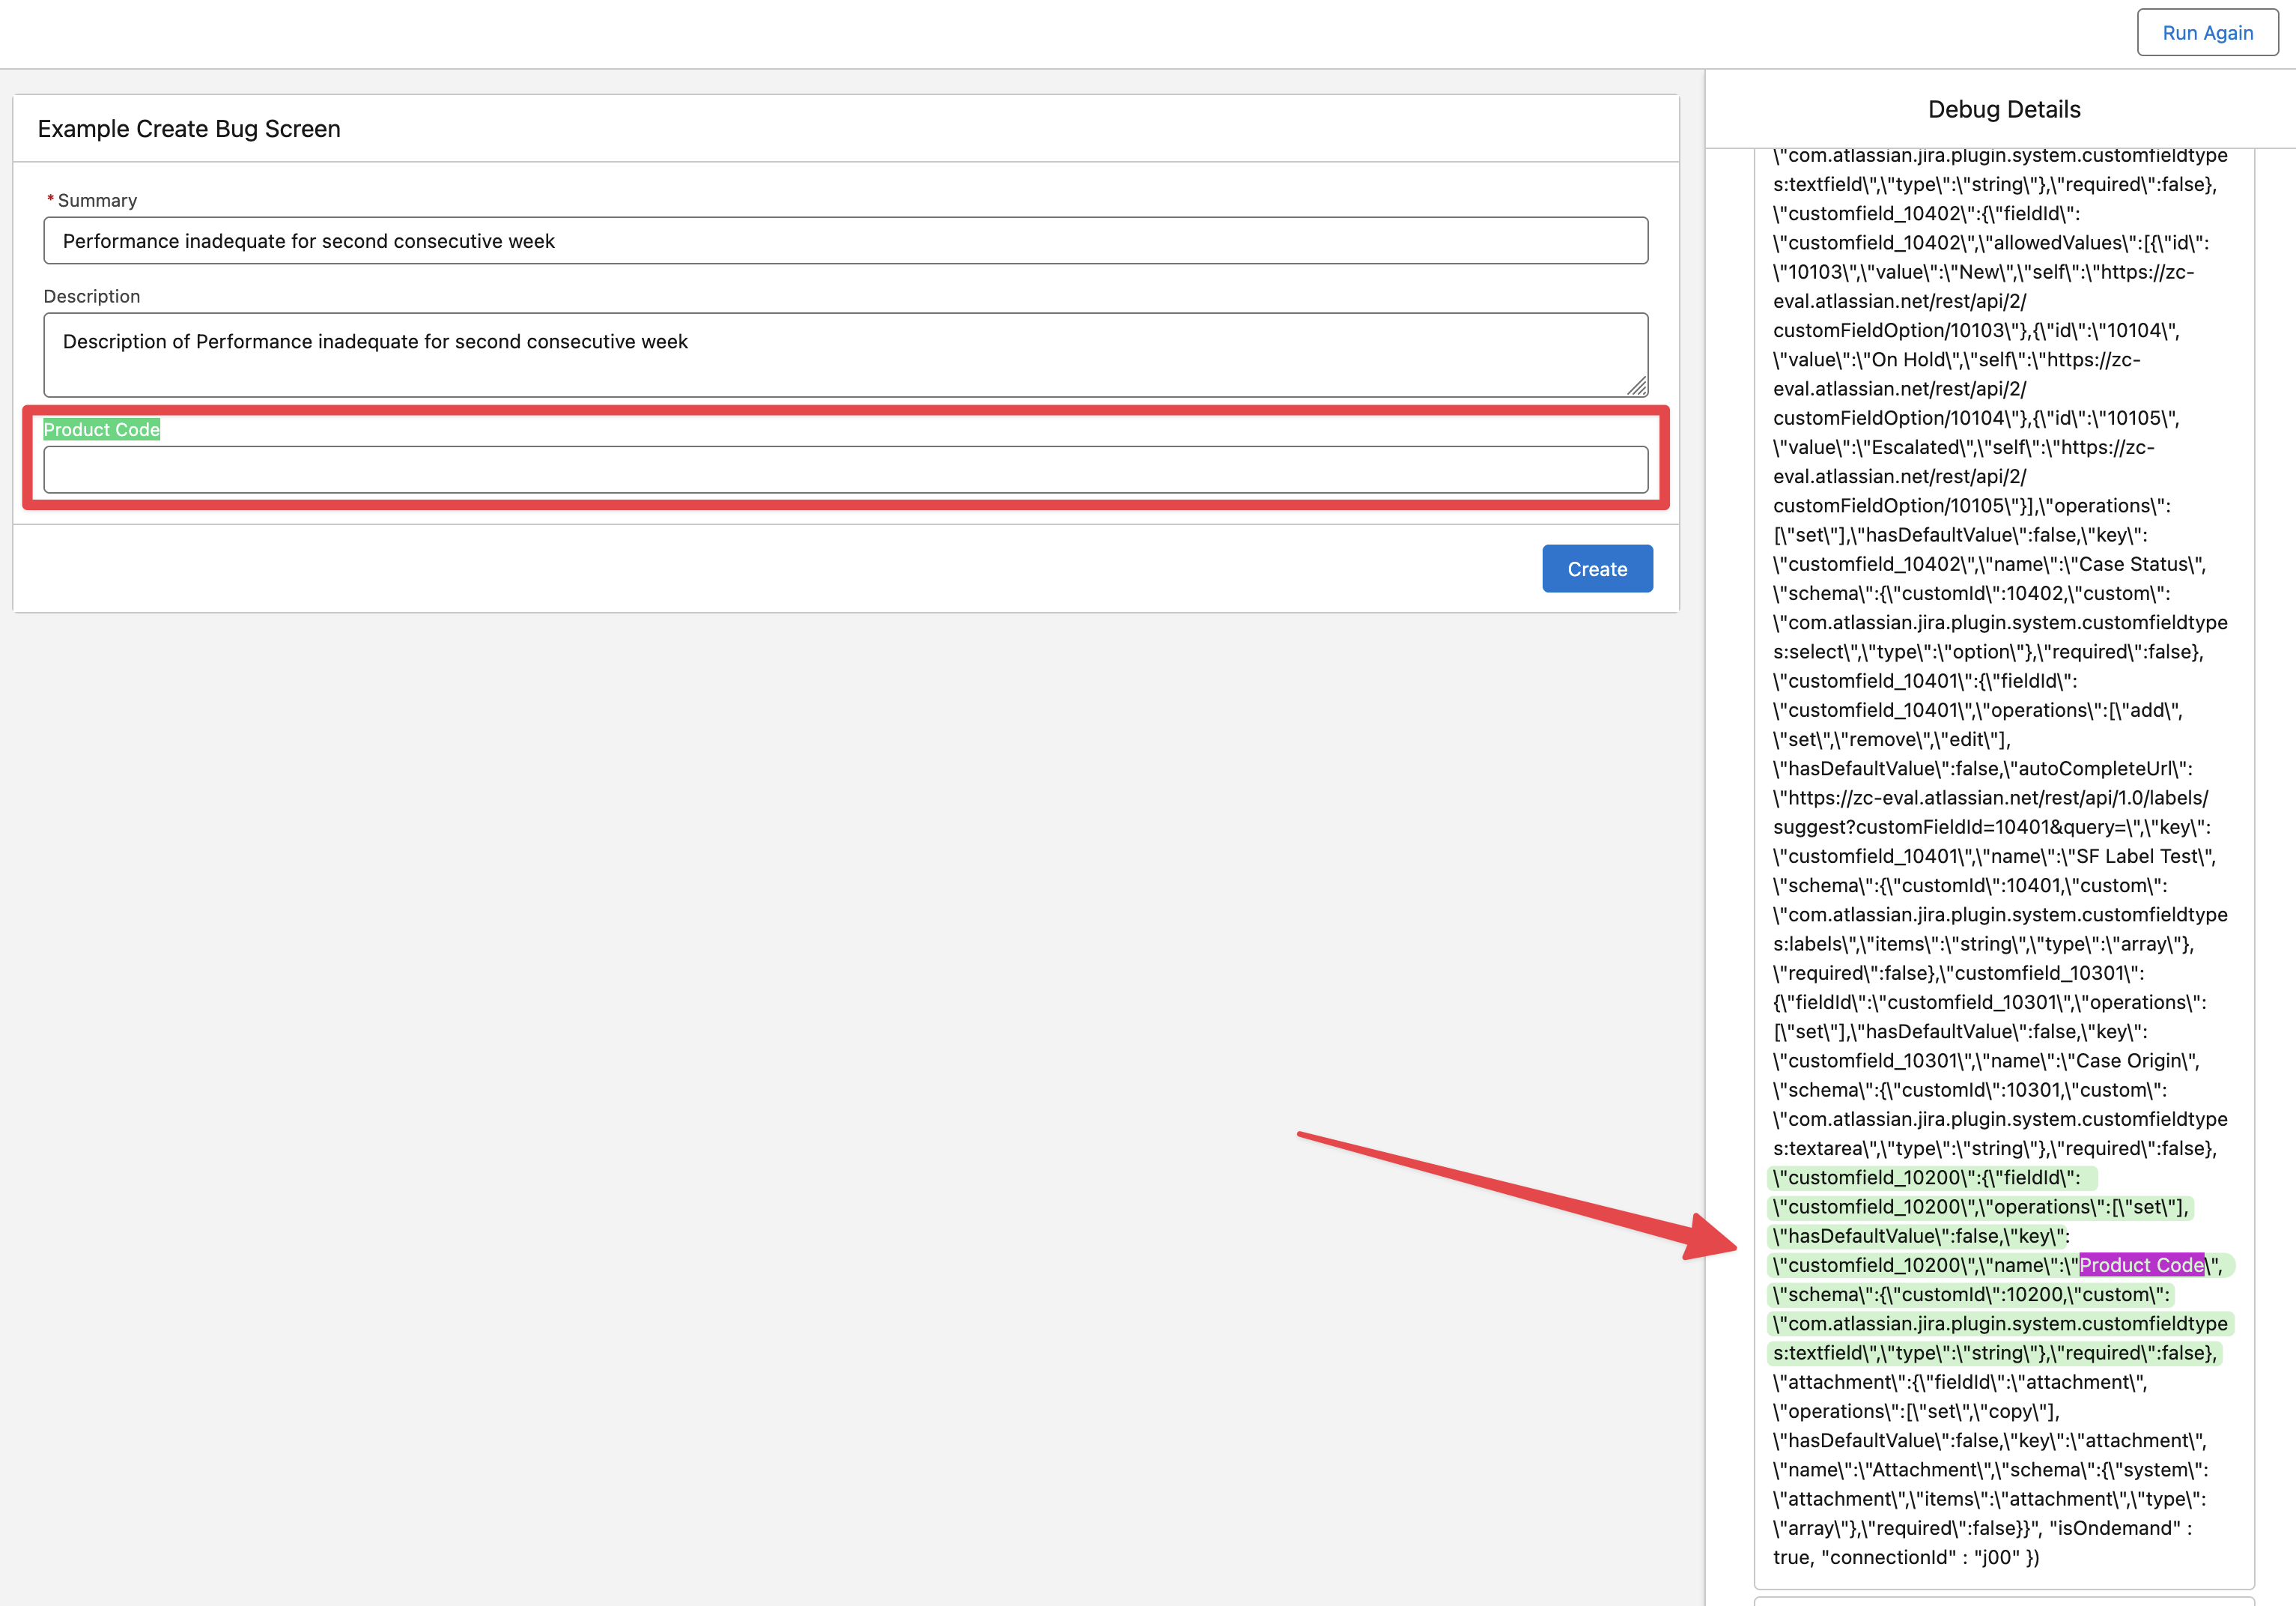
If the custom field is not present in the “Create Issue Metadata“ JSON when debugging the Flow, then it means that particular field is not available for that Jira Project and Issue Type. This field must be added to the create Issue screen by a Jira admin in the Jira Administration.
Create Bug Screen with Current User as Default Reporter
The following example sets the default reporter as the current Salesforce user (assuming the current Salesforce user has an Account in Jira with the same email address).
Create a new Flow as described in the previous example “Simple Create Bug Flow Screen“
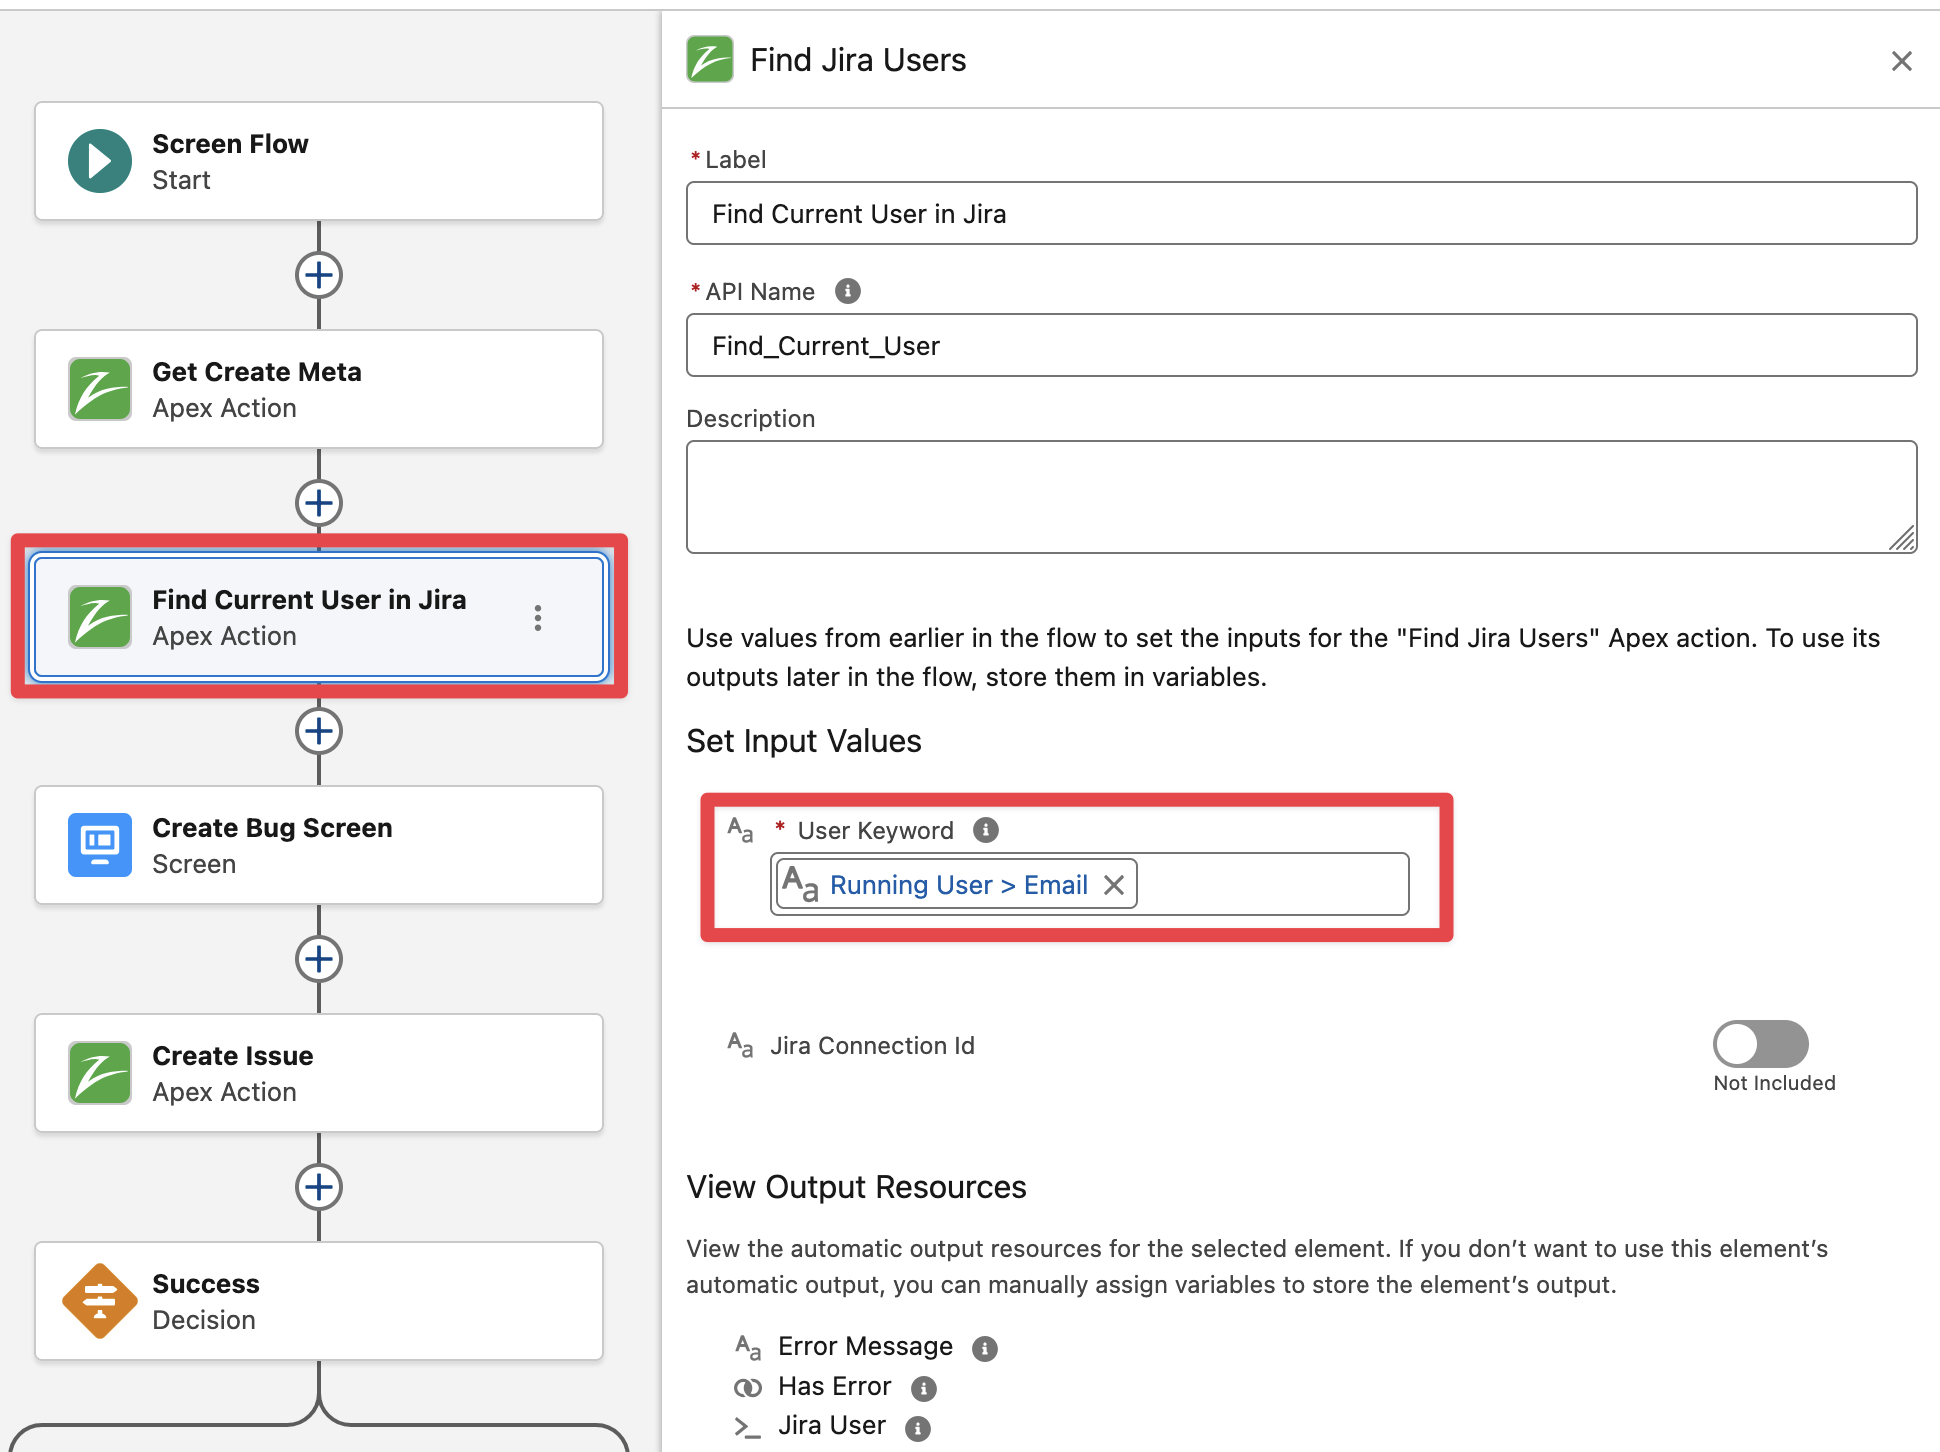
Before the Create Bug Screen add the “Find Jira Users” action and pass the Running User Email as search keyword
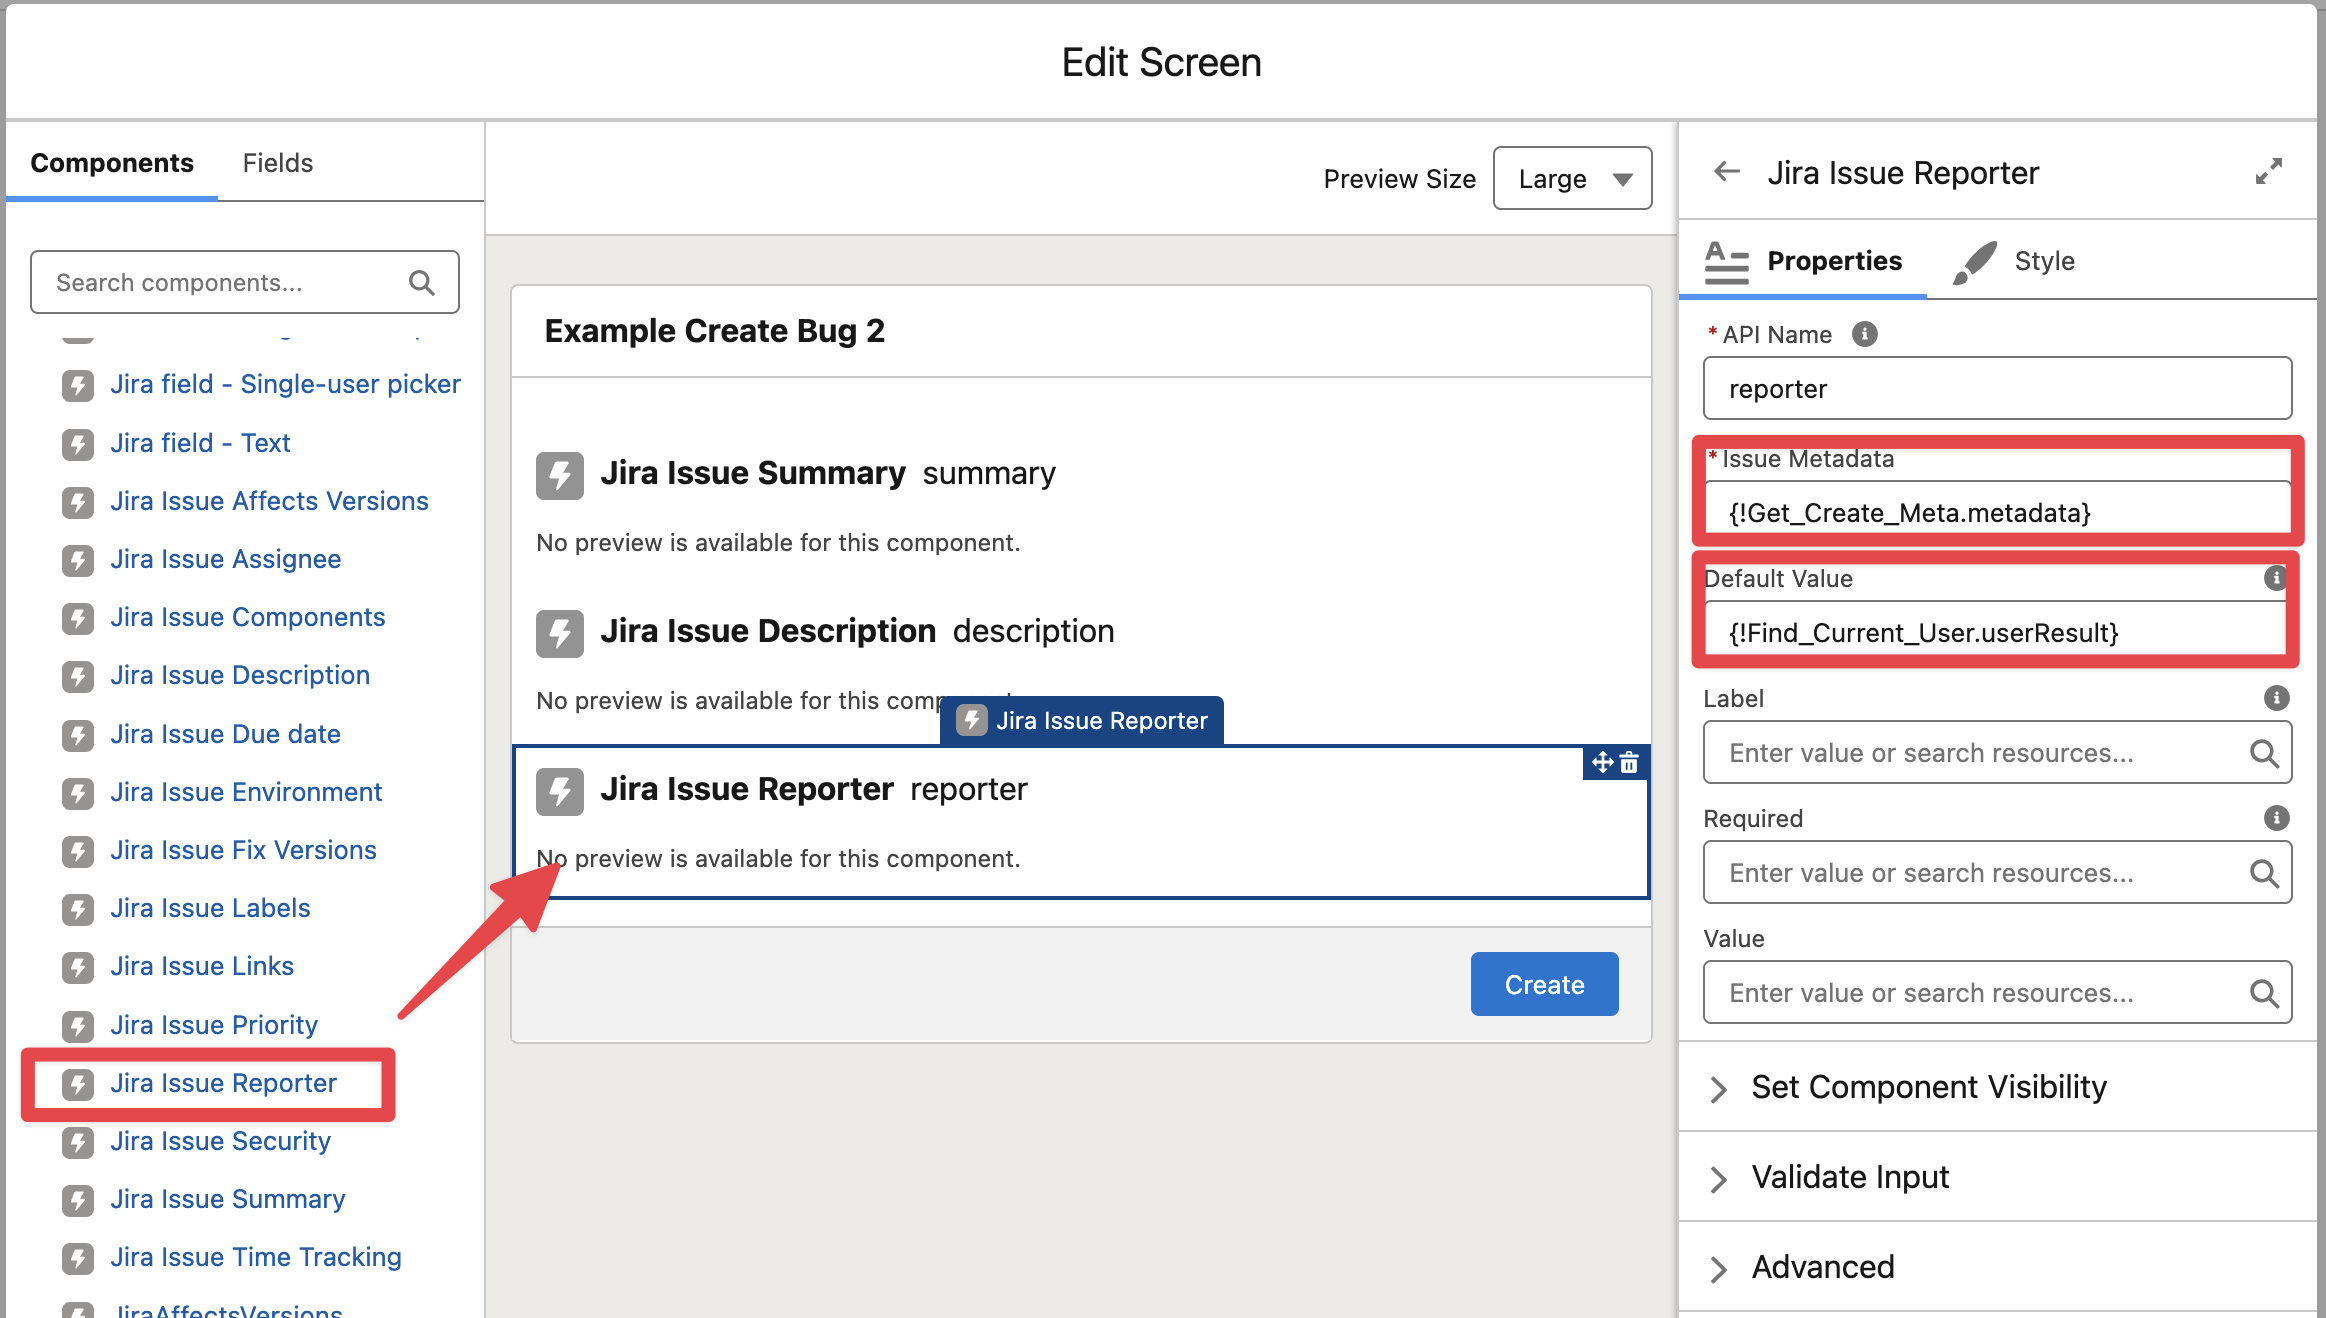
Edit the “Create Bug Screen“ element in the Flow and add the “Jira Issue Reporter“ component, pass the output of the Get Create Metadata (as in any other field component) and the output of the Find Jira Users to the Default Value.
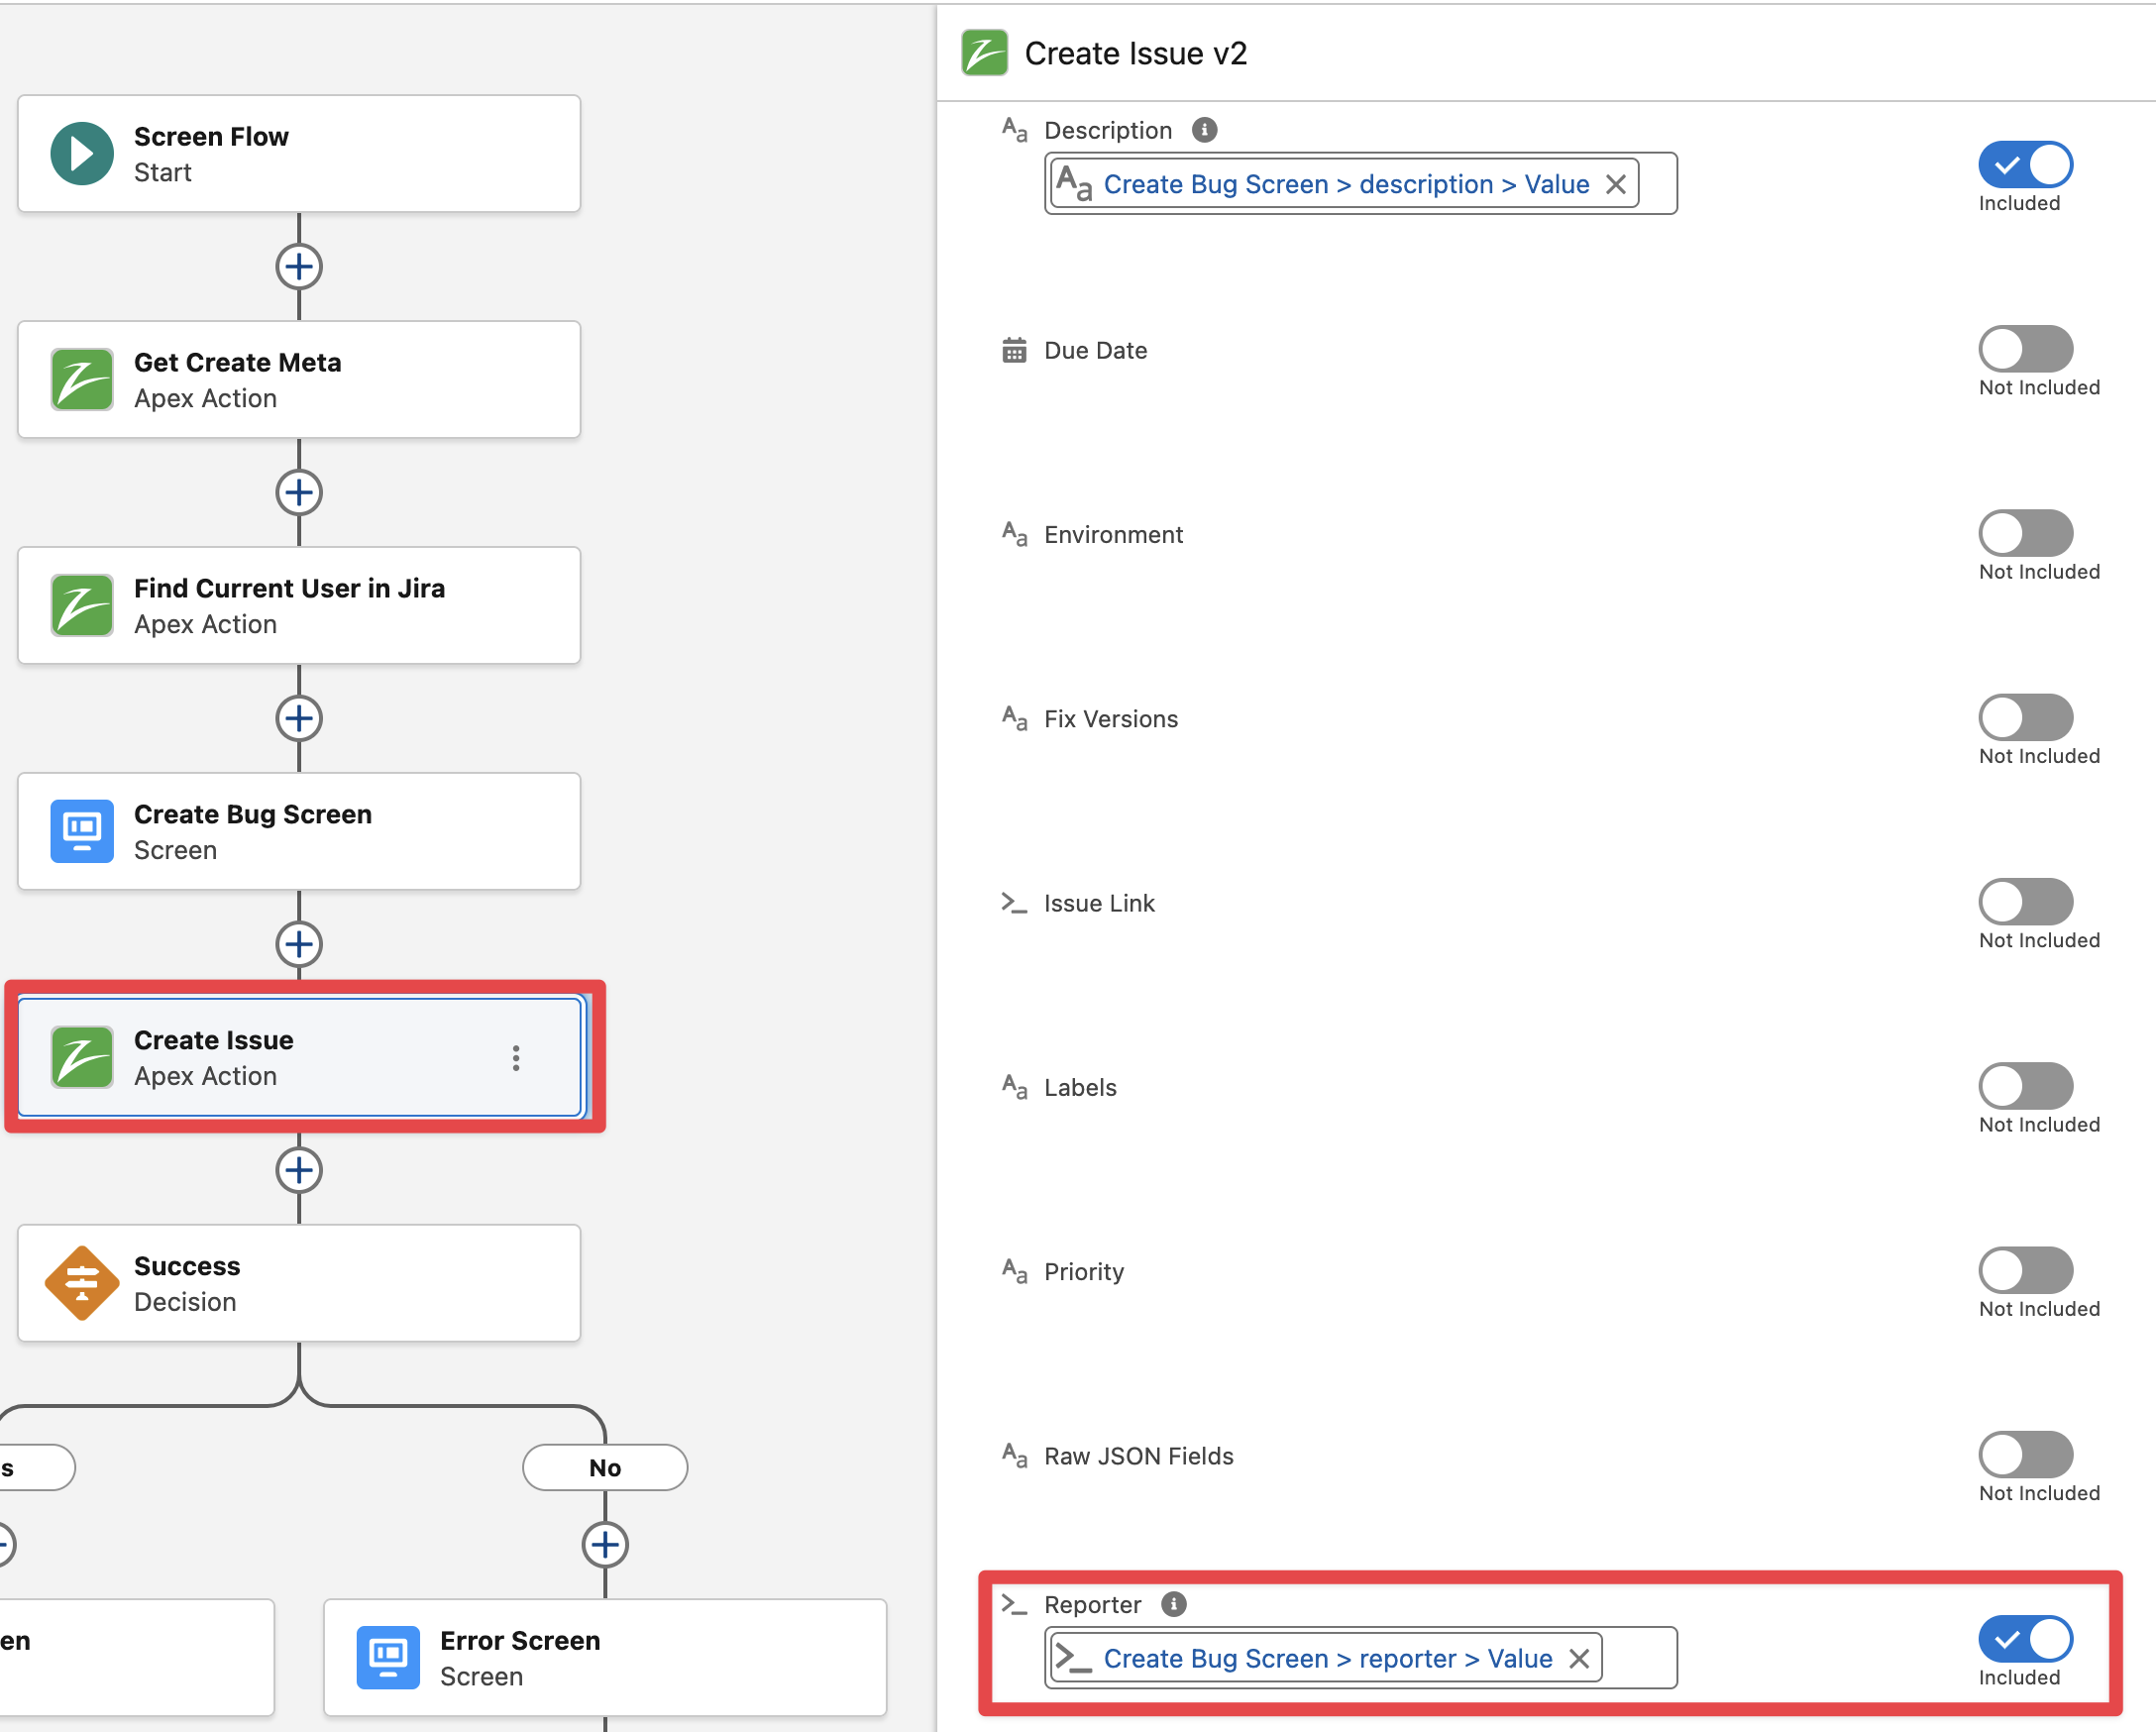
Edit the “Create Issue v2“ action and pass the “Reporter” field (from the Screen Component Value, this will allow the Salesforce users to see the default reporter as the current user but let them select a different reporter for creating the Issue)
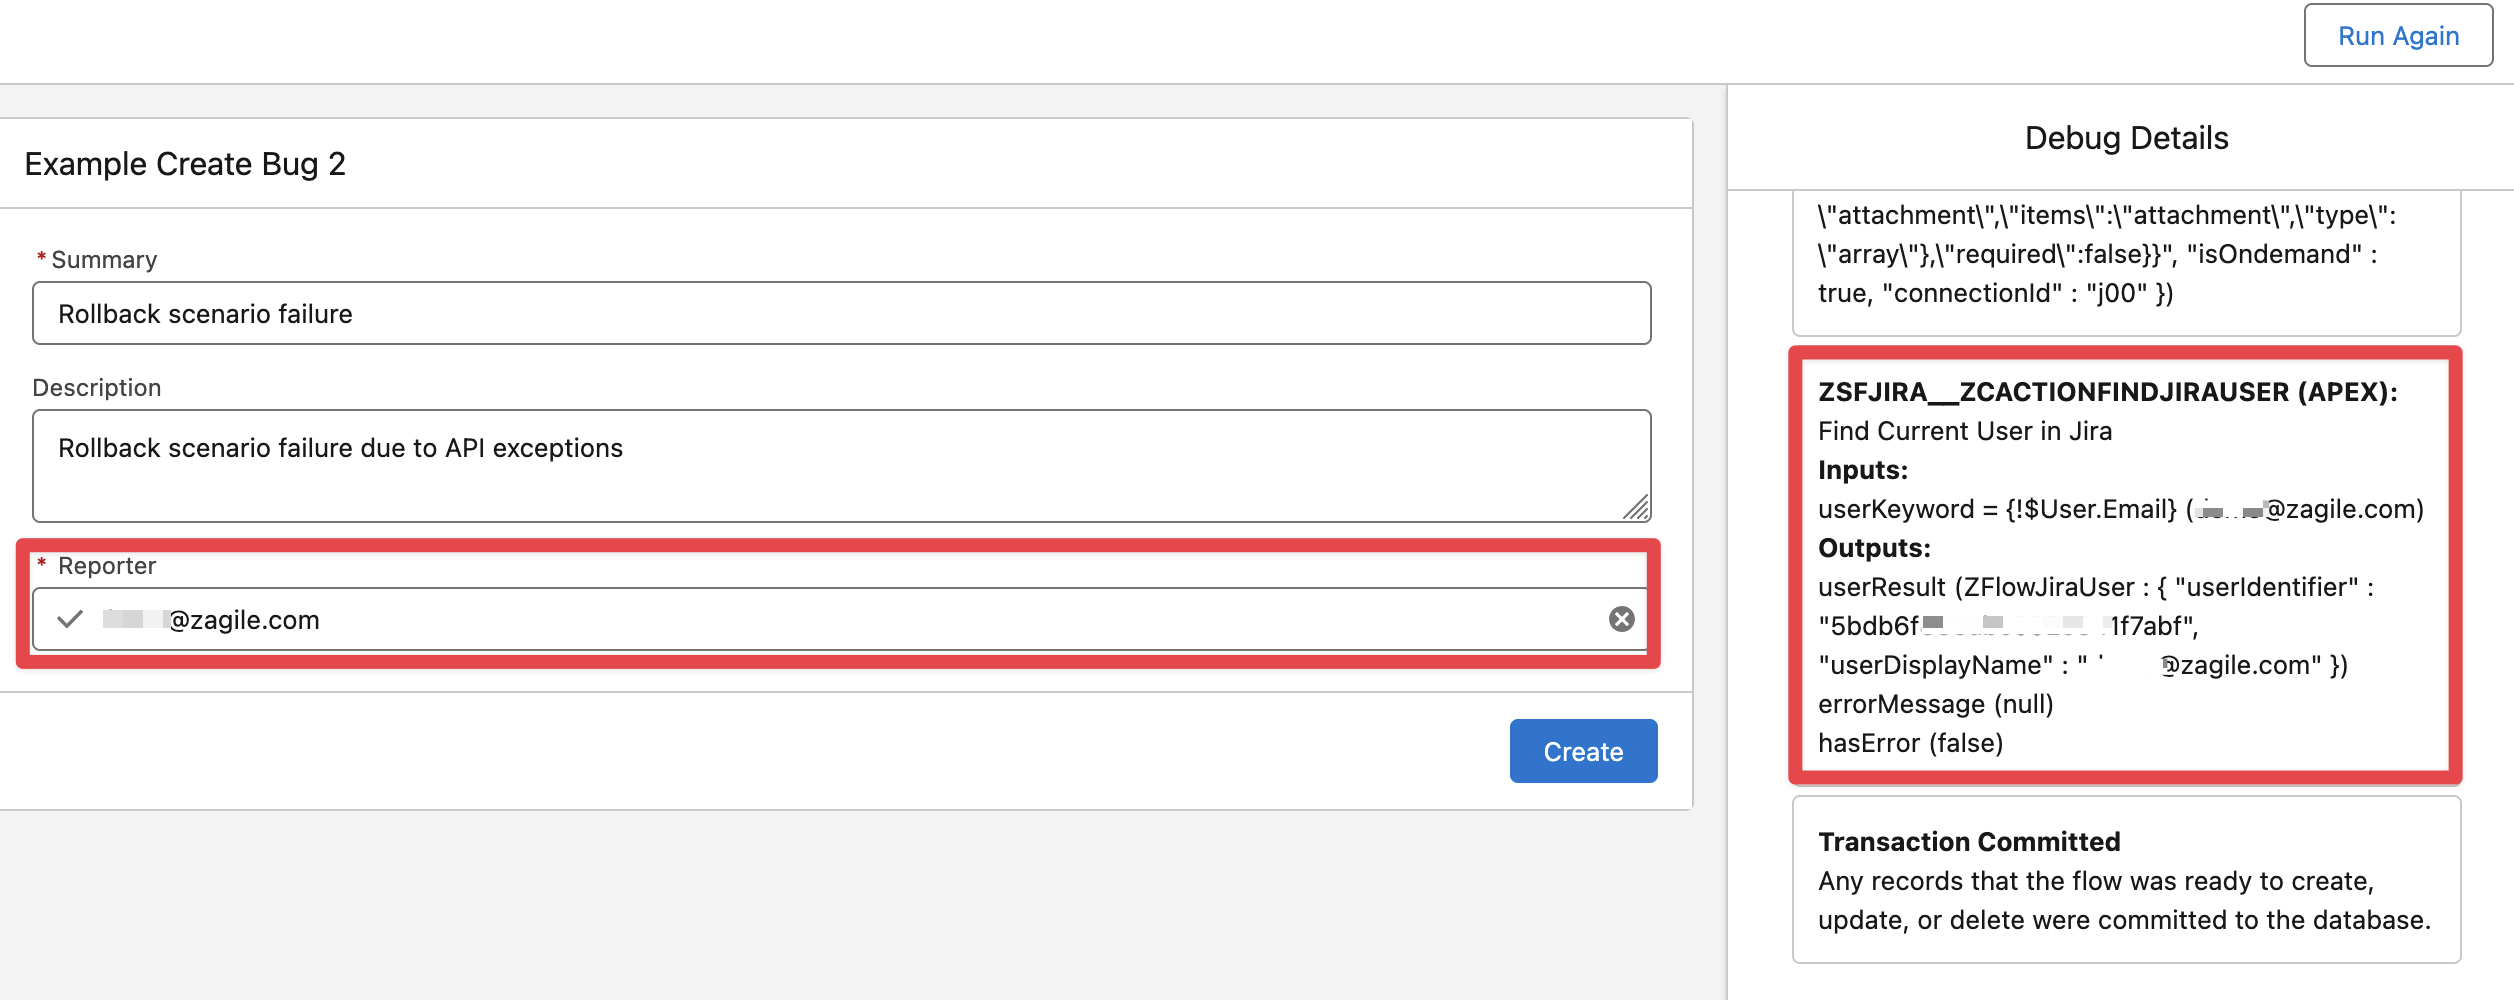
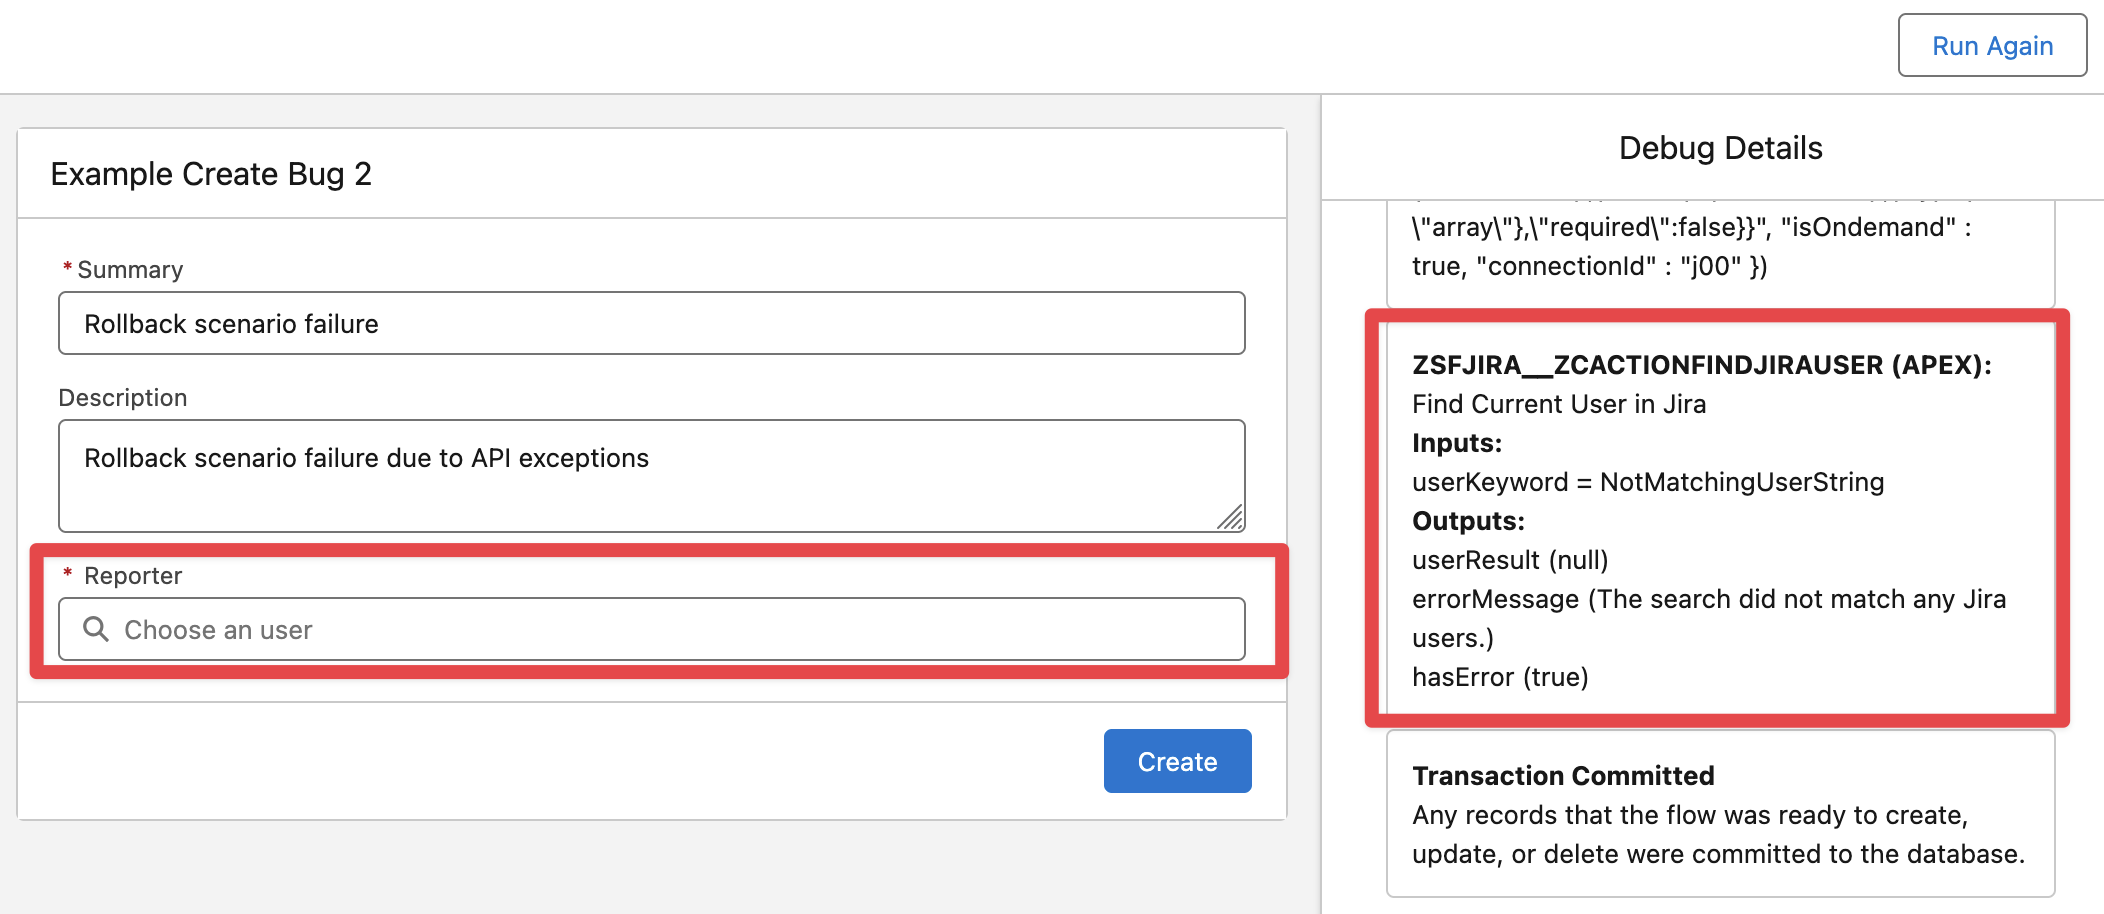
Finally Save and Activate the flow. Run the flow in Debug mode and validate the “Find Jira Users“ action has found an Account in Jira for your Salesforce user email address
Debug output when no Jira user account was found
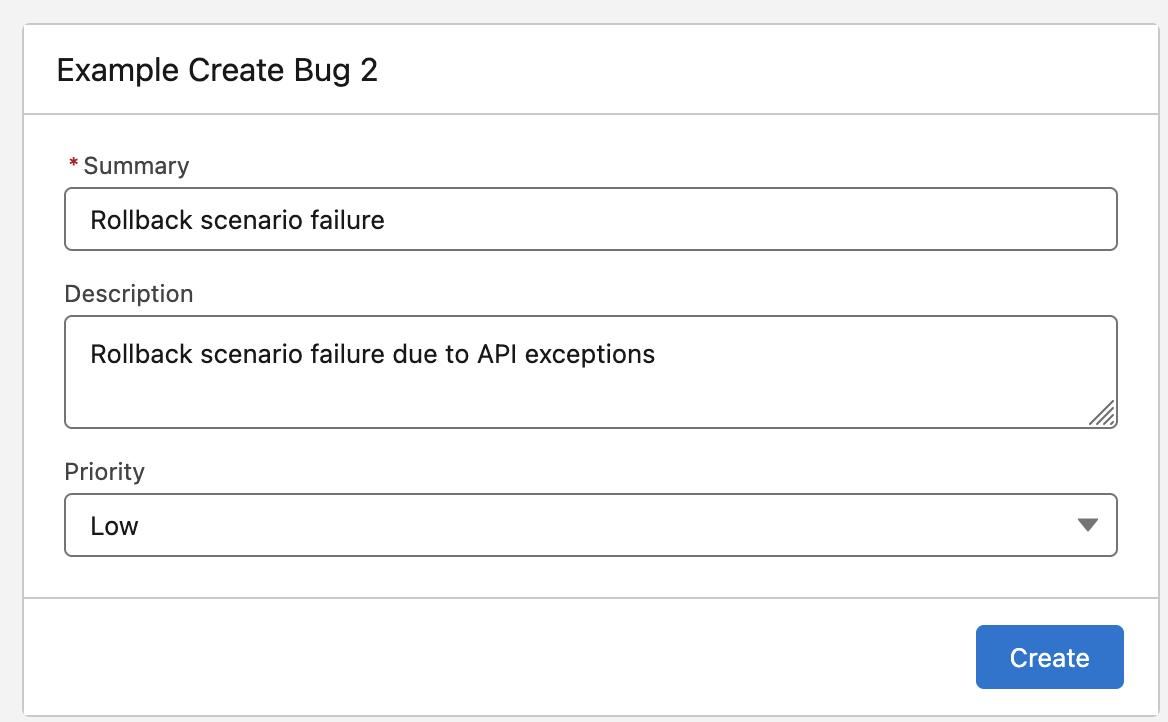
Conditional Field Rendering - Require Assignee when Priority is set to High
The following example renders and requires the field Assignee only when “High“ is selected as Priority.
Create a new Flow as described in the previous example “Simple Create Bug Flow Screen“.
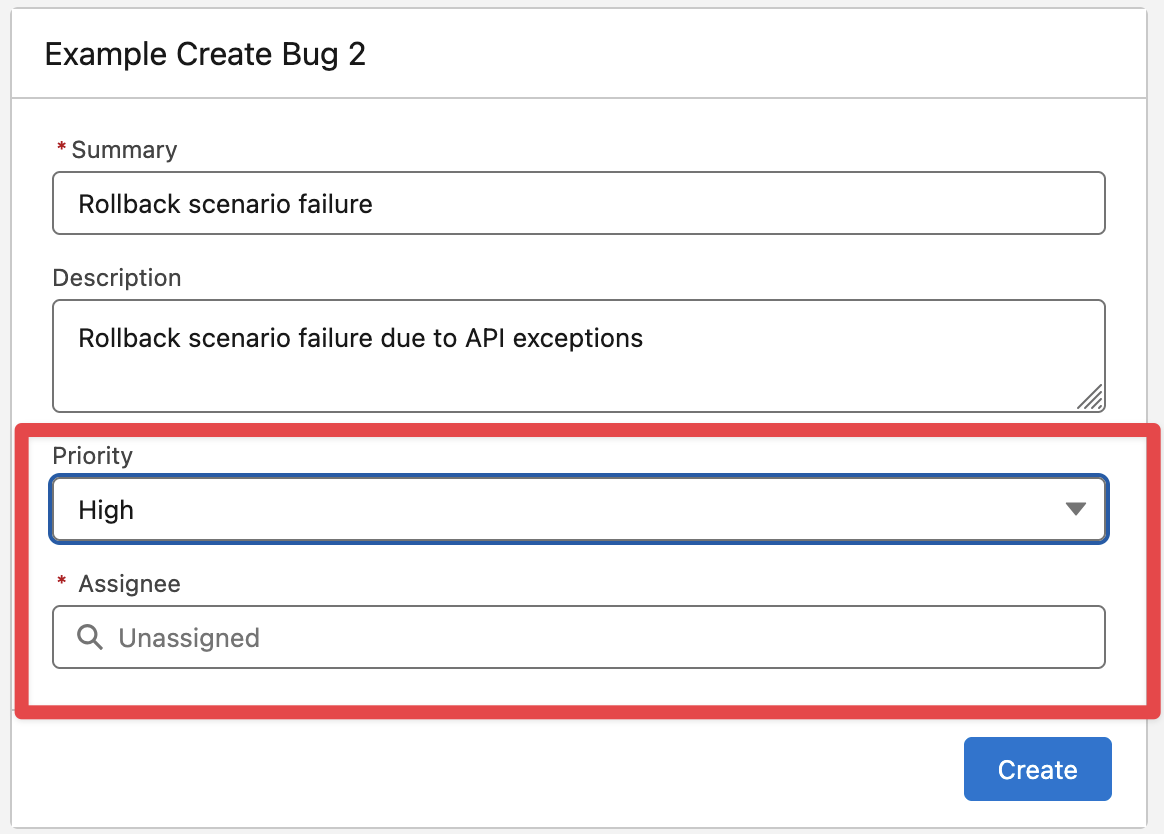
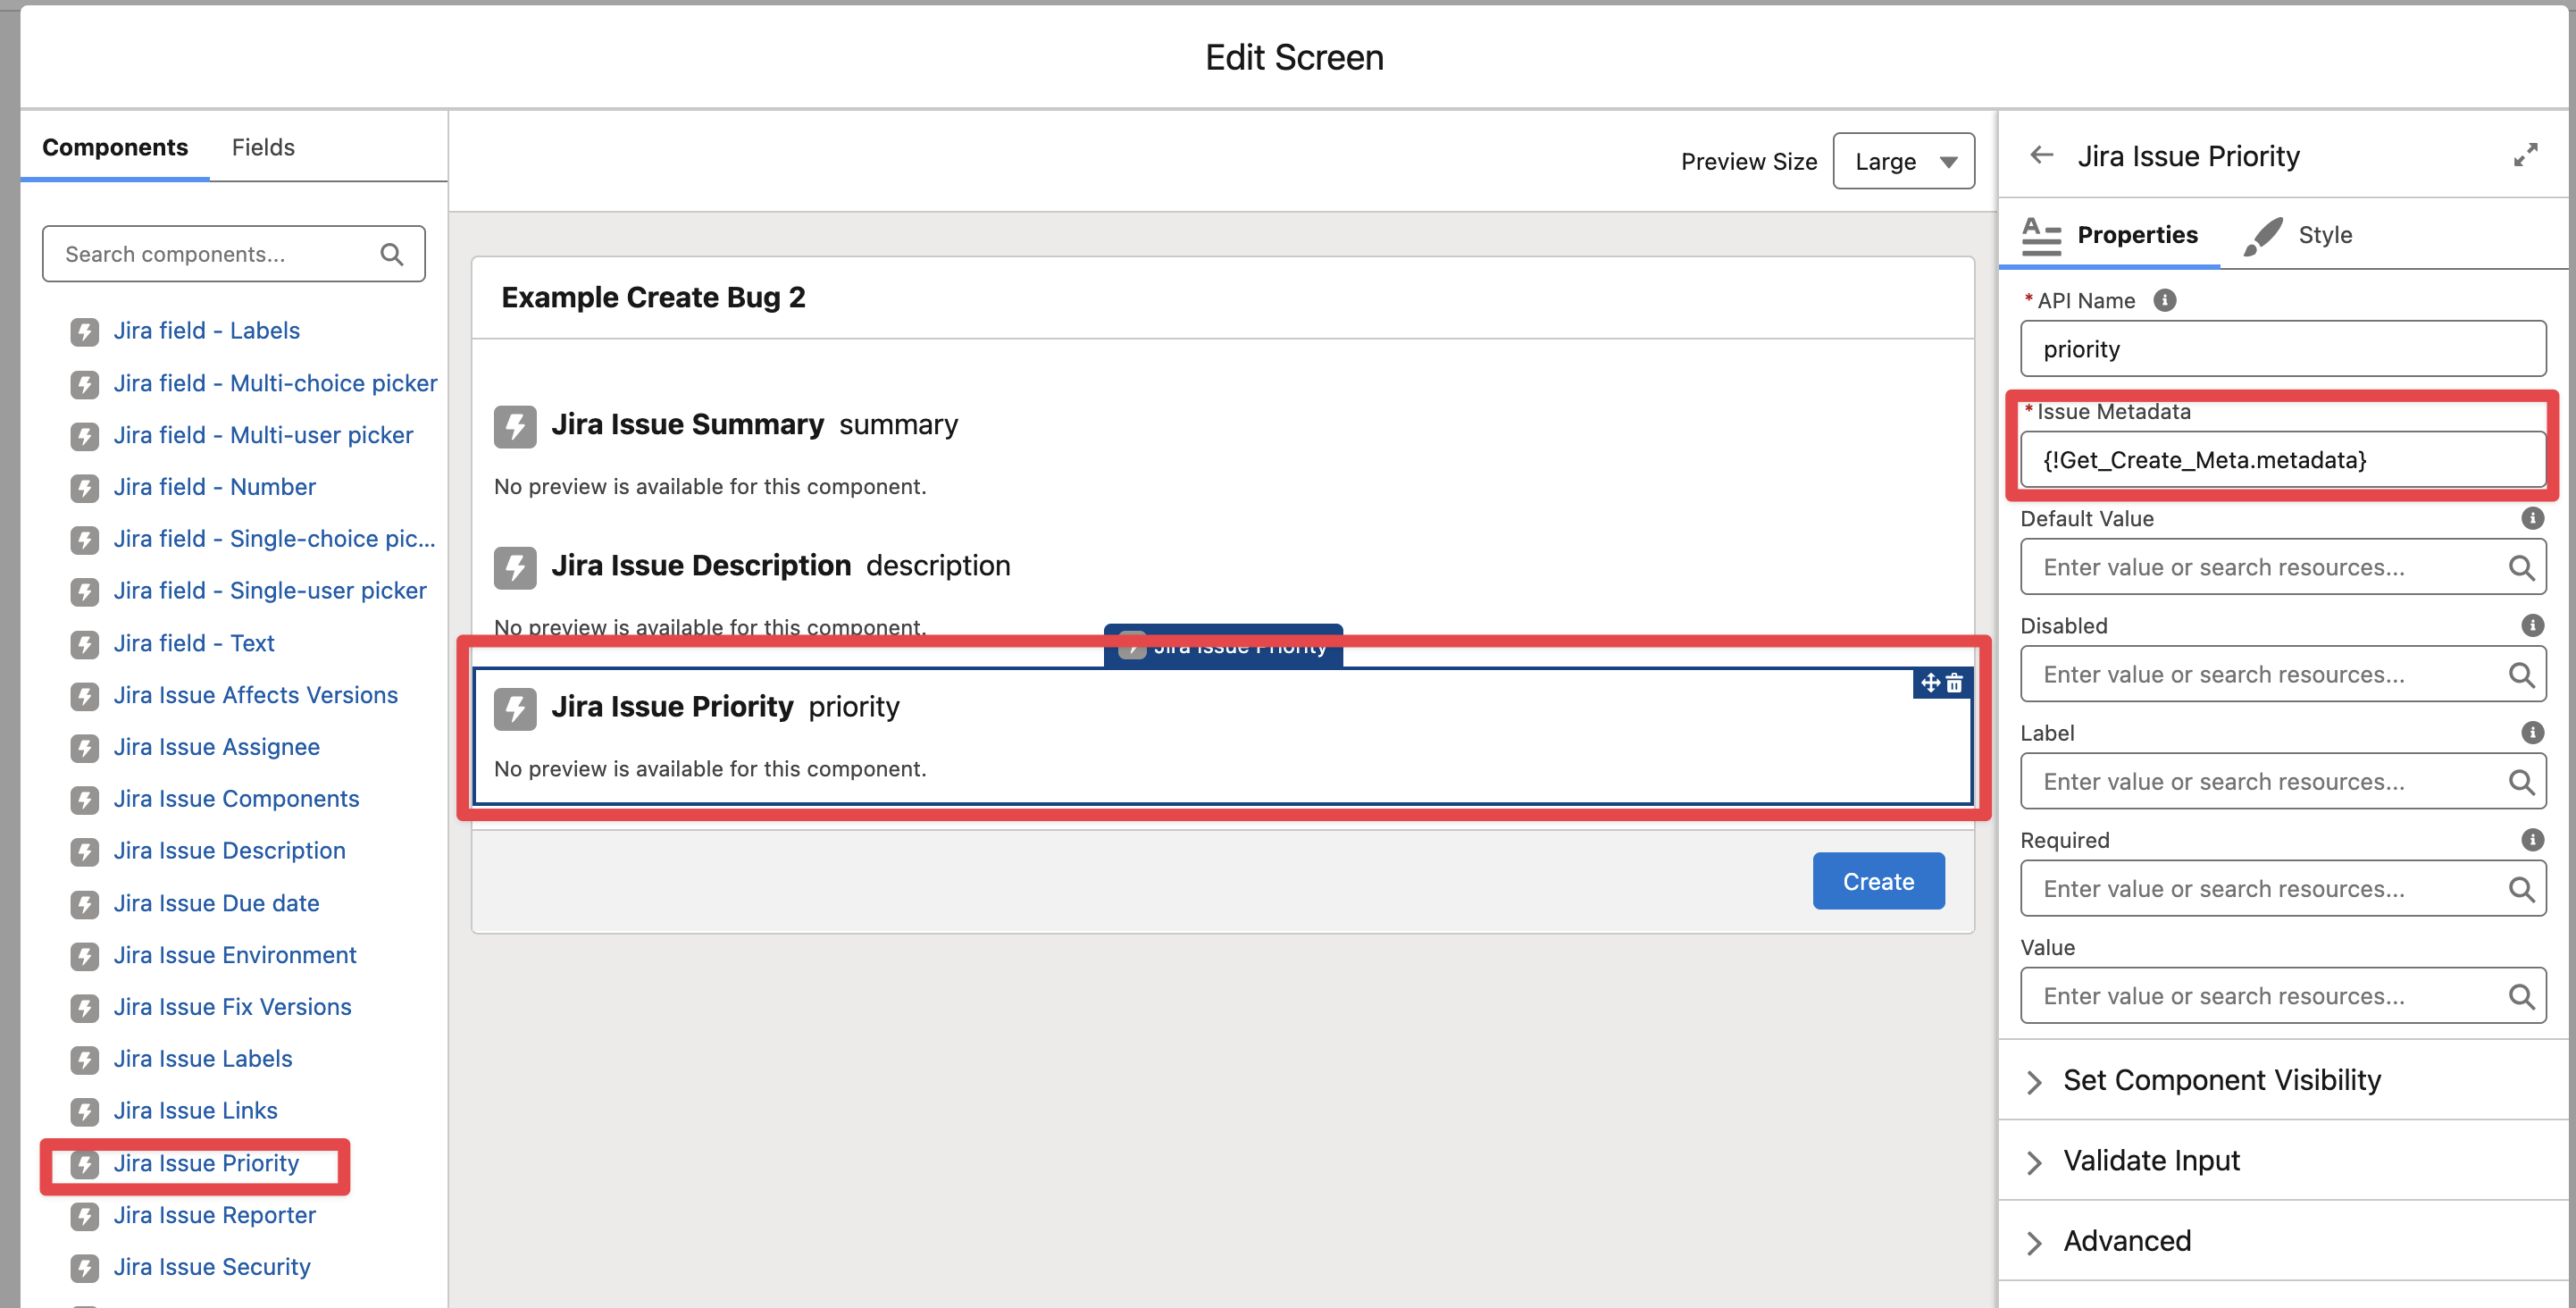
Edit the “Create Bug Screen“ element in the Flow and add the “Jira Issue Priority“ component, pass the output of the Get Create Metadata (as in any other field component)
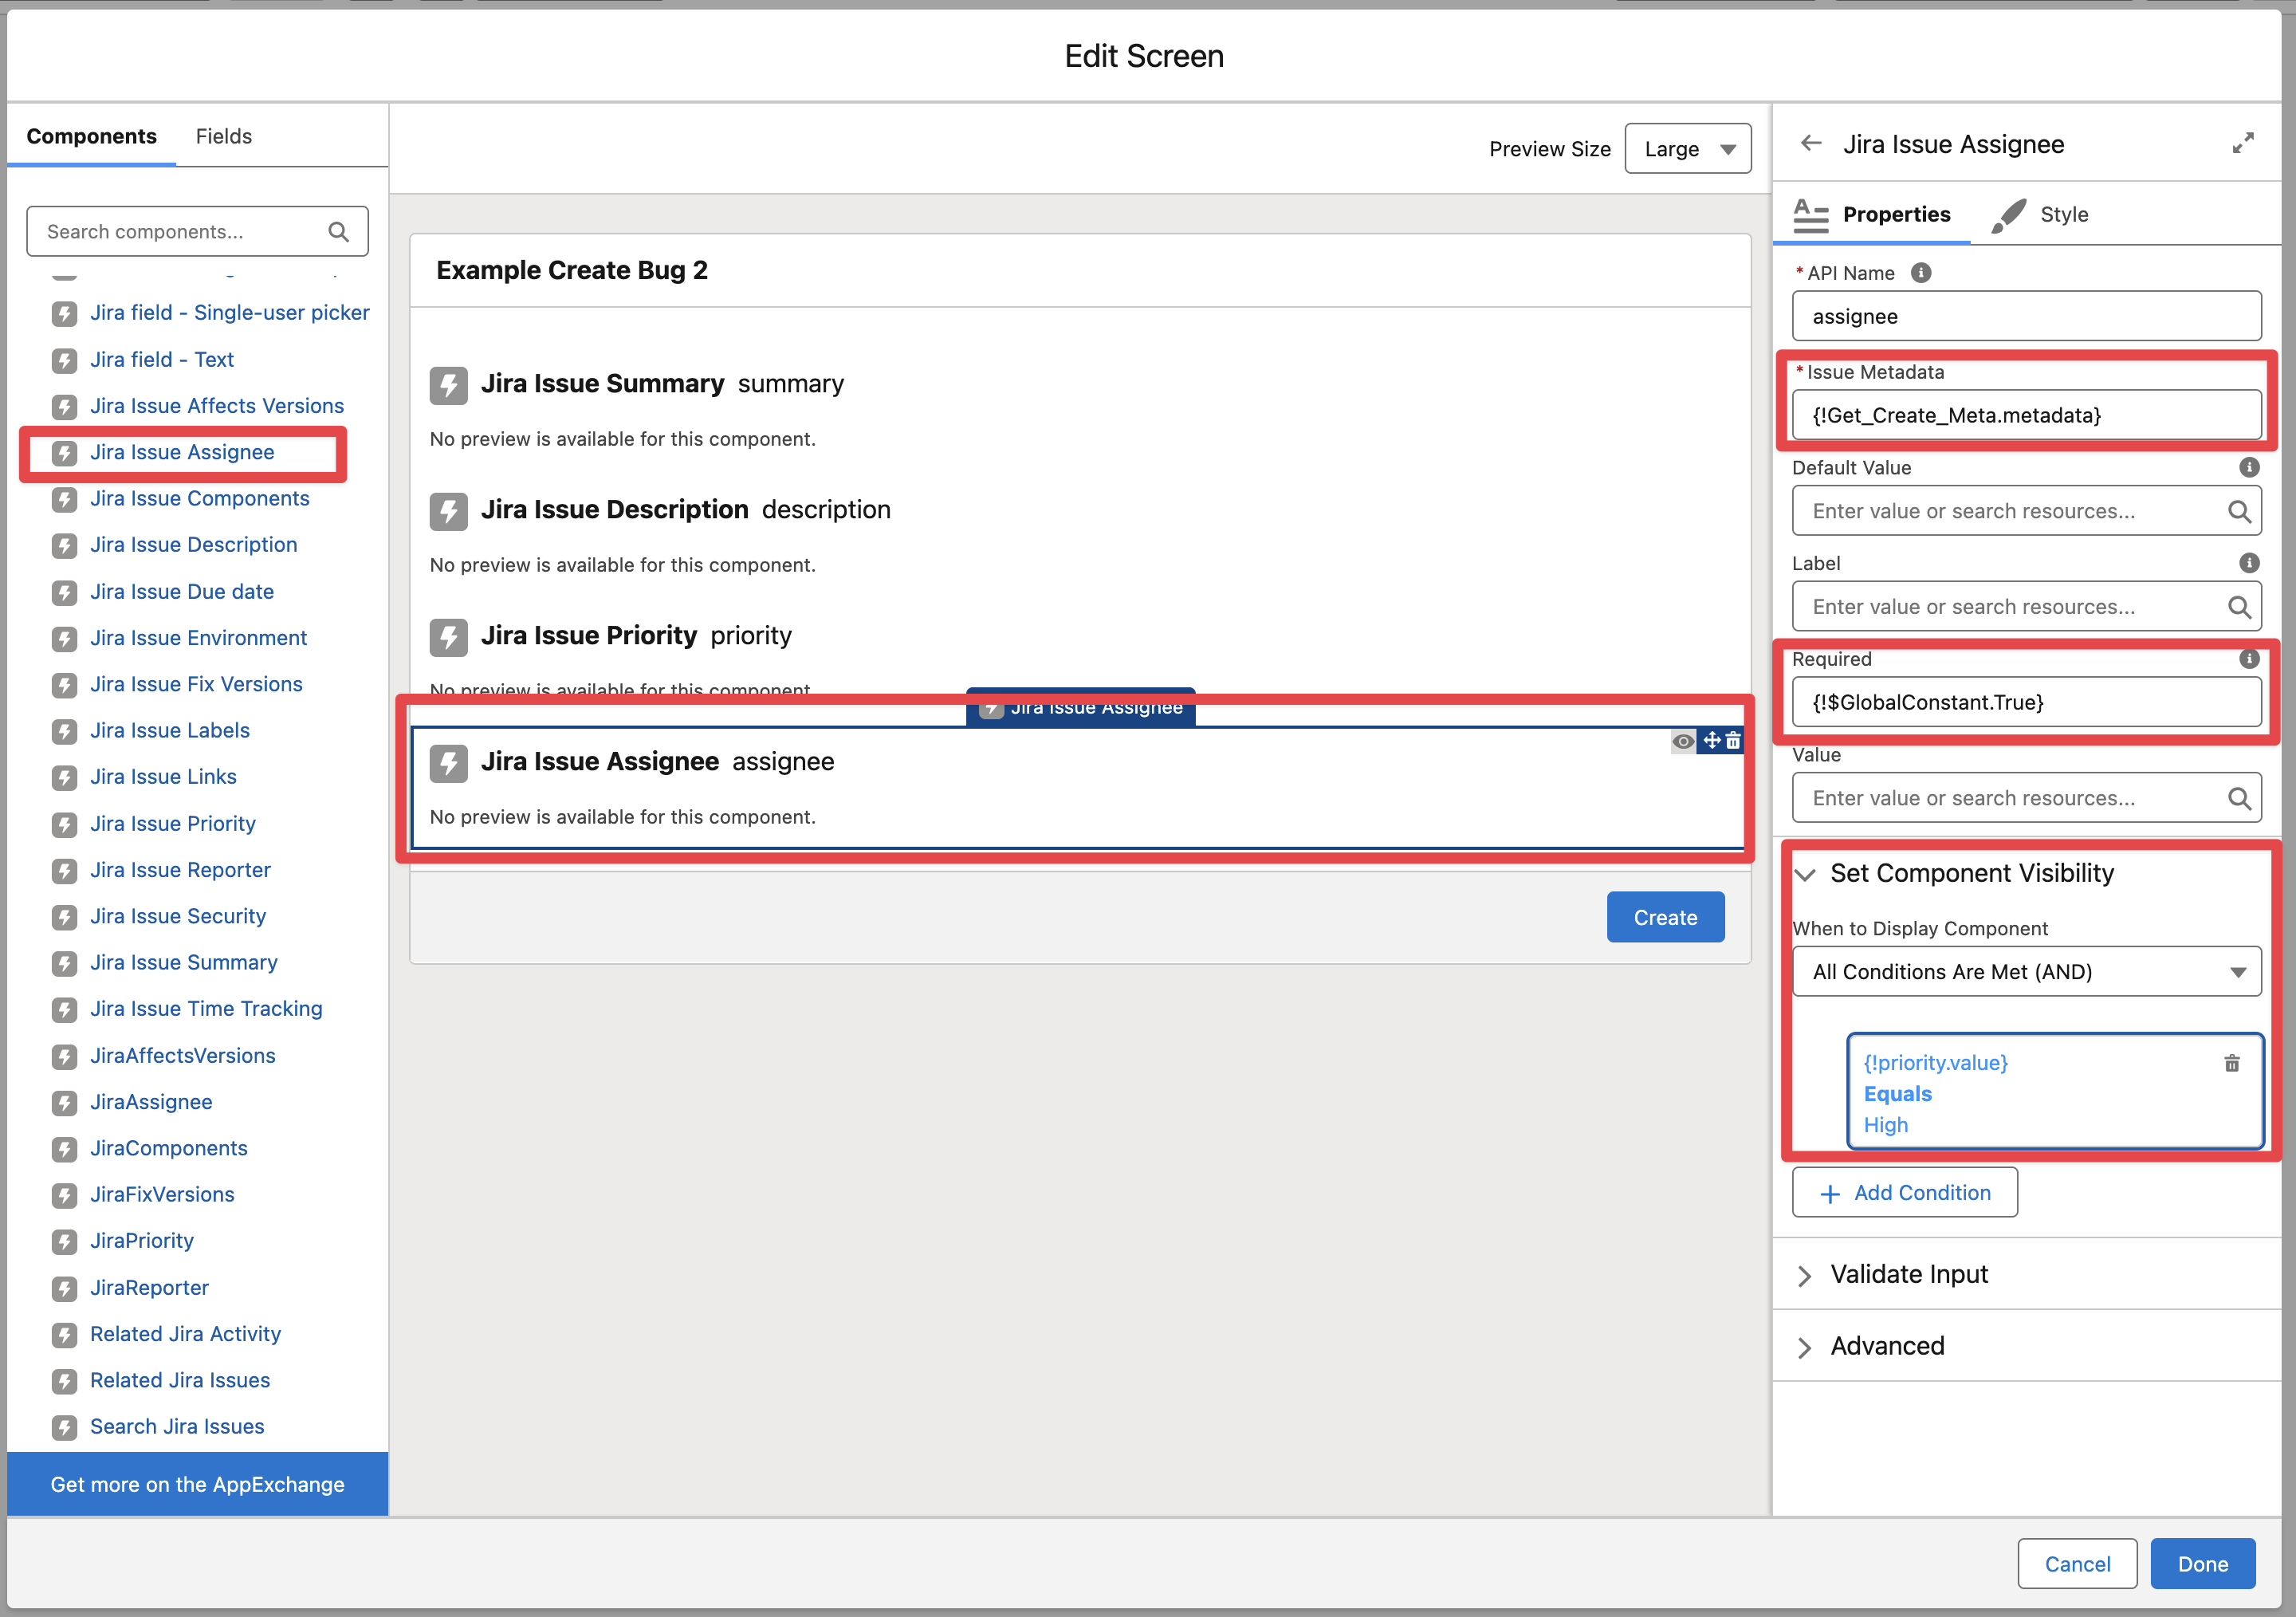
Add the “Jira Issue Assignee“ component, pass the output of the Get Create Metadata, make the component required and set component visibility to only render when priority.value = High
Edit the “Create Issue v2“ action and pass the “Priority” and “Assignee“ fields (from the Screen Component Values)

Finally Save and Activate the flow.