
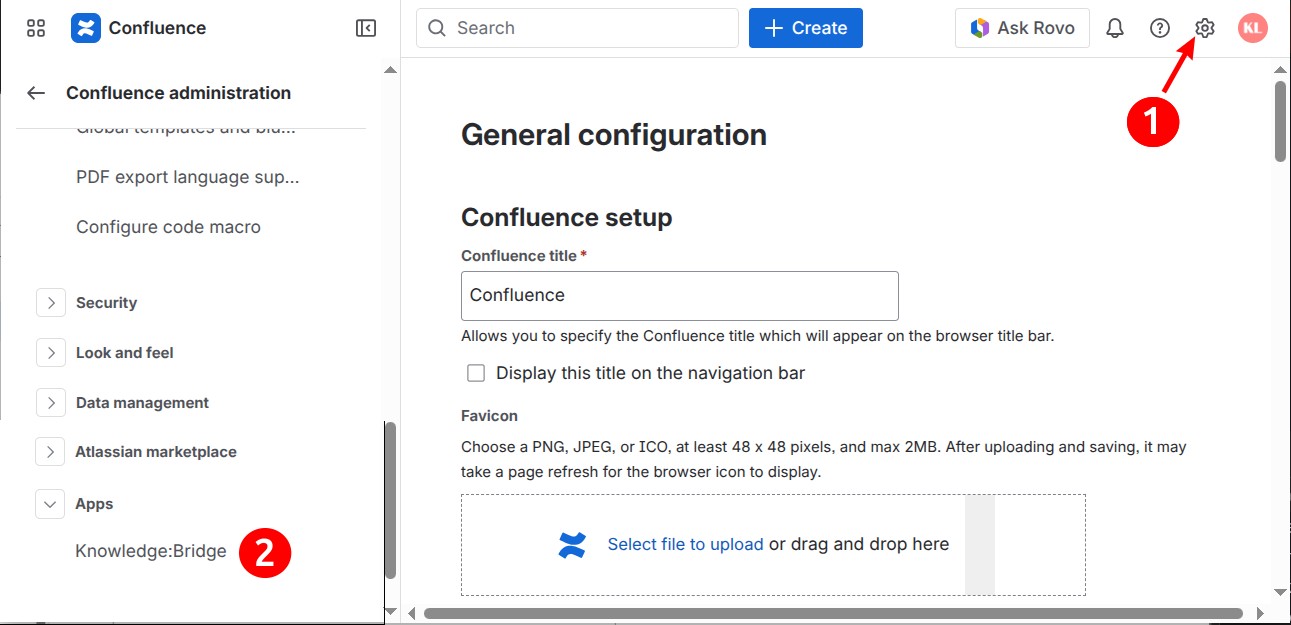
Authenticate Confluence to Salesforce
In Confluence Administration → Apps → Knowledge:Bridge,
Click on the Login to Salesforce button.
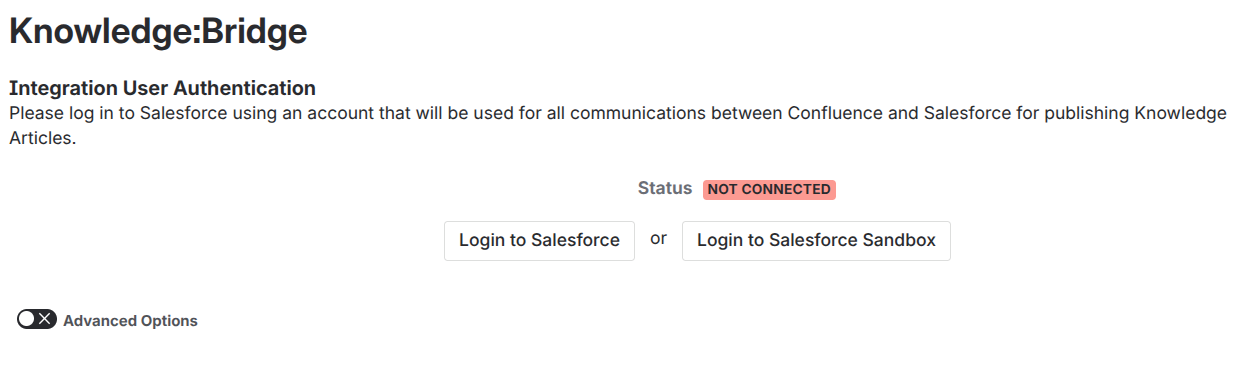
Copy the Callback URL.
-20260507-200443.png?cb=587da755c5ef4a03eb282aa0de8d542d)
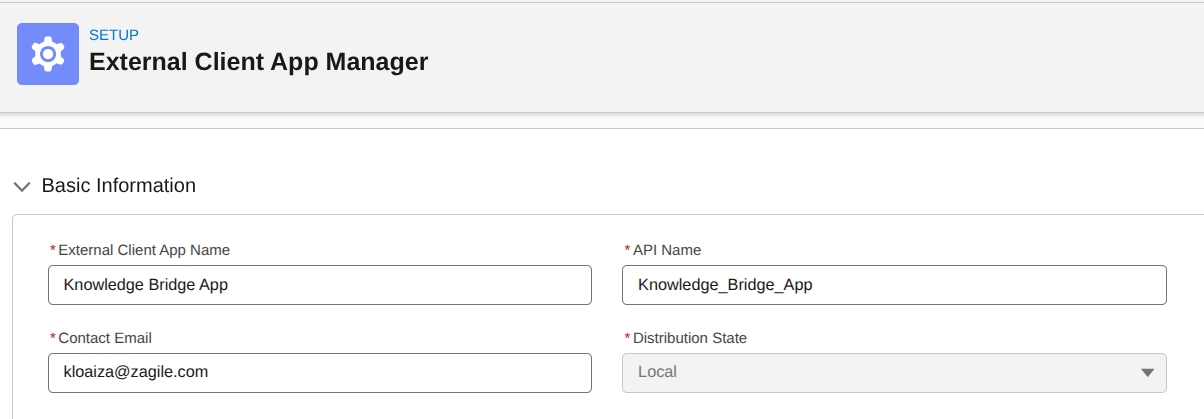
Go to Salesforce in a new tab as a Salesforce Admin and open the External Client App Manager in the Setup, add a New External Client App filling the required fields.
Go to the API (Enable OAuth Settings) section
-
Check Enable OAuth.
-
Paste the copied Calback URL.
-
Select the following OAuth scopes:
-
Access the identity URL service (id, profile, email, address, phone)
-
Manage user data via APIs (api)
-
Perform requests at any time (refresh_token, offline_access)
-
-
Click on the Create button
-20260507-201926.png?cb=adb65fc0b0733058edcdb4364d822086)
Once the External Client App was created, copy the Consumer Key and Secret (find them in the Settings Tab → OAuth Settings in the External Client App).
Return to Confluence, paste the copied Consumer Key and Secret and click Continue. Note that the External Client App may take some minutes to be ready (you may get “invalid client Id” if it is not ready).
-20260507-200711.png?cb=5a02b001c71ddbc8472d6bea3e5ab018)
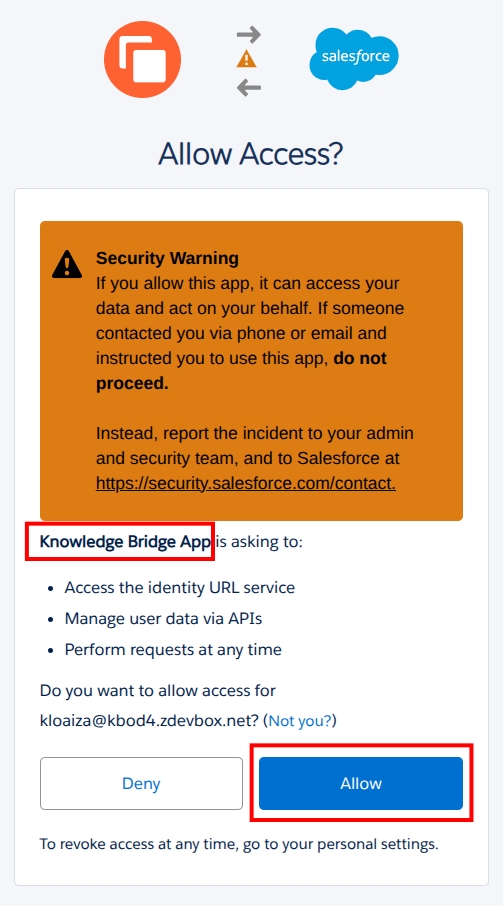
Log in to Salesforce using the account that will be used for publishing Confluence pages to Salesforce Knowledge. Allow Access to the External Client App created before.
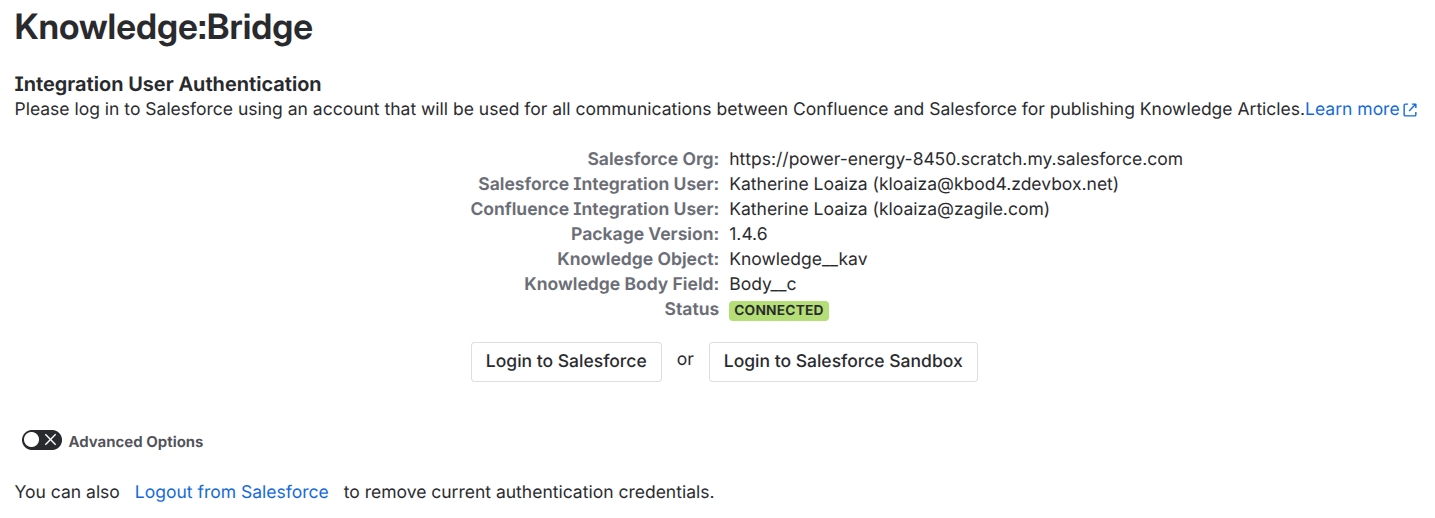
Once authentication is successful, you will be redirected to Confluence, review the Connection Information.
If the Consumer key and secret need to be updated go to the Advanced Options toggle, set the new values and Save, then click on the Login to Salesforce button.
-20260507-202603.png?cb=a0a351a73096b0bac56d0482c4849356)