In Jira Setting → Marketplace Apps section via Salesforce Authentication option, create a new connection, set an Alias for the connection to Salesforce and expand the Advanced Options, make sure the “Use my own Salesforce External Client App” option is enabled.
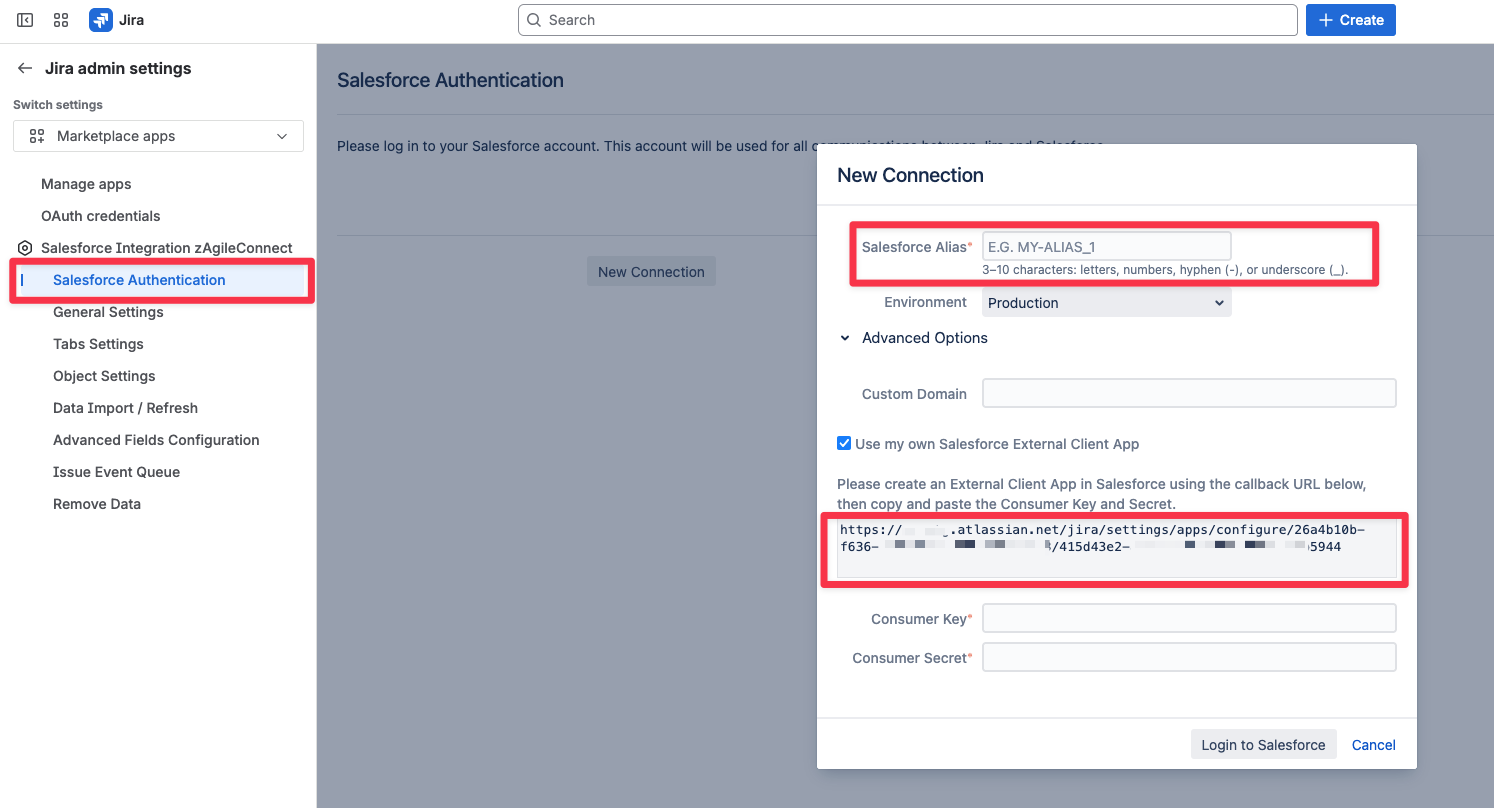
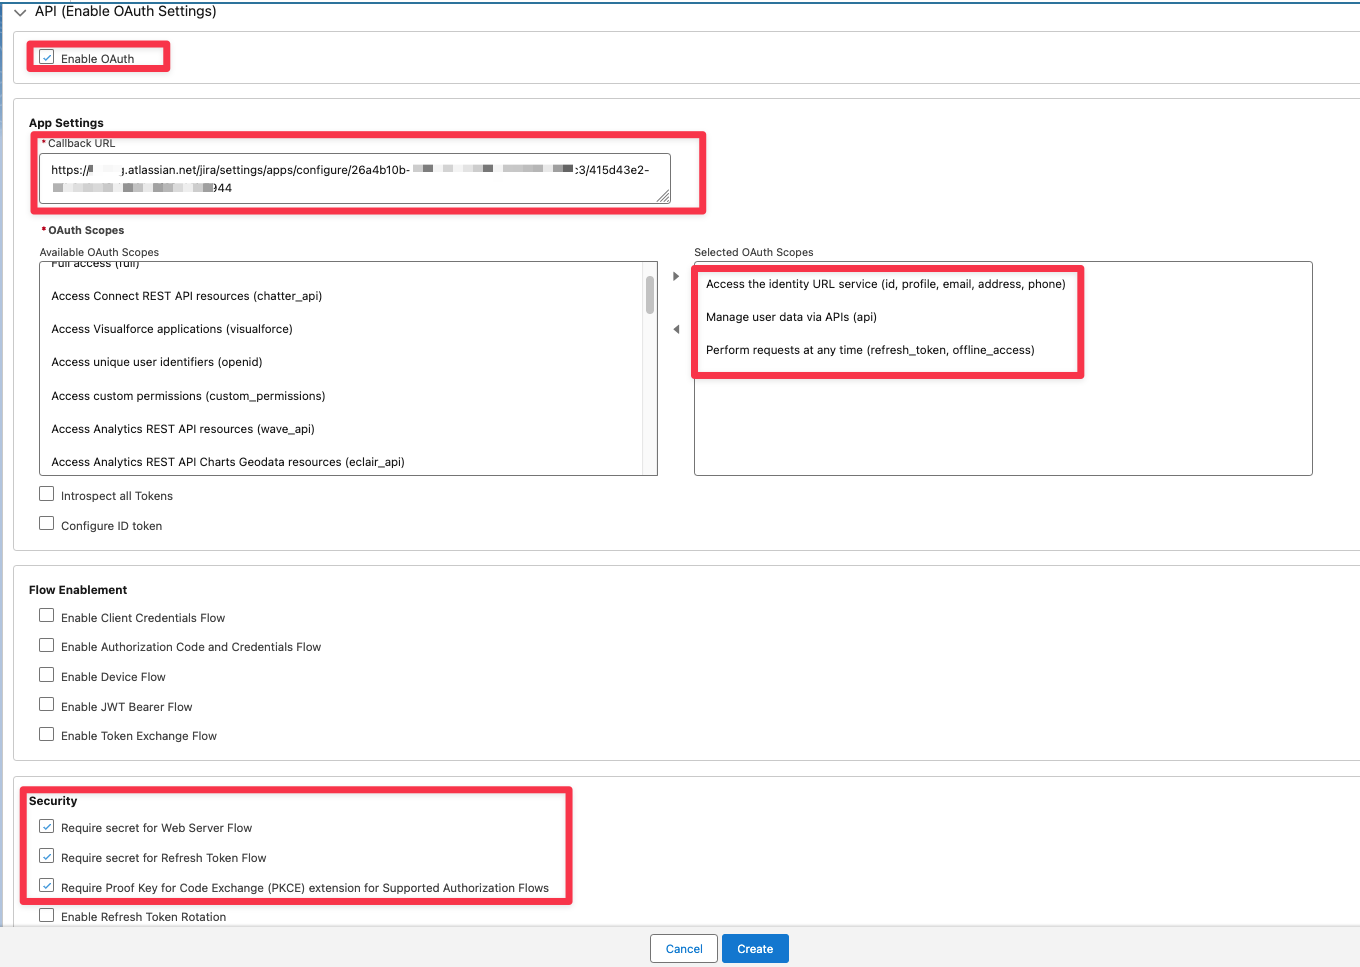
Copy the URL and in Salesforce go to Setup->App Manager and define an entry for External Client App with key parameters as shown below:
The Jira callback URL for this will be the URL copied from the “New Connection” popup.
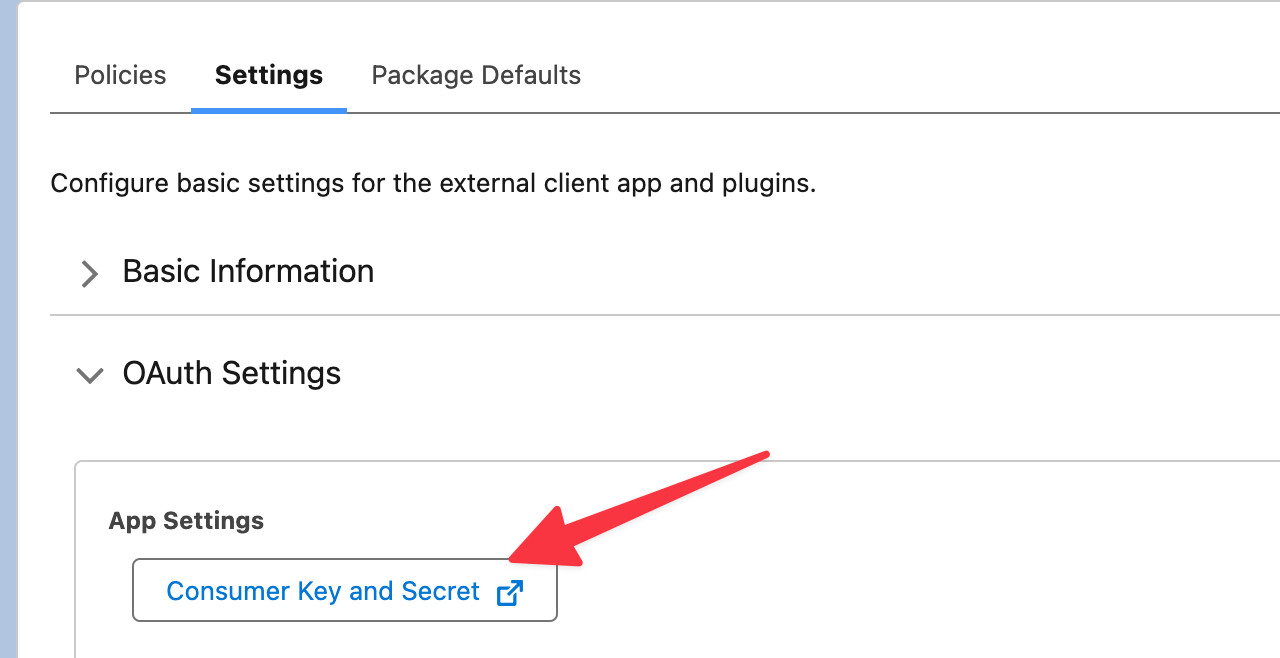
This will result in the generation of Consumer Key and Consumer Secret tokens (shown below).
Once you have setup an External Client App in Salesforce, you can copy and paste the Consumer Key and Consumer Secret from Salesforce into Jira in the “New Connection“ popup, as shown below.
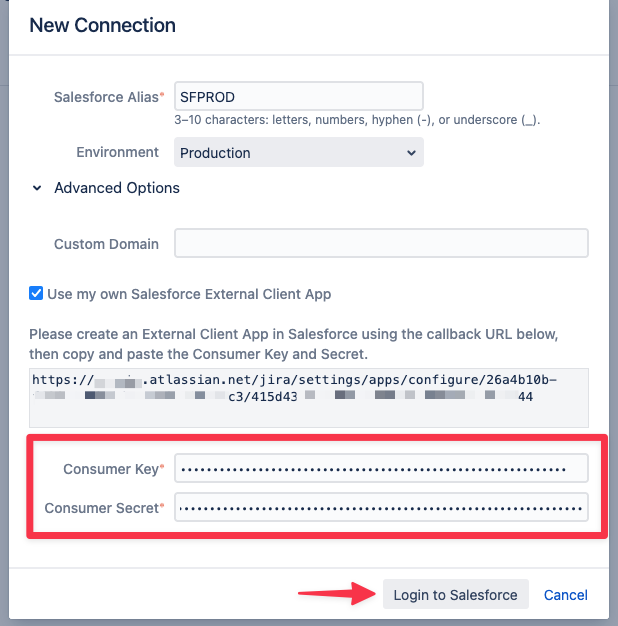
Click on “Login to Salesforce”, you will get redirected to Salesforce to enter the credentials of the Salesforce Integration User. Note that the External Client App may take some minutes to be ready (you may get “invalid client Id” if it is not ready).
Once authentication is successful, you will be redirected back to Jira, review the Connection Information.
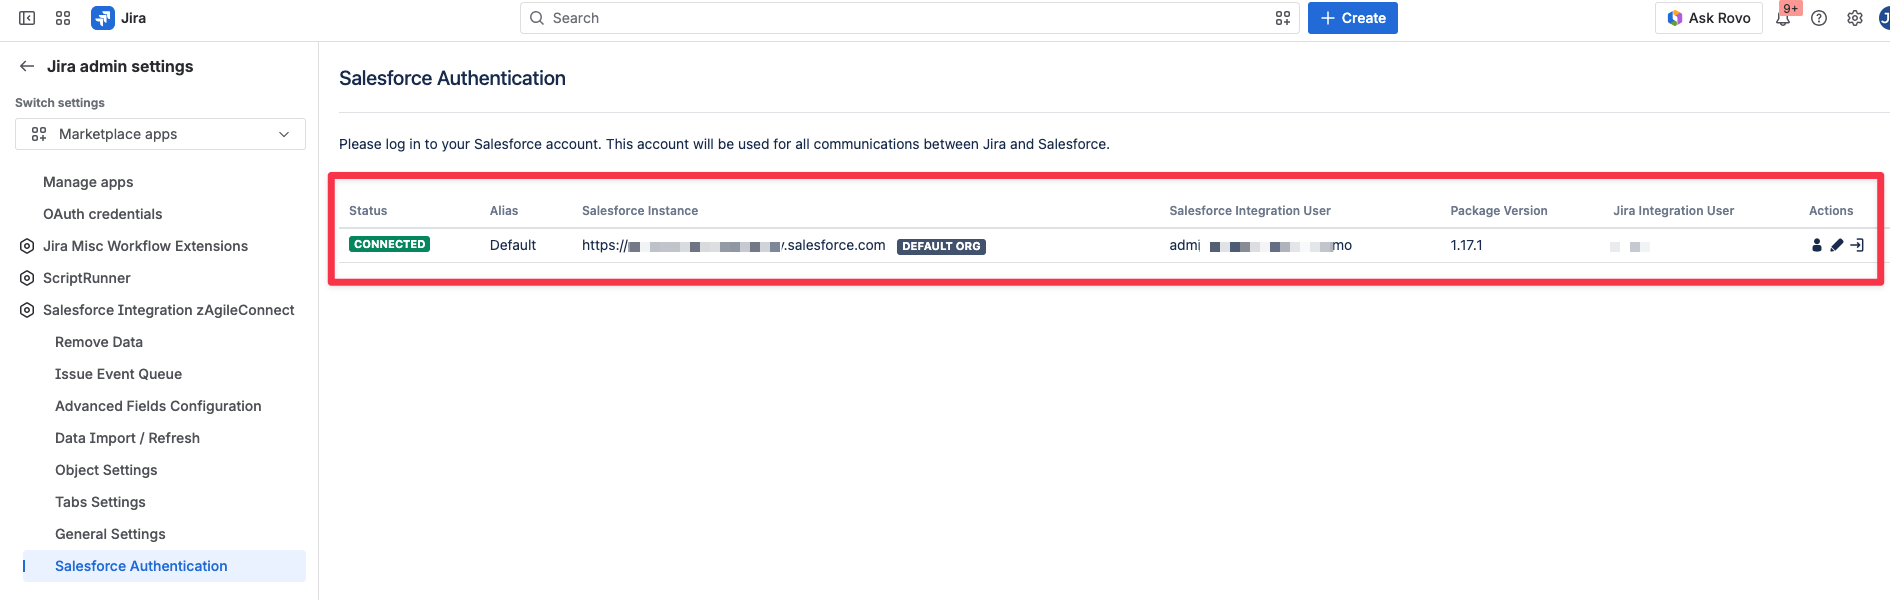
This should result in a 3-way authentication and connection between Salesforce, Jira and the zAgile ConnectApp